Adding USB 3.0 and NVMe Drivers to Windows 7 Install Media

You know what they say about watching sausage getting made.  It may be worse watching install media being modified.  Those with weak stomachs may want to look away…

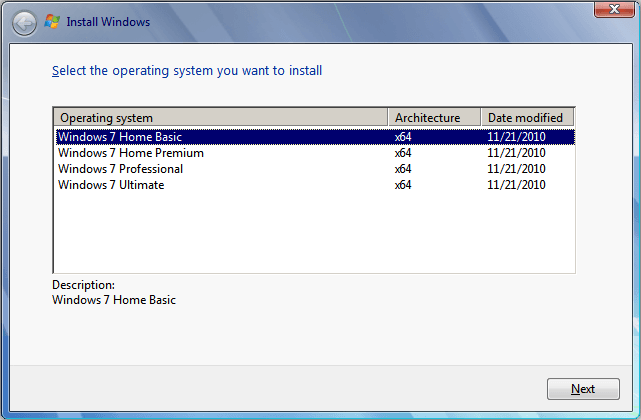
This is the 4th and final (for now…) in a set of small articles on modification and use of Windows 7 install media:  multi-version, UEFI boot, driver injection, and downgrade activation.  The focus will be on USB flash media.

It’s the same old story:  hardware marches on, and operating systems play catch-up.  This has become more of an issue lately with Windows 7 installs and contemporary hardware.  Lack of USB 3.0 drivers can make the install media unbootable (past the initial boot) and lack of NVMe SSD drivers can render the target drive invisible to the installer.  OEM images like Lenovo’s preload and recovery media will include appropriate drivers but Microsoft media will not.  This makes a “clean” install impossible without some work.

Many, if not all laptops these days are USB 3.0 only.  The chipsets don’t support plain-old USB 2.0 sockets.  The strange outcome of this is the misleading “A required CD/DVD drive device driver is missing” error.

windows-7-required-cd-driver-is-missing-cropped

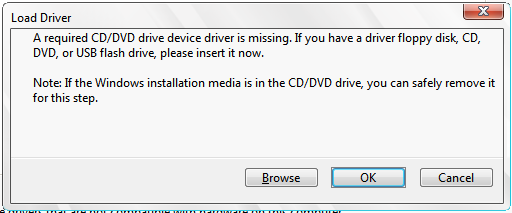
This can be a little startling, especially if you’re installing from a flash drive.  What it means is that the installer is missing the driver it needs to access the flash drive.  Huh?  You’ve already booted from the flash drive, so how can that be?

What happened is that the initial boot was done via BIOS functions.  At some point the install drive access is handed over to the newly-booted install code, which doesn’t have 3.0 drivers.  Fail.

The old-school fix for this is to put the necessary drivers on media and do an “F6” driver add during the install process, but… since we only have USB 3.0 ports we can’t read flash media.  It might be possible to stash the drivers on some other medium (if it’s readable somehow) or even on the target main drive.  This article explores how to add the drivers to the install media so they’re already in place when needed – and the same media can be used for later/other installs as well.

[edit 2018.25.08]  If Only USB drivers are needed and the main drive doesn’t need NVMe or iRST (RAID) drivers for access by the Win 7 installer, it can be used to hold the required drivers during installation.  Use a live Linux flash drive, a temporary install of Windows 8 or 10 (which should be installable via flash drive) or any other means to copy the USB 3.0 drivers (expanded as below) to a directory on the main drive. During the following Win 7 install browse to that folder to access the drivers.

Intel provides a nifty utility that can modify an existing Windows 7 SP1 install setup that’s already on a flash drive and plug in the appropriate drivers.  I’ve tried it and it works.  It’s a little fussy and fragile: it won’t run on a Win 7 host, wouldn’t work for me in a Win 10 virtual machine, and on a native Win 10 laptop it barfed when the laptop went to sleep during the process (and it’s a long process…).

Windows 7* USB 3.0 Creator Utility

If that’s all you need – you’re done 🙂  If you also need NVMe SSD drivers, it makes more sense to integrate those and the USB drivers at the same time.  There is at least one free tool available that can help automate the process: NTLite.  I gave it a good try but never got a result that loaded the USB drivers correctly.  I’ll admit it was probably PEBKAC, so check it out and give it a try if you’re so inclined.  Here, we’ll do it the old-fashioned way.

First, round up the appropriate drivers:

Update to add native driver support in NVM Express in Windows 7 and Windows Server 2008 R2 will get the Microsoft NVMe driver.  For some reason MS requries clicking on the Hotfix Download Available button, then filling out a form.  A link to the actual download will be emailed once the form is submitted.

477475_intl_x64_zip.exe is a self-extracting executable that will extract Windows6.1-KB2990941-v3-x64.msu to a folder of choice.  Either stash it somewhere for now or wait until the working folders are created as described below and extract it there.  The .msu could also be extracted from the .exe with an archiving utility like 7zip.  (Might as well go get it, you’ll need it now … or later:  http://www.7-zip.org/)

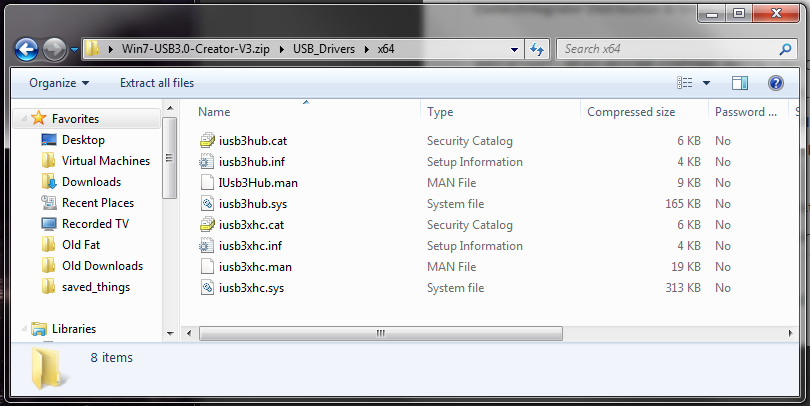
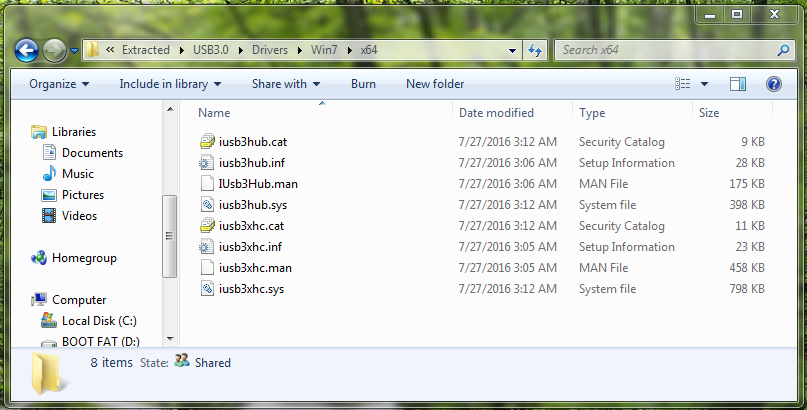
The USB 3.0 drivers can come from Intel or an OEM (Lenovo in my case).  The Intel USB 3.0 creator linked above is a zip file that contains the drivers – among other things.  Open it with Windows explorer or 7zip and drill down to the appropriate drivers – 64 bit for this exercise.  Stash them too, or wait and extract to the folder created below.

extracted-intel-usb-3-drivers

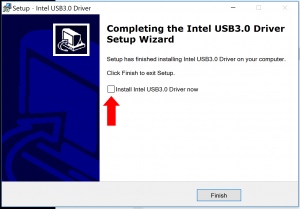
The Intel USB 3.0 drivers available from Lenovo are embedded in an installer.  This driver installer is from the X1 Yoga driver matrix: Intel USB 3.0 Driver for Windows 7 (32-bit, 64-bit) – ThinkPad.

Run it to the point that it wants to do the final install but un-check the “install” checkbox before hitting “finish”.  Drill down in the folder chosen for the driver extraction and pull out the 64-bit USB 3.0 drivers.

lenovo-driver-dont-install-arrow-cropped

extracted-x1y-usb-3-drivers

Now to the real sausage making:

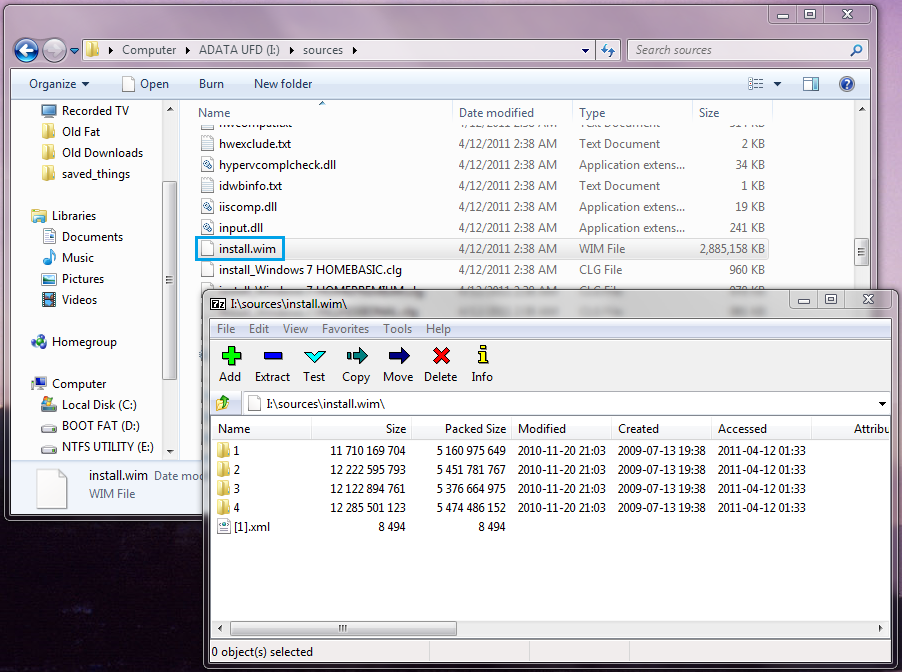
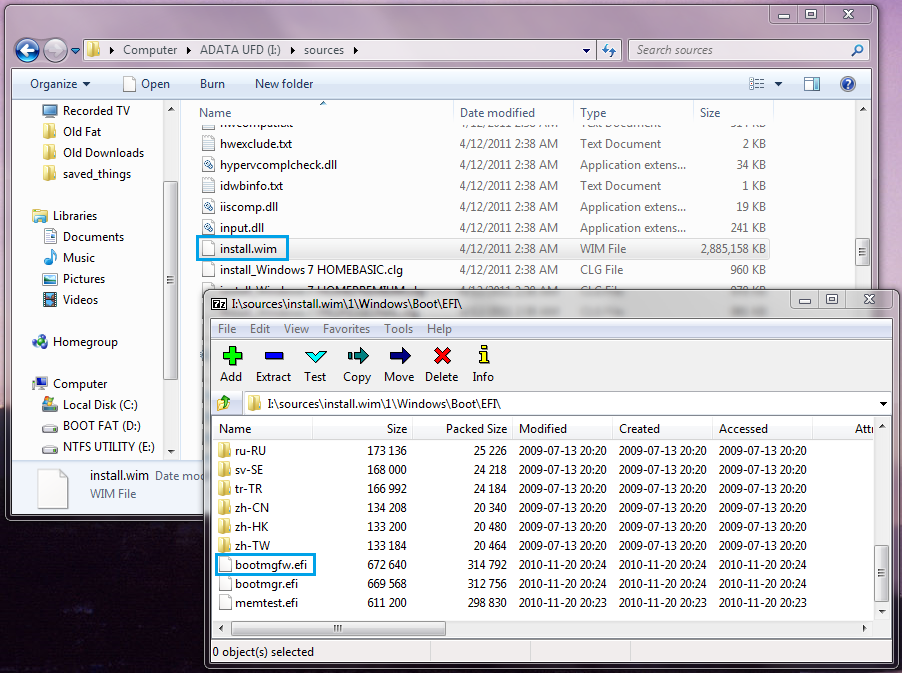
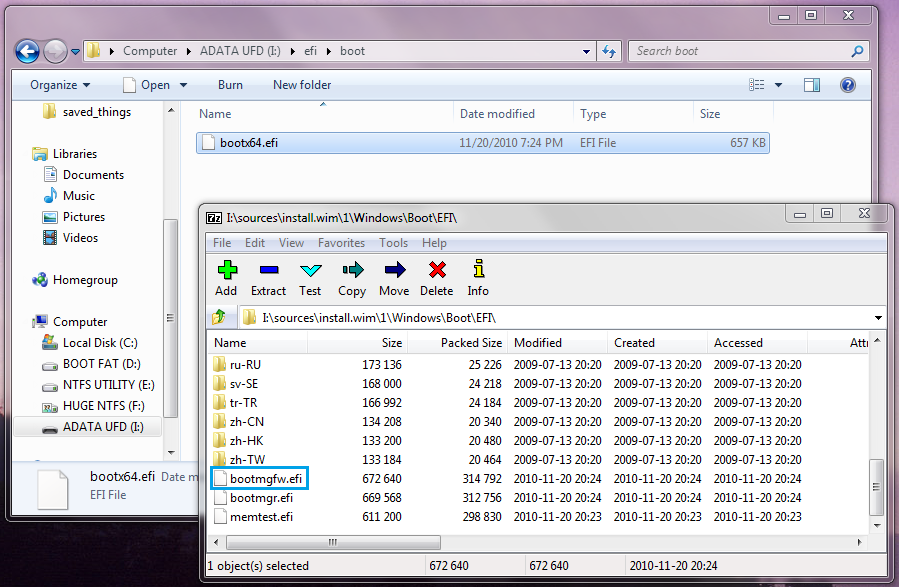
The actual install media manipulation requires using Microsoft’s Deployment Image Servicing and Management tool (dism, the dismal tool) and the command line image creation tool (oscdimg) if an ISO is the end result desired.  If the target is a USB flash drive installer an ISO shouldn’t be necessary (note: I didn’t test that directly – I made an ISO and later  flash drive from the ISO) but may be a convenient way to archive the result.

On my machines dism is available in the stock operating system, but the Windows 7 version doesn’t include the necessary image manipulation commands.  The Windows 10 version does. Neither includes oscdimg.  If a flash drive installer is the goal a stock Win 10 should be sufficient as a host OS.  If an ISO is the desired end result, or Win 7 is the available build platform an additional download will be required.

Download the Windows ADK

Note the different versions for different operating systems – and OS versions.  Use the 8.1 ADK if working in a Win 7 OS.  It’s a large download.  The direct link to the 8.1 ADK is here:  Windows Assessment and Deployment Kit (Windows ADK) for Windows 8.1 Update

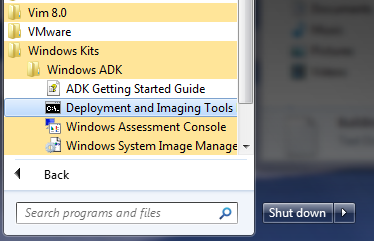
Once it’s downloaded and installed use the newly-created CMD prompt option in Windows Kits -> Windows ADK  to access the new dism and other tools in the correct environment.

window-7-desktop-launch-dism-cropped

So much for the easy part.  Actually modifying the install media is a PITA with many opportunities for error.  Below are links to Microsoft and Lenovo guides.  I find the Lenovo version easier to read and understand.  I’d recommend creating the working folders exactly as specified – based in C: – rather than setting up your own workspace.  This will allow grinding away with copy-and-paste and should avoid many opportunities for error.  I did it … so can you 🙂

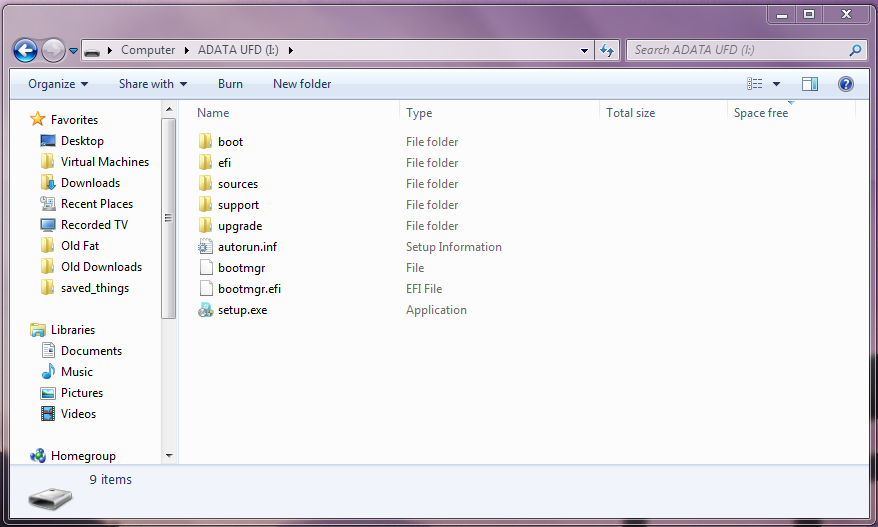
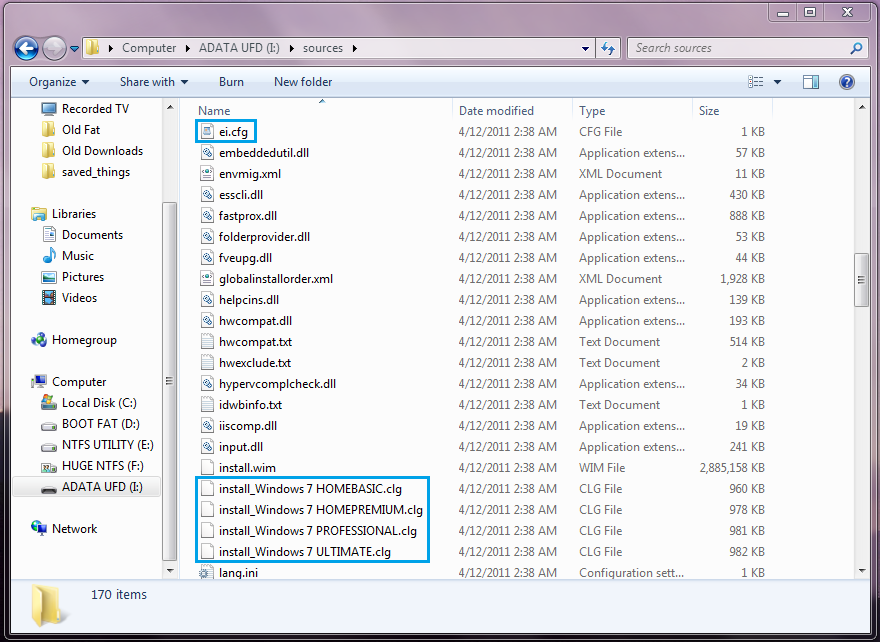
As directed, copy the source install media from Windows 7 SP1 DVD or use 7zip or other archiving/mount tool and extract the source files from an SP1 ISO.

Lenovo: How to prepare the Windows 7 installation ISO image with USB3.0 driver and NVM Express (NVMe) driver

Microsoft: Update to add native driver support in NVM Express in Windows 7 and Windows Server 2008 R2

Patience, fortitude, and good luck 🙂

Posted in Uncategorized | 2 Comments

Activating a Windows 7 Downgrade

This is the 3rd in a set of small articles on modification and use of Windows 7 install media:  multi-version, UEFI boot, driver injection, and downgrade activation.  The focus will be on USB flash media.

Well, 31 October, 2016 brings the end of an era.  OEMs like Lenovo will no longer be able to ship machines with a Windows 7 Pro preload.  Fortunately downgrade rights will persist.  Windows 10 Pro users will be able to downgrade to Windows 7 Pro.   (NOTE: everything I can find online says that’s the case. I can’t personally guarantee it.)

14 November 2016 Correction:  OEMs are able to ship Windows 7 preloads after 31 October if they have an inventory of previously-purchased licenses.  Lenovo, for example, still has Windows 7 machines available as of this date.  Apologies for the misinformation!

Finding Windows 7 install media may or may not be a problem, but activation can be an issue.  OEM preloads, factory media, and user-made recovery media shouldn’t need activation, but clean installs from Microsoft media will.  This will apply to clean installs on machines that originally had ‘7 Pro installed, and to first-time clean installs to machines that shipped with ‘8.x or ’10 Pro.

Microsoft’s downgrade activation is … odd, to say the least.  I’ll try for a TLDR translation here.  Links to MS documents are below.

So:  Run your install from MS media.  Use an existing – already in use – activation key for Windows 7 Pro.  That will probably fail but you should be offered a phone number to use for activation.

You have to use a legitimate key in order to get far enough into the activation process to be offered the phone number.  A made-up key will fail too early.  If you use a key that hasn’t been used before, it will be consumed by the activation, and wasted.  Probably not what you want.

My own experience in several of these downgrade activations has been interesting.  They were all on Lenovo ThinkPads.  I used the key from the battery compartment of my T420 and it just activated immediately online with no call required.  There may be something to using an OEM key from the same manufacturer as the target machine.  I can’t be sure that it will avoid the extra steps, but it has for me.

Some Microsoft documents:

Understanding downgrade rights

Downgrade rights (PDF)


Posted in Uncategorized | 4 Comments

Windows 7 UEFI Installer on Flash Drive

This is another of a set of small articles on modification and use of Windows 7 install media:  multi-version, UEFI boot, driver injection, and downgrade activation.  The focus will be on USB flash media.

It is possible to install Windows 7 in UEFI mode, but it takes some work. Patience, grasshopper, and read on…

Why bother?  Good question.  Perhaps to take advantage of GPT drive formatting, or to co-exist with another OS that boots in UEFI mode.

First, prep a flash drive for UEFI boot as described here:  A FOB STORY: Preparing the flash drive  (TLDR: a single FAT-32 formatted partition, active flag not set.)

If you don’t already have it, go get 7zip.  It’s an incredibly useful archive manipulation tool.  http://www.7-zip.org/  You’ll also need a Windows 7 SP1 DVD or ISO.  Copy the contents of the DVD – or use 7zip to extract the ISO contents – to the prepped flash drive.  The extracted contents should look like this:

win-7-pro-64-iso-extracted-to-flash

Open the “efi” folder and create a new folder there: “boot”.

Navigate up and then down into the sources folder and find install.wim. Open it with 7zip:

win-7-pro-64-flash-install-wim-open-in-7zip

Then drill down into folders “1” -> “windows” -> “boot” -> EFI and locate the file bootmgfw.efi.

win-7-pro-64-flash-install-wim-down-to-bootmgw-in-7zip

Extract that file to the previously created \efi\boot folder on the flash drive.  (use the extract function or simply drag it from 7zip to that \efi\boot folder.)

Rename bootmgw.efi to bootx64.efi.  That’s it.

win-7-pro-64-flash-extracted-to-temp-bootx64-created

To boot the created USB flash drive: in BIOS configuration turn off Secure Boot, make sure UEFI booting and USB booting are enabled, and enable CSM (compatibility support module).

If CSM isn’t enabled the installer will boot but typically hang on the Windows + dancing balloons splash screen.  An installed UEFI Windows 7 will also hang in the same way if CSM support is OFF.

Posted in Uncategorized | Leave a comment

Convert Windows 7 Install Media to All-Version

This is the first of a set of small articles on modification and use of Windows 7 install media:  multi-version, UEFI boot, driver injection, and downgrade activation.

This has been discussed extensively elsewhere, but I’m gathering it all here to document my recent experience – and maybe help a few others.

The articles will focus on flash media.  It’s almost certain that a computer that needs any of these mods will be able to boot a flash drive – and may not even have an optical drive.

To the topic…

The Windows 7 SP1 install media I have access to is single-version.  That is, a given DVD or ISO will install either Home Basic, Home Premium, Professional, or Ultimate.  The version available is determined by the particular ISO or DVD in hand. That can be changed 🙂

The image below is a screen shot of a Window 7 SP1 Pro 64-bit ISO extracted to a flash drive by the 7zip archiving tool.  The folders and files will look the same if copied from a DVD.

7zip is free and amazingly useful.  You need it.  Get it here:  http://www.7-zip.org/  You won’t need it today if working from DVD media, but you will need it in the future.  Trust me on that 😉

win-7-pro-64-iso-extracted-to-flash

If you examine the sources folder, it looks like all four versions are there, but something restricts the media to a single version at install time.  Turns out that something is the ei.cfg file in the sources folder.  See the image below.

win-7-pro-64-flash-sources-file-list-partial-ei-cfg-highlight

The contents of this particular ei.cfg are:

[EditionID]
Professional
[Channel]
Retail
[VL]
0

Note “Professional”.

If one deletes or renames ei.cfg (to ei.cfg.OLD, for instance) the install media will offer all four versions.  Why would you want it to do that?  You have a license for one version but only media for another maybe.  You’d like to have a single copy in your kit – flash drive or DVD – but be able to install any version as needed.  The possibilities are endless…

So, copy the contents of the DVD to a flash drive or temporary workspace – or use 7zip to extract the contents of an ISO to same – and rename ei.cfg.  Hey presto!  an all version installer – or at least the files for one.

win-7-all-version-install-menu

Note: the 64-bit installer contains the above options once ei.cfg is modified.  The 32-bit version also includes Windows 7 Starter.

How to format the flash drive (or in the complicated case remake a DVD) is beyond the scope of this particular little article.  Flash drive prep is covered elsewhere on this blog:  A FOB STORY: Preparing the flash drive  (TLDR: a single FAT-32 formatted partition, active flag not set.) Either do that in advance of making the mods if working directly on the flash drive, or copy the workspace files to the prepared flash drive after making the mod.

Posted in Uncategorized | Leave a comment

Fixing Windows 7 Update Hangs

Update hangs?  Boy howdy!  This has become a real nightmare. Windows Update can spin on “checking for updates…” for hours – or even days.

I (and many, many others) have run into this on new Windows 7 SP1 installs from Microsoft media, newly arrived laptops with Win 7 SP1+ preloads, and laptops and desktops running ‘7 SP1 that were previously fully updated.

The below fix was recommended to me by a wise old IT JOAT.  It has fixed all my machines and will hopefully help others.  OTOH it isn’t likely a universal fix and it takes some patience to apply.

For me Windows Update works almost instantly after this procedure.


Install  .NET update NDP461-KB3102436-x86-x64-AllOS-ENU

In an elevated command window turn off the update service:  net stop wuauserv

rename the folder C:\Windows\SoftwareDistribution to …OLD

With the update service still off, install this update to the update client:  KB3138612

turn the update service back on: net start wuauserv

Install the following KBs in order, rebooting after each install.  It may be necessary to turn off the update service while doing this to keep it from hanging on “checking…”.  The update service is typically on a delayed start so it may or may not be necessary to turn it off for each install.

KB3145739
KB3153199
KB3161664
KB3020369
KB3172605

That last KB is the July roll-up.  It may be superseded by later roll-ups, and there should be an indication of that on the KB’s page.

Happy updating 🙂

25 December 2018 Update: long overdue – a Lenovo forum mod suggest the below method to get Win 7 updates running.  Looks simpler – and possibly faster – than the above.

Update servicing stack: https://www.microsoft.com/en-us/download/details.aspx?id=46817


Then apply this: https://www.microsoft.com/en-us/download/details.aspx?id=53332

Then retry windows update

Posted in Uncategorized | Leave a comment