
Well, not that big…
I’m going to allow myself one grade-school halibut joke. *snicker*
It won’t happen again.

Well, not that big…
I’m going to allow myself one grade-school halibut joke. *snicker*
It won’t happen again.
This is a draft of an article I wrote for “Community Spotlight” over at the Lenovo forums: In the Spotlight: App attack: Zoltantheg
I recently had my first taste of Android development. With no prior Android experience – as either a user or developer – it was pretty interesting. The occasion was porting a toy tcl/tk application that was running in Windows, Linux, and Apple’s OS over to the Android environment. More about that later. Much later…
The tablet:
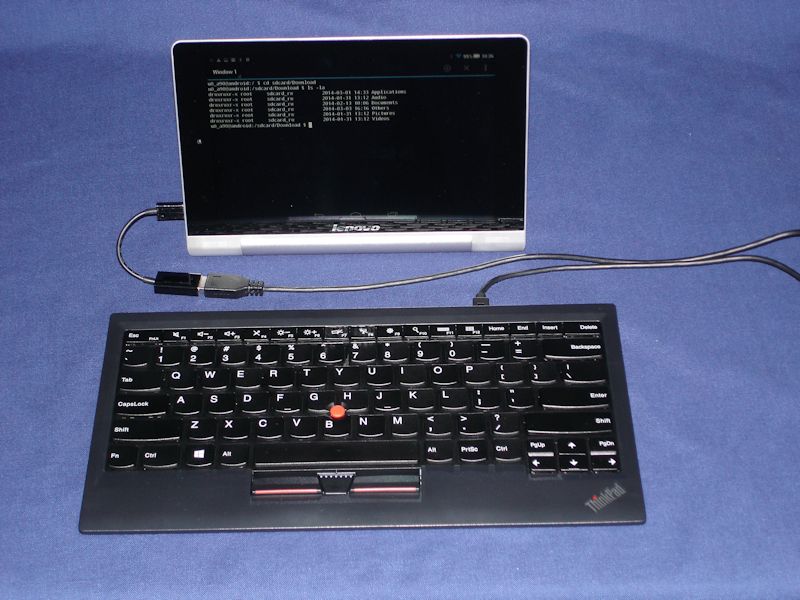
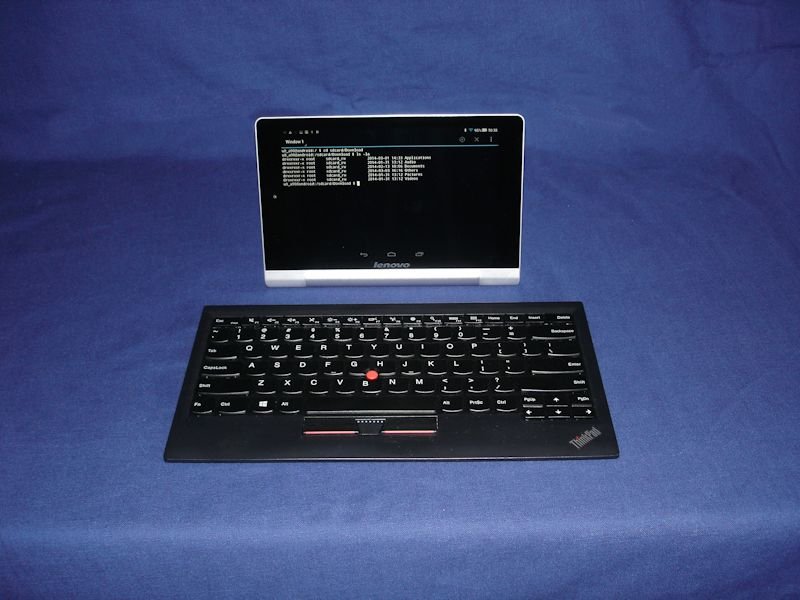
First, thanks to Lenovo for providing the Yoga Tablet 8 for this exercise. I’m a old-school keyboard and TrackPoint using command-line c coder, so I was a pleasantly surprised by the little tablet’s capabilities. The touchscreen is very readable and usable and the “kickstand” is a nice feature. It’s handy to have the YT8 propped up and visible while using an external keyboard or poking at it from an attached PC.
Battery life is ridiculous. In all my playing with it, I haven’t needed to recharge yet. I can’t give you specific numbers but in my use case it looks to be at least 10+ hours. Nice.
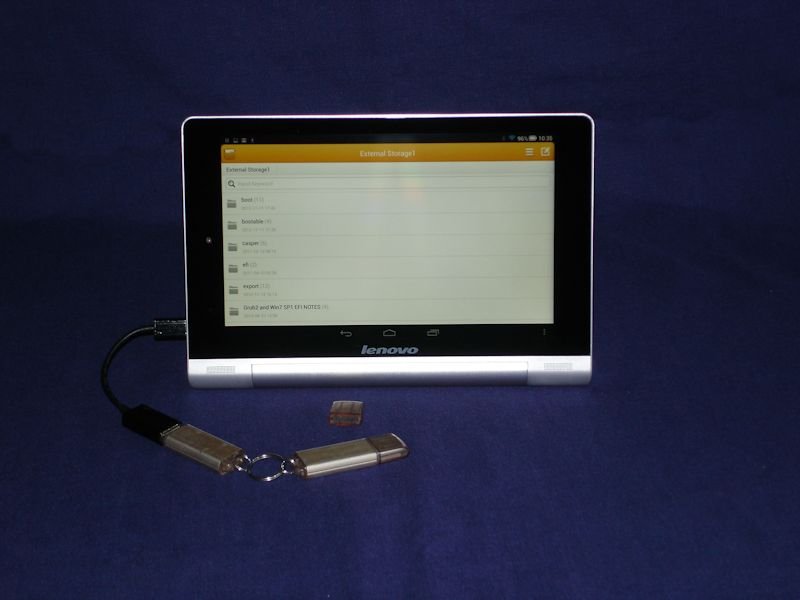
Another very useful feature is the OTG (on-the-go) micro USB port. The provided standard micro USB cable works for charging or attaching to a PC for file transfer. With an OTG adapter plugged in, the tablet becomes a USB host. The OTG adapter provides a female USB connector that can be used to attach a keyboard (nice for development work) or things like my USB flash nunchucks (pictured below) for file backup and off-line transfer.
Bluetooth is also available. The Lenovo compact USB and Bluetooth keyboards worked very well with the YT8.
Added apps:
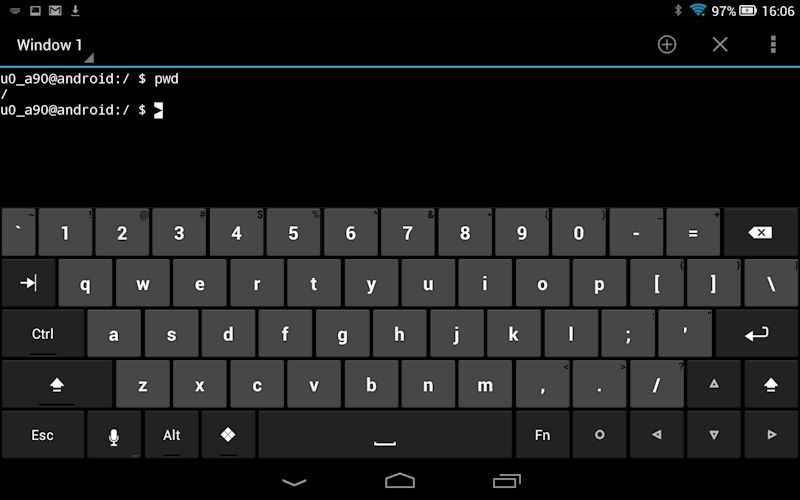
A pair of apps were immediate necessities. I’m comfortable working from the Linux command line (a Linux kernel is at the heart of the Android environment – mostly invisible to the user) so I needed a terminal emulator. Off to the Google Play Store and grab Android Terminal Emulator. It was obvious very quickly that the stock on-screen keyboard was going to be a challenge. Arrow keys to recall and modify previous command line entries are close to mandatory. Back to the Play Store and add Hacker’s Keyboard. There are some really excellent free apps available via the Play store. Who knew?
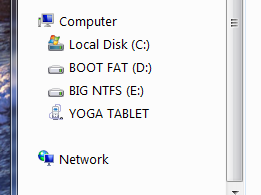
Now it’s easy to navigate the internals of the system – hunting down file paths and manipulating things not easily accessible via the stock file browser. I’ll admit that it was often even easier yet to attach the YT8 to my desktop PC and just use Windows Explorer (yeah, I’m running Win 7 on the desktop) to navigate the tablet’s filesystem. The tablet shows up as an attached storage device in explorer.
Development guides and tools:
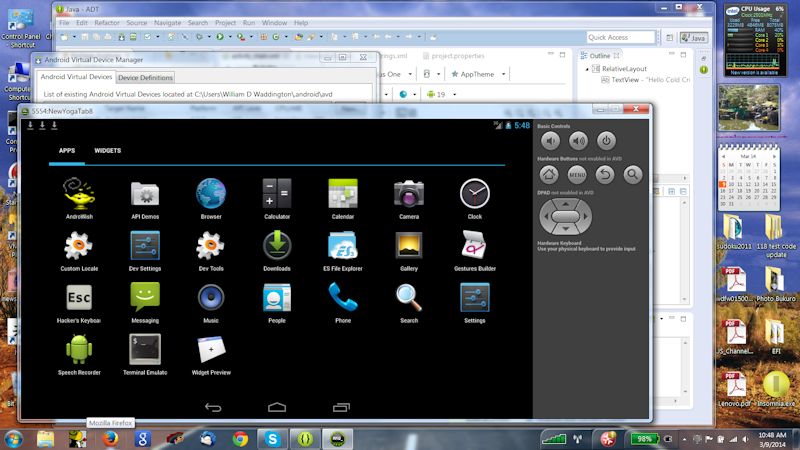
To the bookstore… some browsing and guesswork led me to Ed Burnette’s Hello Android. For me – the totally clueless – it was a good place to start. Looks like development is usually done with an Android emulator running on a host machine. Faster is better. See below.
The book said to install Java (the development kit, not just the runtime), an IDE, and the Android SDK. Things change fast in this realm so it was a little easier than that. The JDK SE 7 development kit comes from Oracle. Everything else can be found at the Android developer site. The Android SDK now includes the Eclipse IDE, so that’s a plus.
First impression of the Android emulator: slow. Really, really slow. Unusably slow. This can be greatly improved by installing the Intel Hardware Accelerated Execution Manager (HAXM) and an x86 Atom System Image. These allow taking advantage of the host computer’s hardware virtualization. Thanks to this article: Slow Android emulator.
I wanted to add the Terminal Emulator and Hacker’s keyboard to the emulator. Another thing that you real developers already know: in order for the emulation to install apps from the Google Play Store, it’s necessary to link the emulation to a Google account. To do that, the Google APIs must be added to the Android emulation. Use the SDK manager in the Android IDE. Another way to do this is to browse to the app in the store and then follow the link to the individual app’s author’s site. There’s usually a download link there.
The project. At last:
This began with a desire to try some GUI programming. In my professional life I design hardware and write Linux and Solaris device drivers and test code. Command line stuff. vi and BASH. No GUI experience at all.
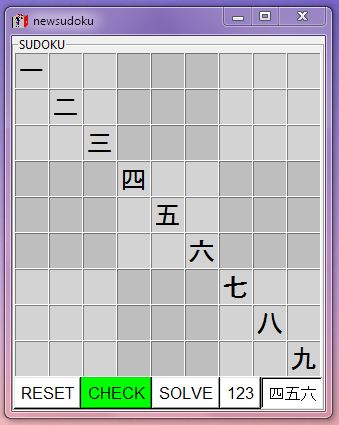
My little toy GUI project was a Sudoku solver written tcl/tk using Active’s free community edition multi-platform tcl. It doesn’t do anything useful but was a good learning experience. For fun it will try to solve (but not generate) Sudoku puzzles in Arabic numerals (123…) or Kanji (四, 五, 六).
Problem is, that’s tcl/tk. Android requires Java. Yike. The conversion could take forever since I don’t know Java. Lenovo’s Android developer forum and AndroWish to the rescue…
AndroWish:
The Lenovo forums have recently added the Lenovo Developer Community, including Android Ecosystem Developers. I posted a n00b’s request for guidance there: [Android n00b] how to begin? No idea how such a basic request would be received.
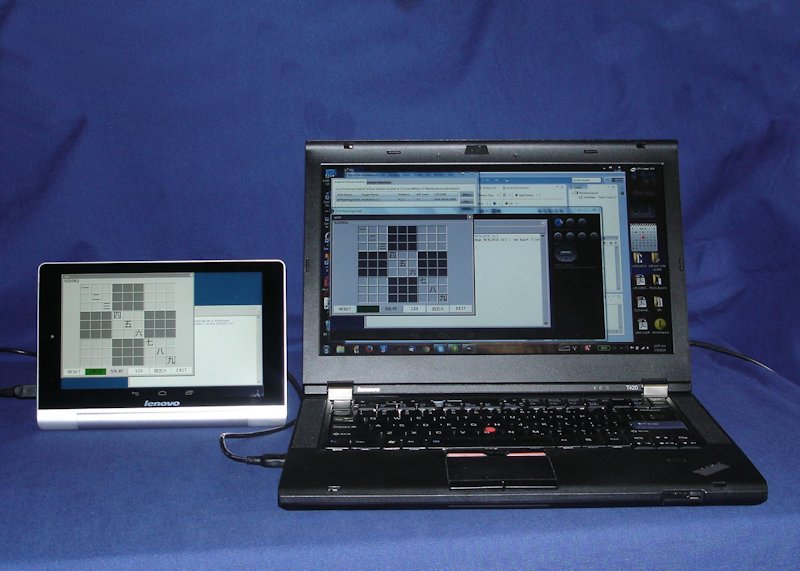
I got an almost immediate reply from Christian Werner, the author and maintainer of AndroWish. This is a wonderful project that’s brought tcl/tk to Android. With his encouragement – he even caught a typo in my code that had been lurking there all along – I quickly had my little toy program running in the Android emulator and on the Yoga Tab 8. Maybe I can put off learning Java for another year or two 🙂
At this time it’s necessary to launch my little program from AndroWish’s command line. The next phase of the project will be to convert it into an actual Android app. Christian has provided tools and a how to: HelloTclTk.
Many thanks to Christian Werner for his help, to the nice people at the comp.lang.tcl newsgroup for getting me going in the fist place, and to Lenovo for providing the Yoga Tab 8 – and a place to post and share.
Z.
..oh, almost forgot…
A friend’s laptop came back from service the other day in a very strange state. It was acting as if NumLock was on – but it doesn’t have a NumLock key or the numeric overlay below. That makes it difficult (impossible!) to enter a password that contains u,i,o,j,k, or l – or do anything else with that part of the keyboard.

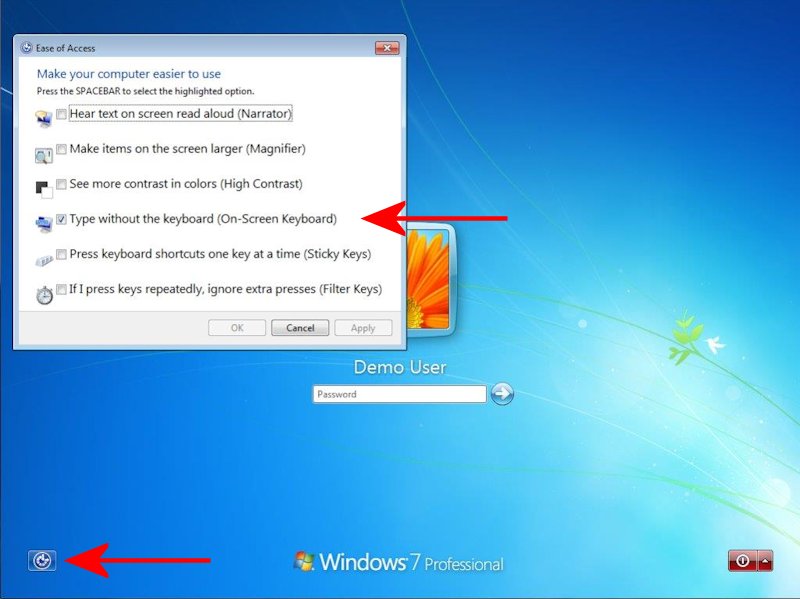
There is a way around this. Use the on-screen keyboard available via the Ease of Access icon on the log in screen. Click on the Ease of Access icon, then check “Type without the keyboard” and click “OK”.
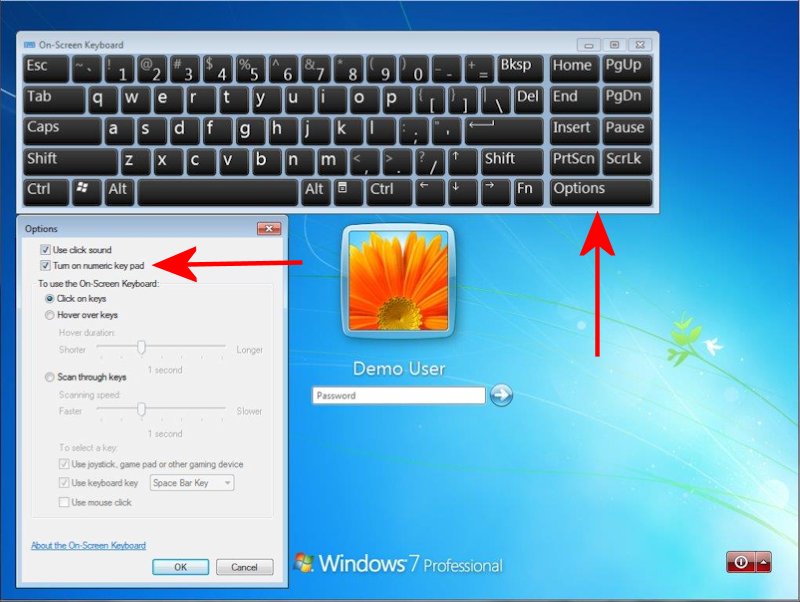
That will bring up the on-screen keyboard. Click “Options” and check “Turn on numeric keypad” and click “OK”.
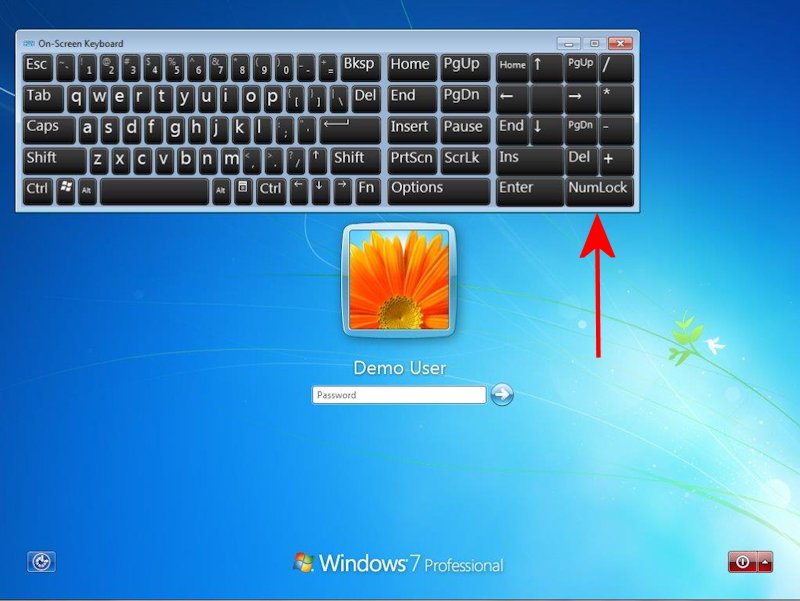
You should now have an on-screen keyboard with a NumLock key that will also affect the physical keyboard.
This can also be done from within Windows (if you can get that far) via Start -> Accessories -> Ease of Access -> On-Screen Keyboard.
We lost the patriarch a year ago. A small remembrance:

William Shakespeare – from “The Tempest”
The short version of this story is “don’t have any spaces in your directory path.”
My recent multi-boot build was based on an Intel DH67CL motherboard with an H67 chipset. The NIC is an Intel 82579V, PCI ID 8086,1503. I downloaded the Intel driver direct from the Intel site: Network Adapter Driver for PCI-E Gigabit Network Connections under Linux.
It built, installed, and worked on several Linuxen in this multi-boot machine – including a live CD image (with persistenct) that I keep in the boot partition – but failed for Suse Enterprise Linux V11.
The error message during build was something like “no rule to make target xxxx.”
Turns out it was nothing to do with Suse. Since I didn’t have a working NIC, I was downloading to a windows machine, copying to a thumb drive, and copying that to the target Linux install. The download directory on the Windows box was something like “Intel NIC Driver”. By chance, I had copied its contents to most of my Linux installs, but copied the entire directory to the Suse install.
The spaces in the directory name were confusing make, and causing the less-than-helpful error message. Got rid of the spaces, and make was happy again.