You know what they say about watching sausage getting made. It may be worse watching install media being modified. Those with weak stomachs may want to look away…
This is the 4th and final (for now…) in a set of small articles on modification and use of Windows 7 install media: multi-version, UEFI boot, driver injection, and downgrade activation. The focus will be on USB flash media.
It’s the same old story: hardware marches on, and operating systems play catch-up. This has become more of an issue lately with Windows 7 installs and contemporary hardware. Lack of USB 3.0 drivers can make the install media unbootable (past the initial boot) and lack of NVMe SSD drivers can render the target drive invisible to the installer. OEM images like Lenovo’s preload and recovery media will include appropriate drivers but Microsoft media will not. This makes a “clean” install impossible without some work.
Many, if not all laptops these days are USB 3.0 only. The chipsets don’t support plain-old USB 2.0 sockets. The strange outcome of this is the misleading “A required CD/DVD drive device driver is missing” error.
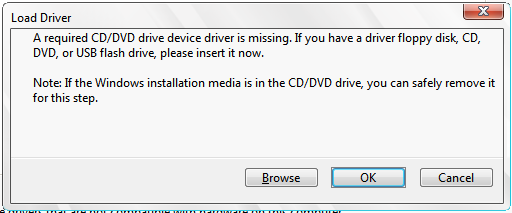
This can be a little startling, especially if you’re installing from a flash drive. What it means is that the installer is missing the driver it needs to access the flash drive. Huh? You’ve already booted from the flash drive, so how can that be?
What happened is that the initial boot was done via BIOS functions. At some point the install drive access is handed over to the newly-booted install code, which doesn’t have 3.0 drivers. Fail.
The old-school fix for this is to put the necessary drivers on media and do an “F6” driver add during the install process, but… since we only have USB 3.0 ports we can’t read flash media. It might be possible to stash the drivers on some other medium (if it’s readable somehow) or even on the target main drive. This article explores how to add the drivers to the install media so they’re already in place when needed – and the same media can be used for later/other installs as well.
[edit 2018.25.08] If Only USB drivers are needed and the main drive doesn’t need NVMe or iRST (RAID) drivers for access by the Win 7 installer, it can be used to hold the required drivers during installation. Use a live Linux flash drive, a temporary install of Windows 8 or 10 (which should be installable via flash drive) or any other means to copy the USB 3.0 drivers (expanded as below) to a directory on the main drive. During the following Win 7 install browse to that folder to access the drivers.
Intel provides a nifty utility that can modify an existing Windows 7 SP1 install setup that’s already on a flash drive and plug in the appropriate drivers. I’ve tried it and it works. It’s a little fussy and fragile: it won’t run on a Win 7 host, wouldn’t work for me in a Win 10 virtual machine, and on a native Win 10 laptop it barfed when the laptop went to sleep during the process (and it’s a long process…).
Windows 7* USB 3.0 Creator Utility
If that’s all you need – you’re done 🙂 If you also need NVMe SSD drivers, it makes more sense to integrate those and the USB drivers at the same time. There is at least one free tool available that can help automate the process: NTLite. I gave it a good try but never got a result that loaded the USB drivers correctly. I’ll admit it was probably PEBKAC, so check it out and give it a try if you’re so inclined. Here, we’ll do it the old-fashioned way.
First, round up the appropriate drivers:
Update to add native driver support in NVM Express in Windows 7 and Windows Server 2008 R2 will get the Microsoft NVMe driver. For some reason MS requries clicking on the Hotfix Download Available button, then filling out a form. A link to the actual download will be emailed once the form is submitted.
477475_intl_x64_zip.exe is a self-extracting executable that will extract Windows6.1-KB2990941-v3-x64.msu to a folder of choice. Either stash it somewhere for now or wait until the working folders are created as described below and extract it there. The .msu could also be extracted from the .exe with an archiving utility like 7zip. (Might as well go get it, you’ll need it now … or later: http://www.7-zip.org/)
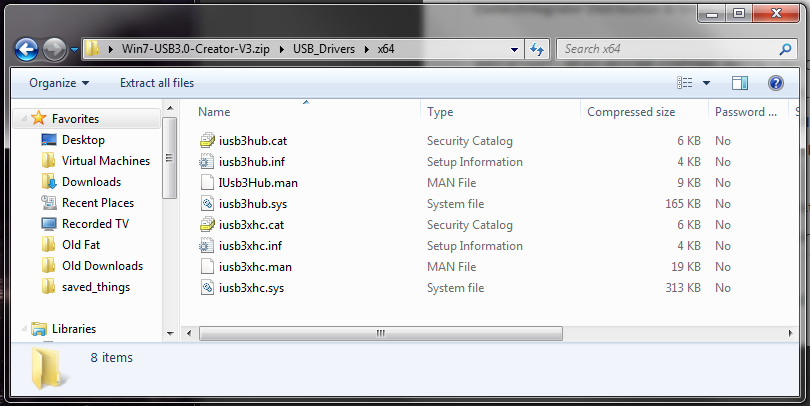
The USB 3.0 drivers can come from Intel or an OEM (Lenovo in my case). The Intel USB 3.0 creator linked above is a zip file that contains the drivers – among other things. Open it with Windows explorer or 7zip and drill down to the appropriate drivers – 64 bit for this exercise. Stash them too, or wait and extract to the folder created below.
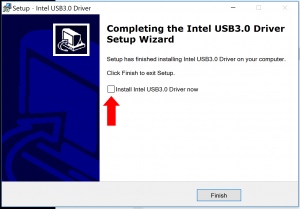
The Intel USB 3.0 drivers available from Lenovo are embedded in an installer. This driver installer is from the X1 Yoga driver matrix: Intel USB 3.0 Driver for Windows 7 (32-bit, 64-bit) – ThinkPad.
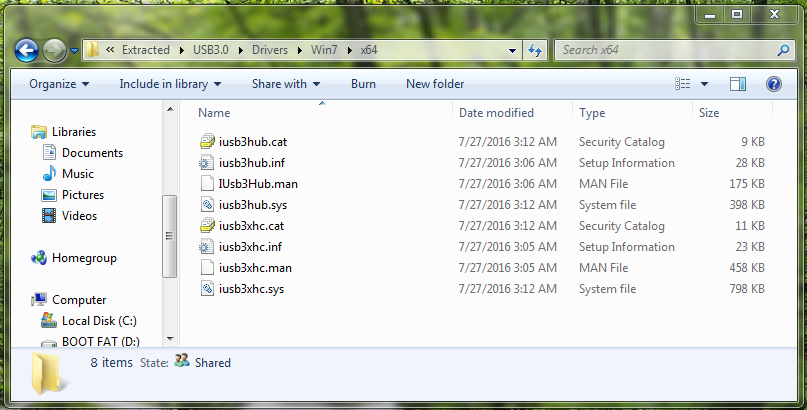
Run it to the point that it wants to do the final install but un-check the “install” checkbox before hitting “finish”. Drill down in the folder chosen for the driver extraction and pull out the 64-bit USB 3.0 drivers.
Now to the real sausage making:
The actual install media manipulation requires using Microsoft’s Deployment Image Servicing and Management tool (dism, the dismal tool) and the command line image creation tool (oscdimg) if an ISO is the end result desired. If the target is a USB flash drive installer an ISO shouldn’t be necessary (note: I didn’t test that directly – I made an ISO and later flash drive from the ISO) but may be a convenient way to archive the result.
On my machines dism is available in the stock operating system, but the Windows 7 version doesn’t include the necessary image manipulation commands. The Windows 10 version does. Neither includes oscdimg. If a flash drive installer is the goal a stock Win 10 should be sufficient as a host OS. If an ISO is the desired end result, or Win 7 is the available build platform an additional download will be required.
Note the different versions for different operating systems – and OS versions. Use the 8.1 ADK if working in a Win 7 OS. It’s a large download. The direct link to the 8.1 ADK is here: Windows Assessment and Deployment Kit (Windows ADK) for Windows 8.1 Update
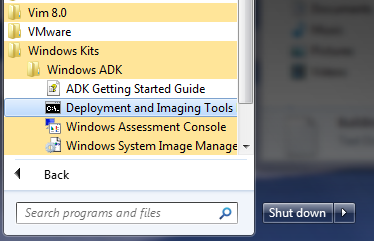
Once it’s downloaded and installed use the newly-created CMD prompt option in Windows Kits -> Windows ADK to access the new dism and other tools in the correct environment.
So much for the easy part. Actually modifying the install media is a PITA with many opportunities for error. Below are links to Microsoft and Lenovo guides. I find the Lenovo version easier to read and understand. I’d recommend creating the working folders exactly as specified – based in C: – rather than setting up your own workspace. This will allow grinding away with copy-and-paste and should avoid many opportunities for error. I did it … so can you 🙂
As directed, copy the source install media from Windows 7 SP1 DVD or use 7zip or other archiving/mount tool and extract the source files from an SP1 ISO.
Lenovo: How to prepare the Windows 7 installation ISO image with USB3.0 driver and NVM Express (NVMe) driver
Microsoft: Update to add native driver support in NVM Express in Windows 7 and Windows Server 2008 R2
Patience, fortitude, and good luck 🙂

utility is not available in Intel site please suggest,
It looks like Intel has removed the USB 3.0 Creator utility. Neither I nor The Google can find it. In that case you’ll have to use the manual procedure described.