
As I indicated in previous whinge post, the size of the install.wim file in Windows install ISOs can present some problems when creating USB flash install media: Windows 10 USB Install Media … or MS BS This came up again when I wanted to try a pure clean install of Windows 11 on a ThinkPad X1 Yoga Gen 4. The MS download site is offering the Windows 11 ISO to all visitors – not just non-windows hosts as it did with ’10 – and others may trip over this.
Some UEFI machines – ThinkPads for instance – will only boot FAT32 USB install media. The multi-version ISO has an install.wim file too large for FAT32, so just dropping its contents on a FAT32 flash drive as I usually do won’t work. The ISO produced by the MS media creation tool (so far) produces an install.esd file that will fit, but may not always be the desired option.
I’ve just come across another way to tackle this that allows creating FAT32 + NTFS media with the multi-version ISO, and may also be handy if using a custom install.wim file. First, this is not my invention. Full credit and kudos to the sites and people linked below:
USB install media with WIM file larger than 4GB
Create bootable USB installer if install.wim is greater than 4GB
Very useful and bears repeating. My take in detail … perhaps too much detail…
To recap, simply mounting the ISO with Windows Explorer or an archiving tool like 7zip and extracting the contents to a FAT32 flash drive won’t work. It is possible with an NTFS drive, but ThinkPad UEFI BIOS isn’t NTFS-aware. (Some other brands and models are able to boot from NTFS media.) There are ways to split the overlarge file using Windows or Linux tools from the command line. ( Windows: https://www.zdnet.com/article/windows-10-installer-files-too-big-for-usb-flash-drive-heres-the-fix/ Linux: https://wimlib.net/ ) Another reported possibility is using Rufus to create a split FAT32/NTFS drive but so far I’ve not found the appropriate options – if they exist at all.
[Update 2022.10.02] Using non-MS tools that claim to build bootable media can lead to media that won’t boot at all, or that gets part way into the process and throws the error “No device drivers were found”, followed by a pop-up – this is typically because the tool created media that wasn’t FAT32 formatted. The boot code hands off to the install code and there’s no driver available to handle the unexpected file format of the install media.
Another possible symptom is the install media not being able to find the target drive.
The approach described in those links at the top of this article does make use of a flash drive with both FAT32 and NTFS partitions. This is made possible by a pair of things: Windows now allows creation of – and access to – multiple partitions on a flash drive, and the unmodified windows installer is capable of finding the install.wim file in the NTFS partition.
SIDE NOTE: regardless of multiple posts on the interweb claiming that to do a UEFI install to a GPT main drive the flash drive must be GPT partitioned – that is not the case. The MBR partitioning on most flash drives out of the box is fine. Either for this split drive or the simpler FAT32-only drives I use for both Windows and Linux installs. In fact, the MS media creation tool builds an MBR/FAT32 flash drive.
The process in words and pictures using Windows in-built tools. It should also be possible to do this from Linux.
[Update 2022.10.02] Verified by building Windows 11 media from the ISO while running Ubuntu. Tools used were Disk Image Mounter, gParted, drag & drop/copy & paste in the GUI file manager.
Below is the Windows procedure. The Linux approach looks very similar.

Use Disk Management to delete any existing partition(s)
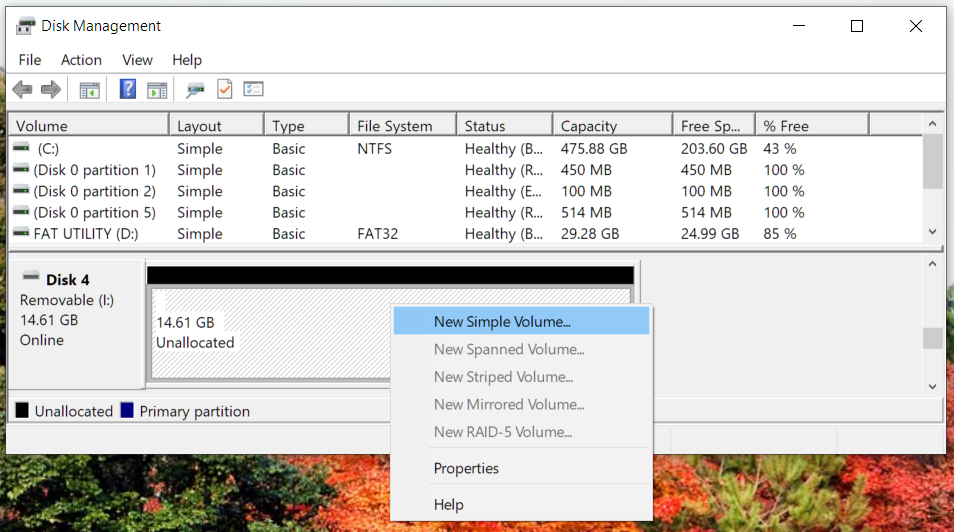
Create the FAT32 partition

1GB is sufficient
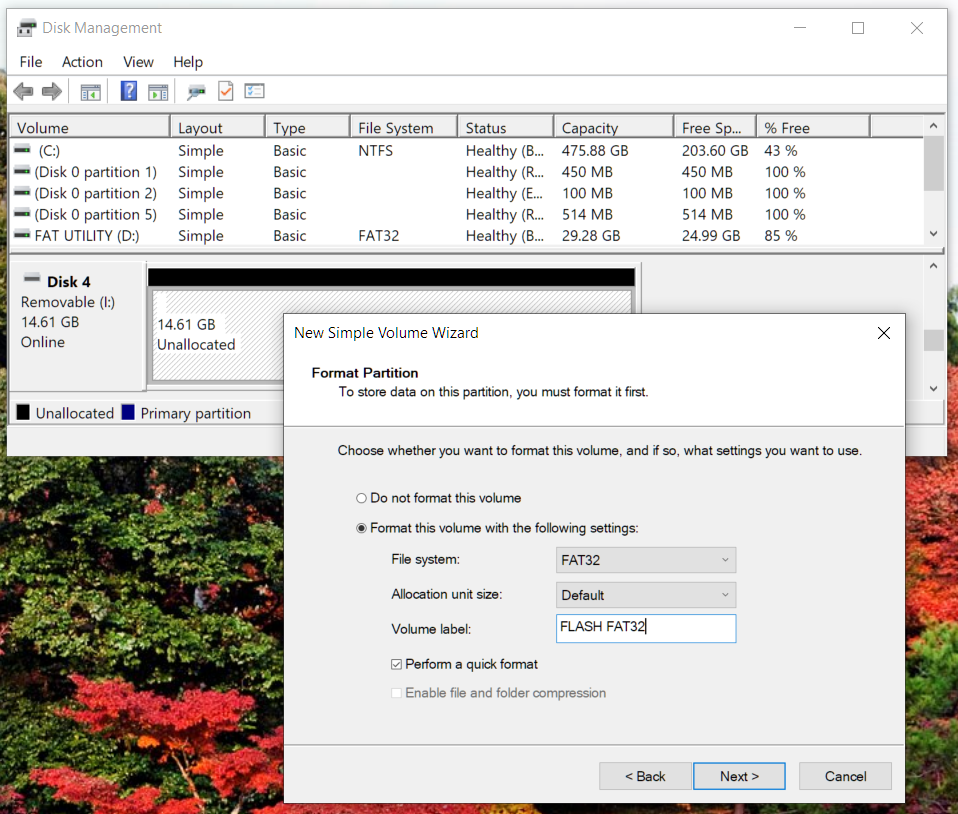
Make it FAT32 and name it if you like
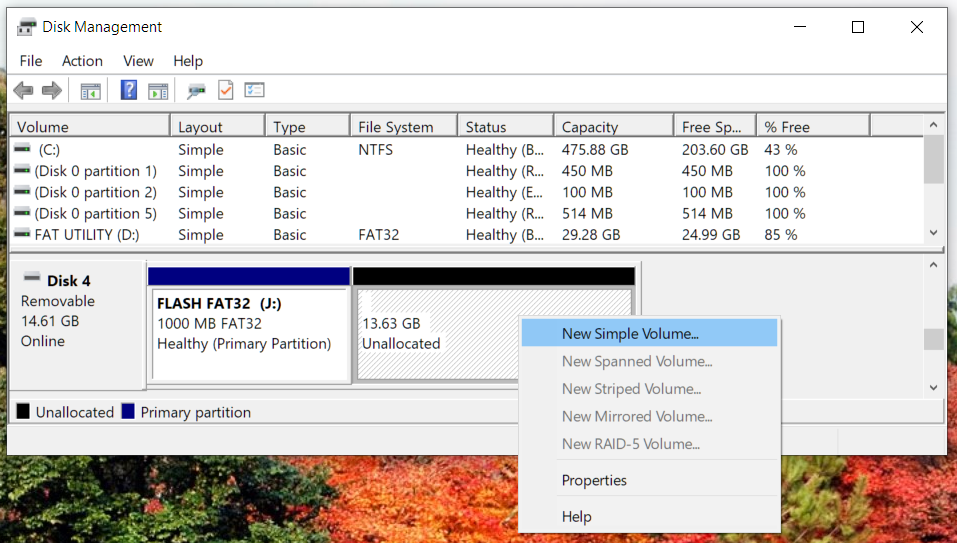
And the NTFS partition
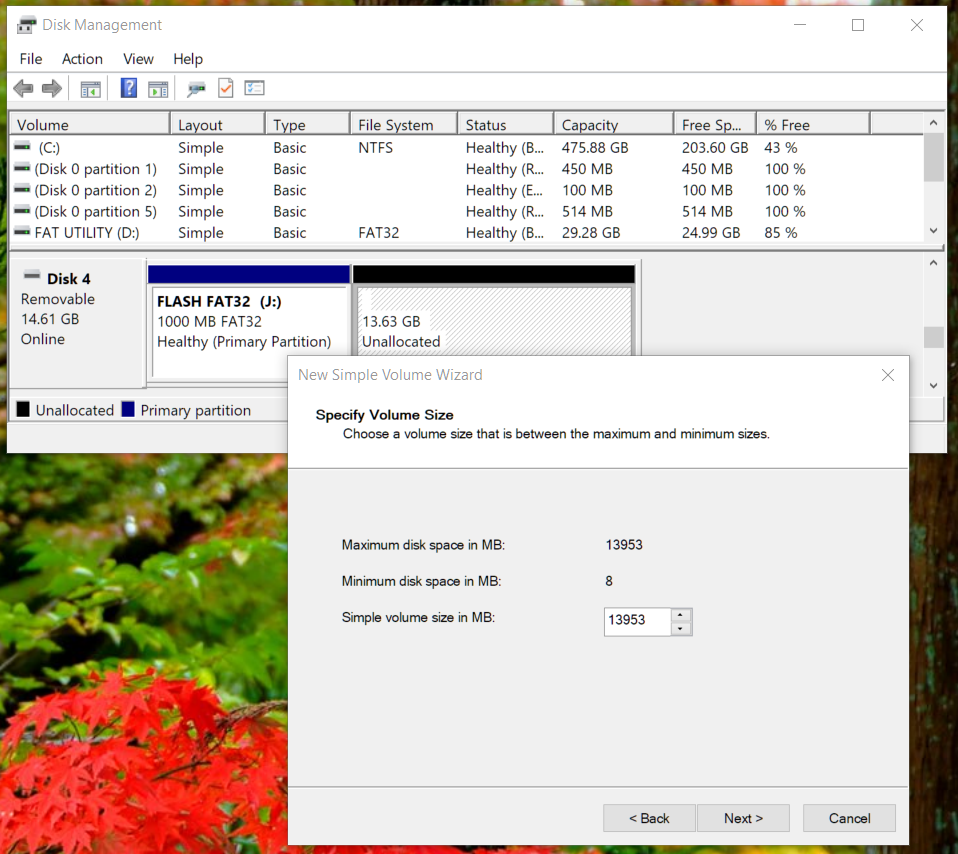
Use the rest of the drive – 7GB is enough
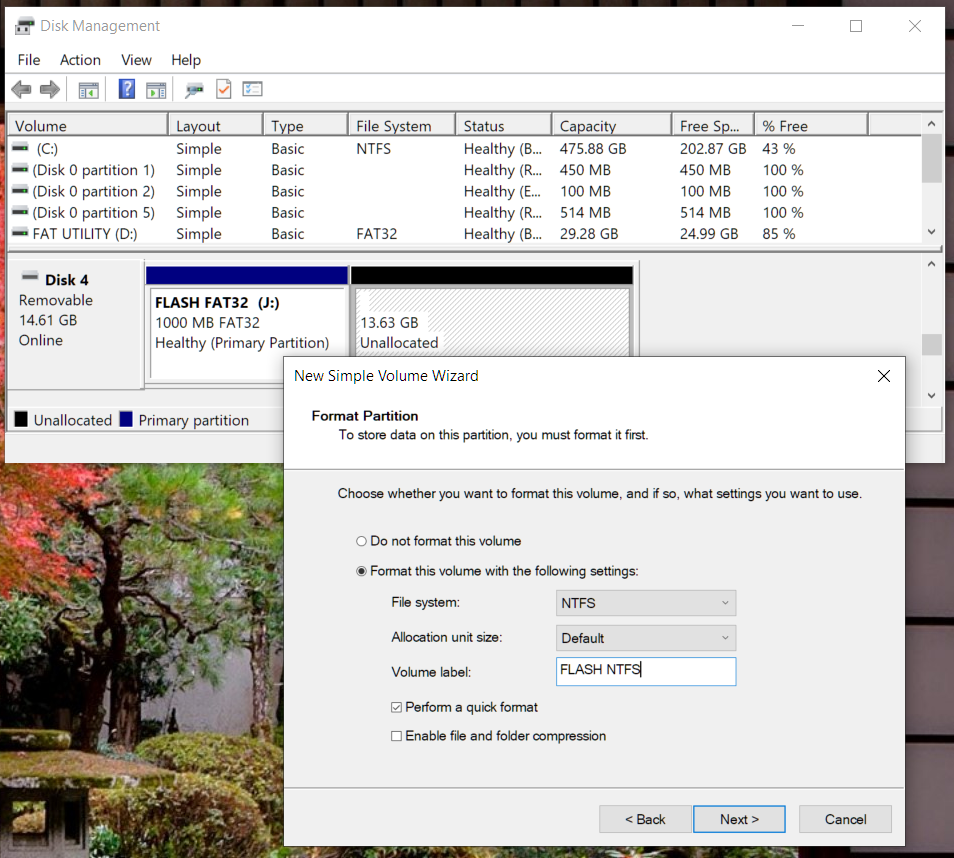
NTFS and name it if desired
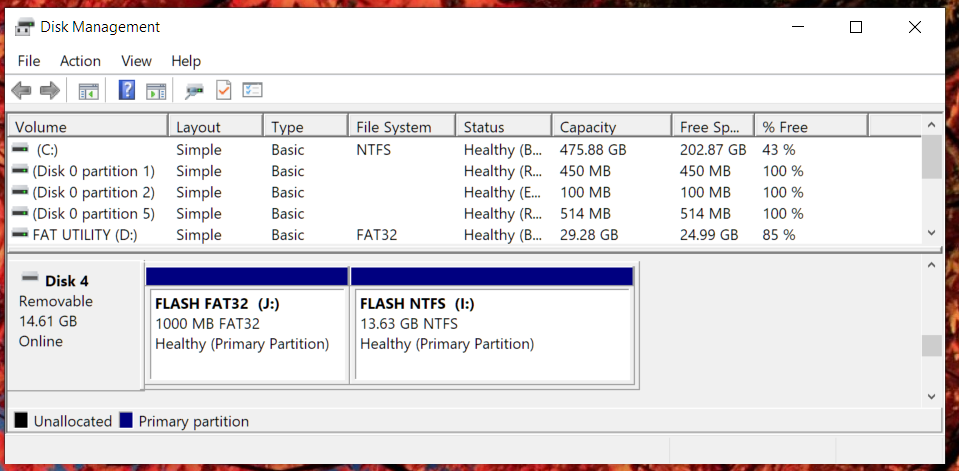
Ready – specific drive letters are not important as long as they are assigned
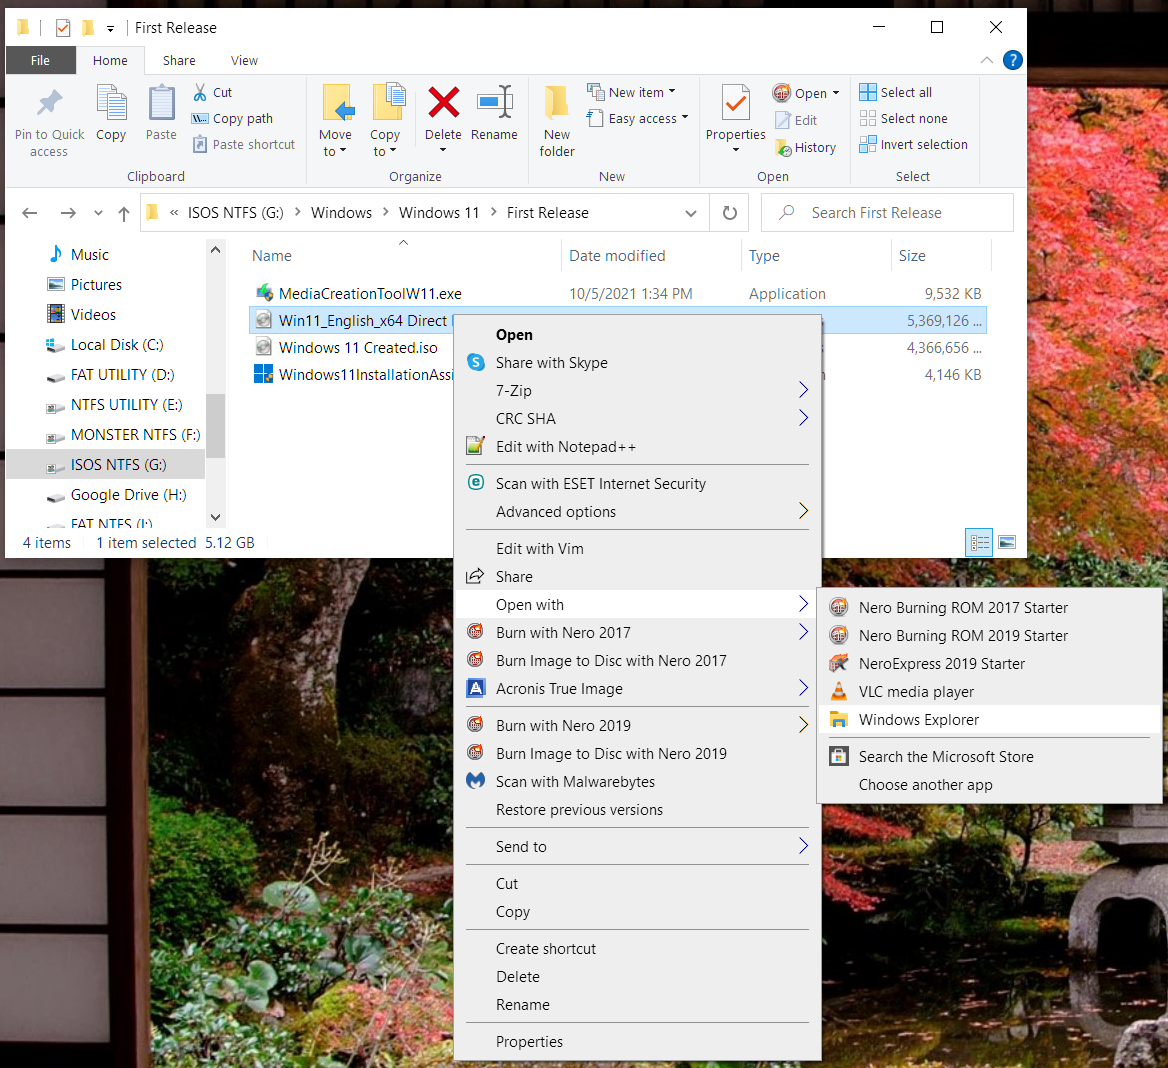
Open ISO with Windows Explorer or (un)archiving or mount tool
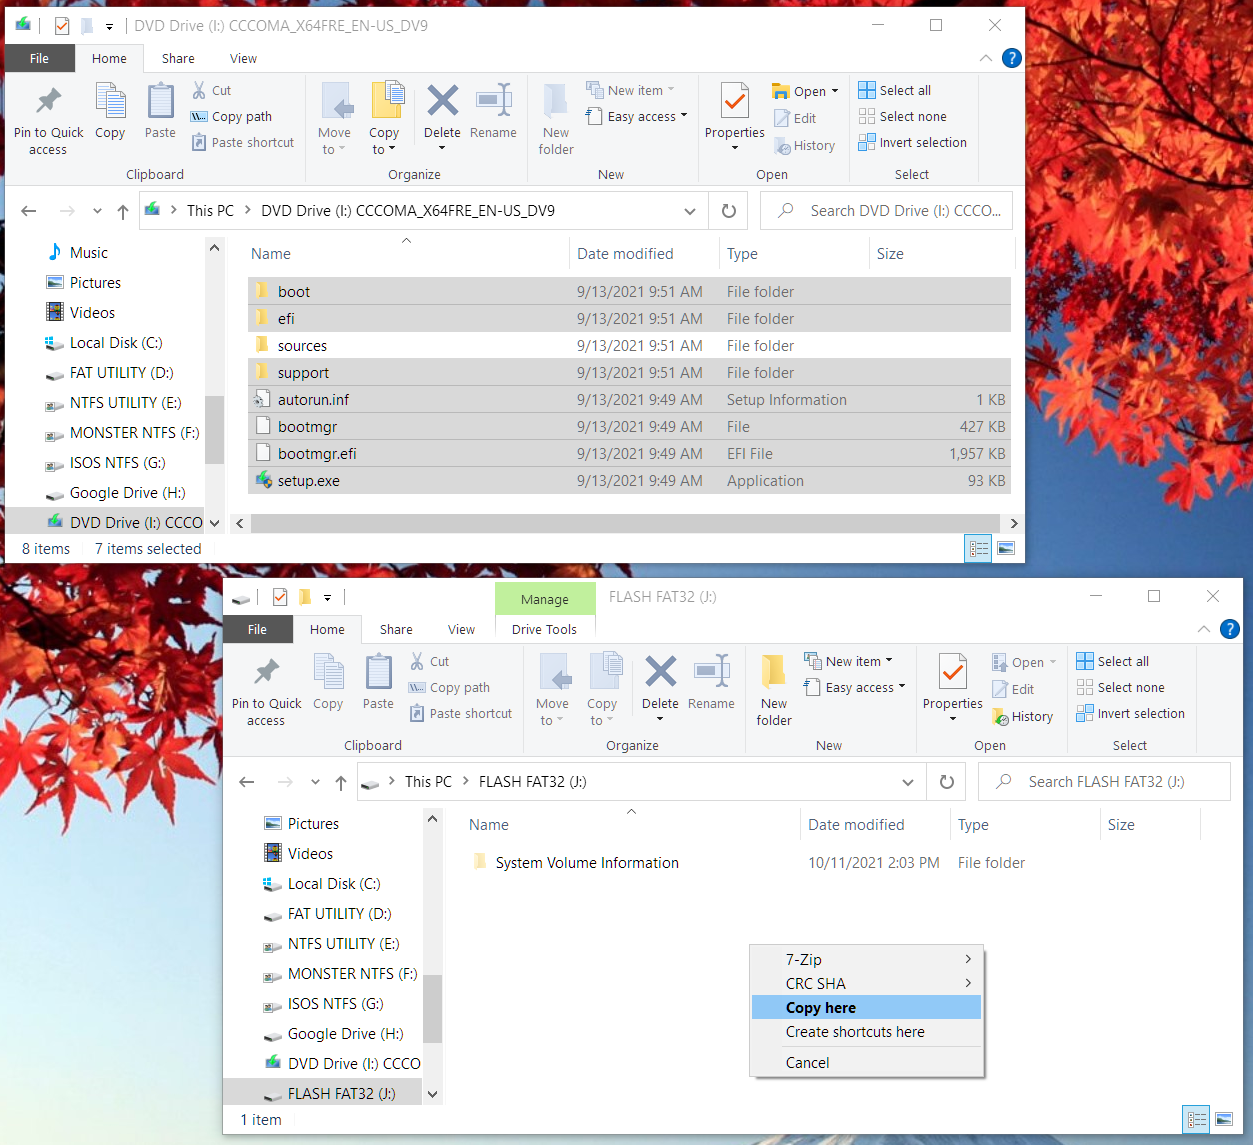
Copy ISO contents to FAT32 but do not include sources folder

Contents minus sources copied
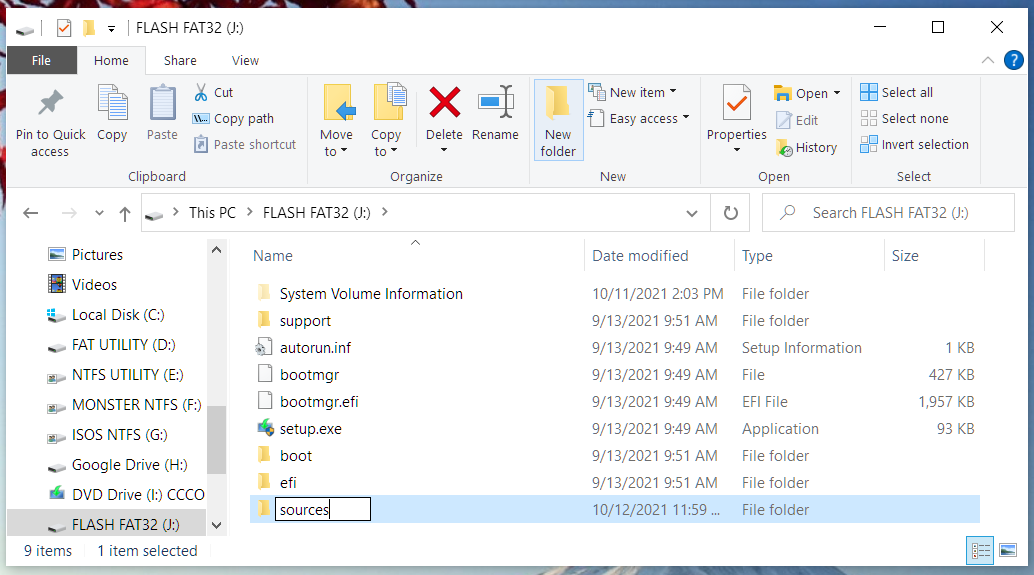
Use “New folder” button to manually create an empty sources folder in FAT32
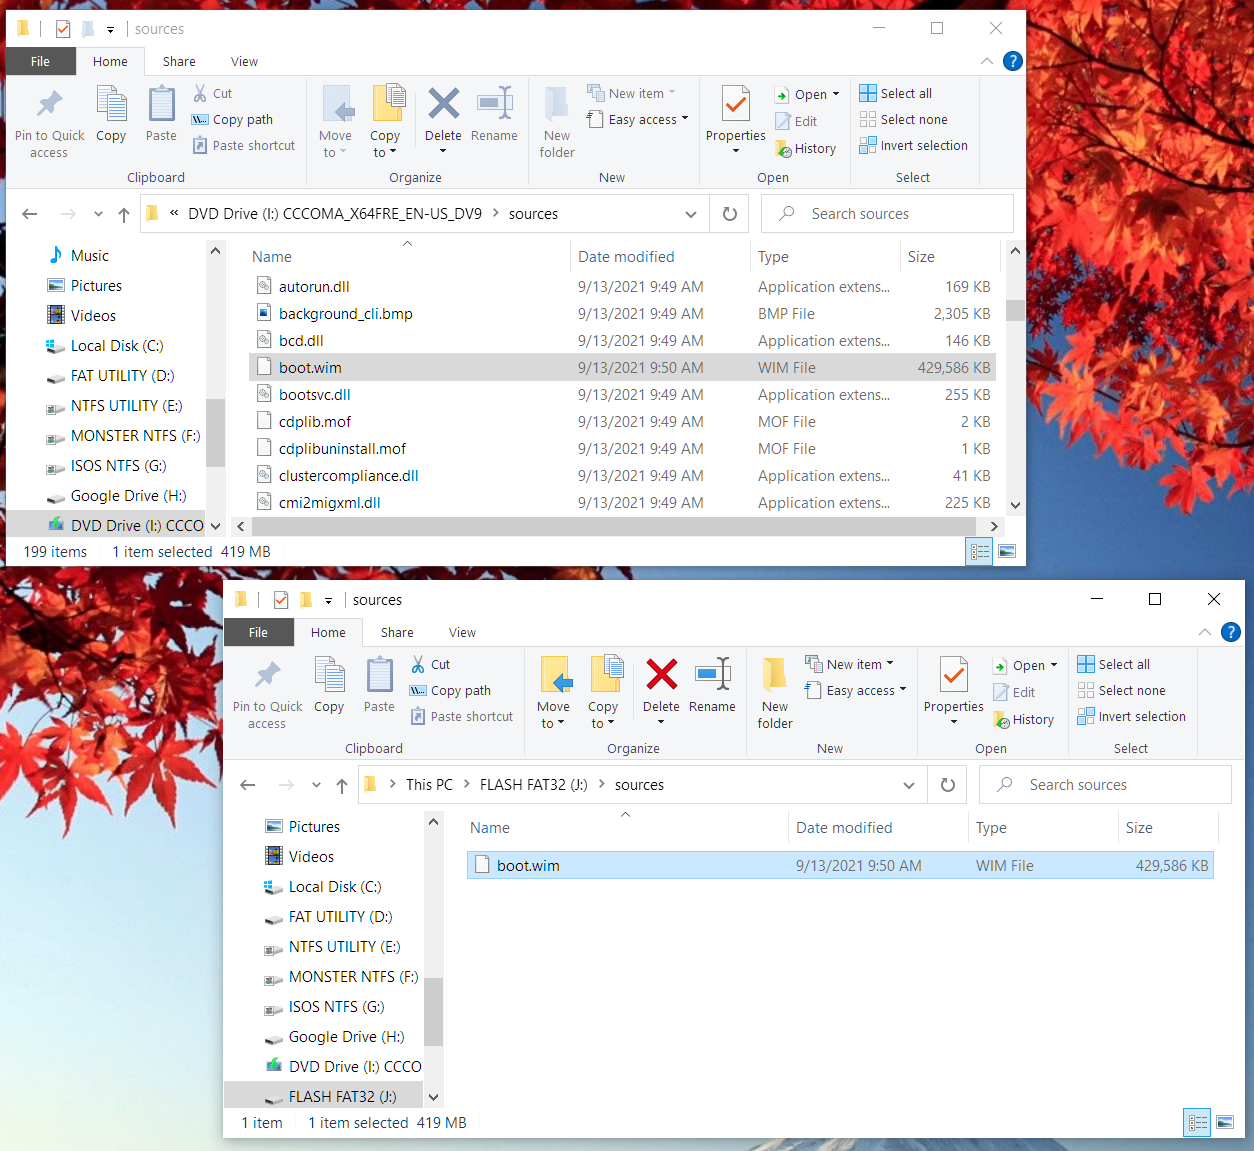
Open the sources folder in the ISO and copy boot.wim to sources in FAT32
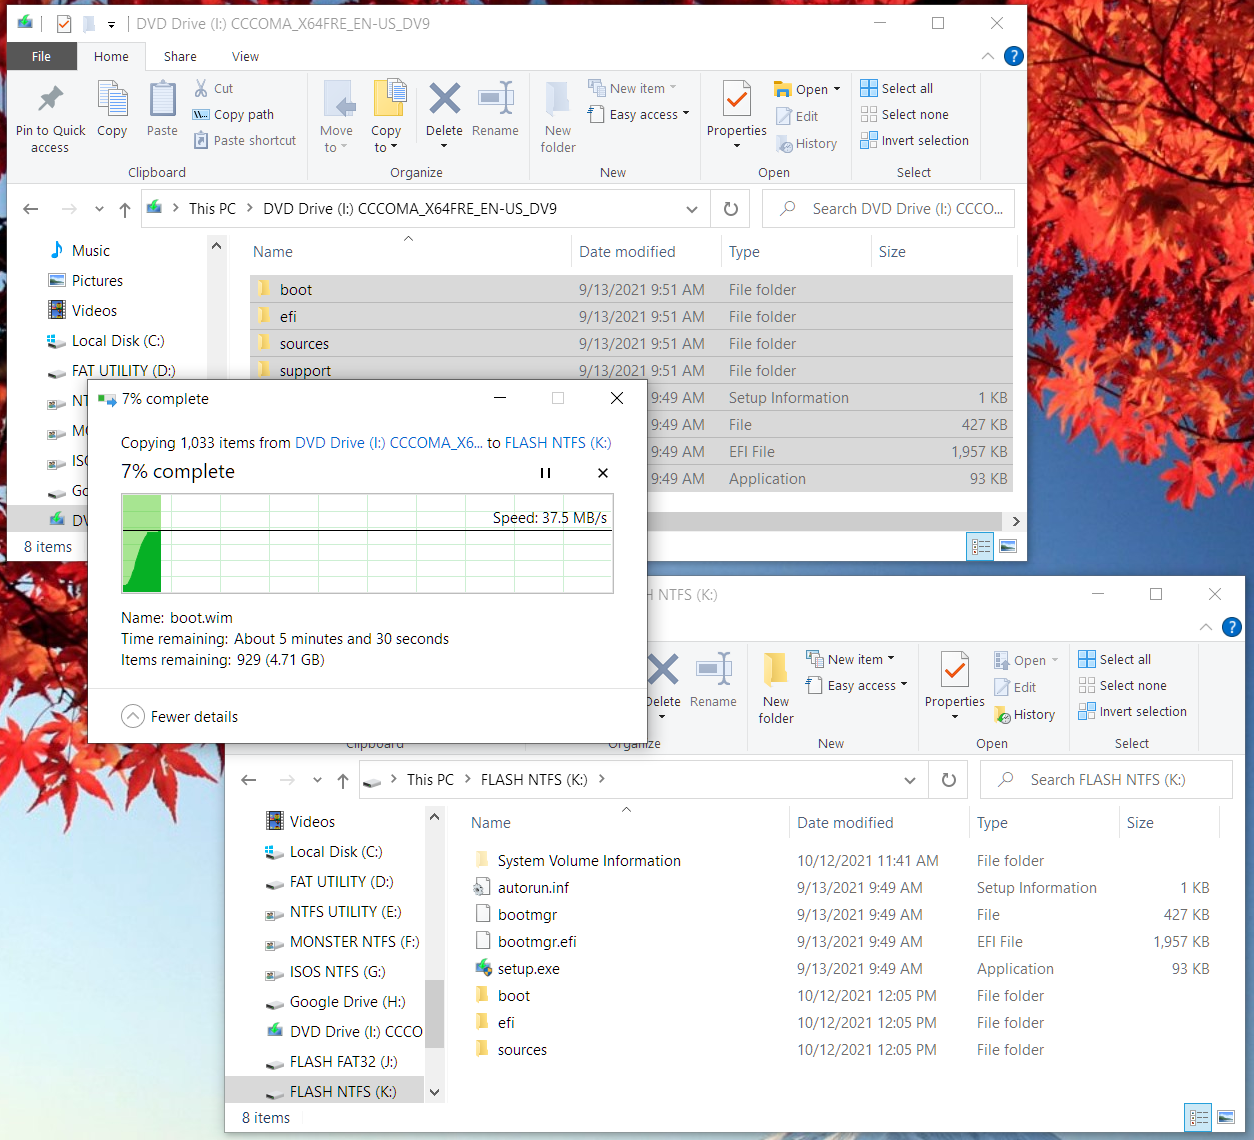
Copy entire ISO contents to NTFS partition
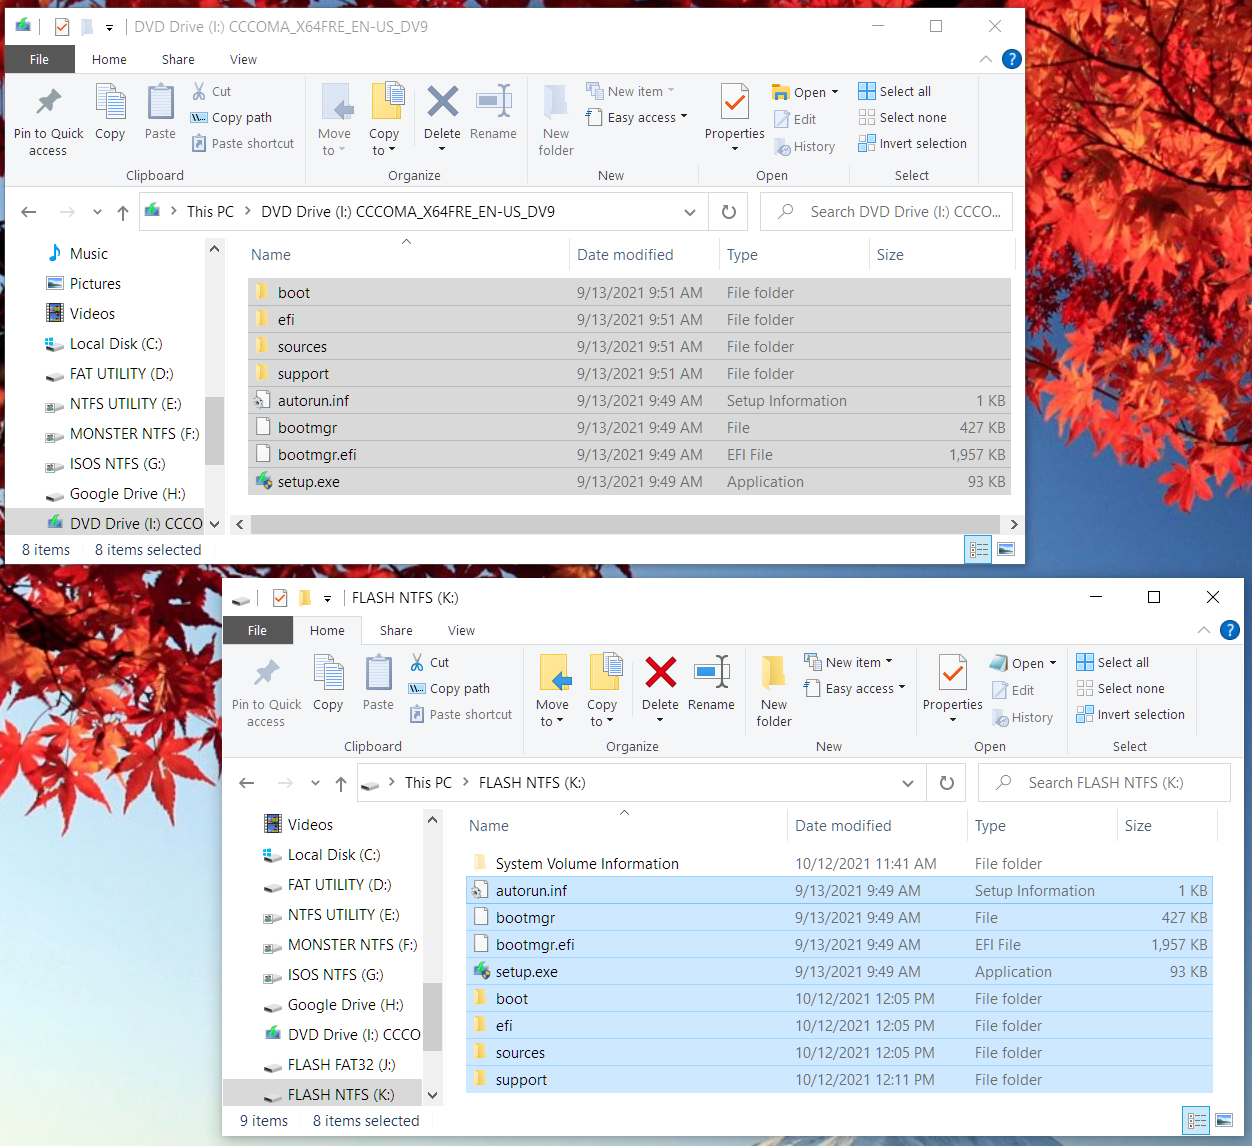
All copied
And that’s it. It probably wasn’t necessary to copy all of the folders in both cases, but it was easier than figuring out what was required in each partition.
Eject the flash drive, plug into the target machine, boot or restart and access the boot menu (F12 on a ThinkPad). Install…
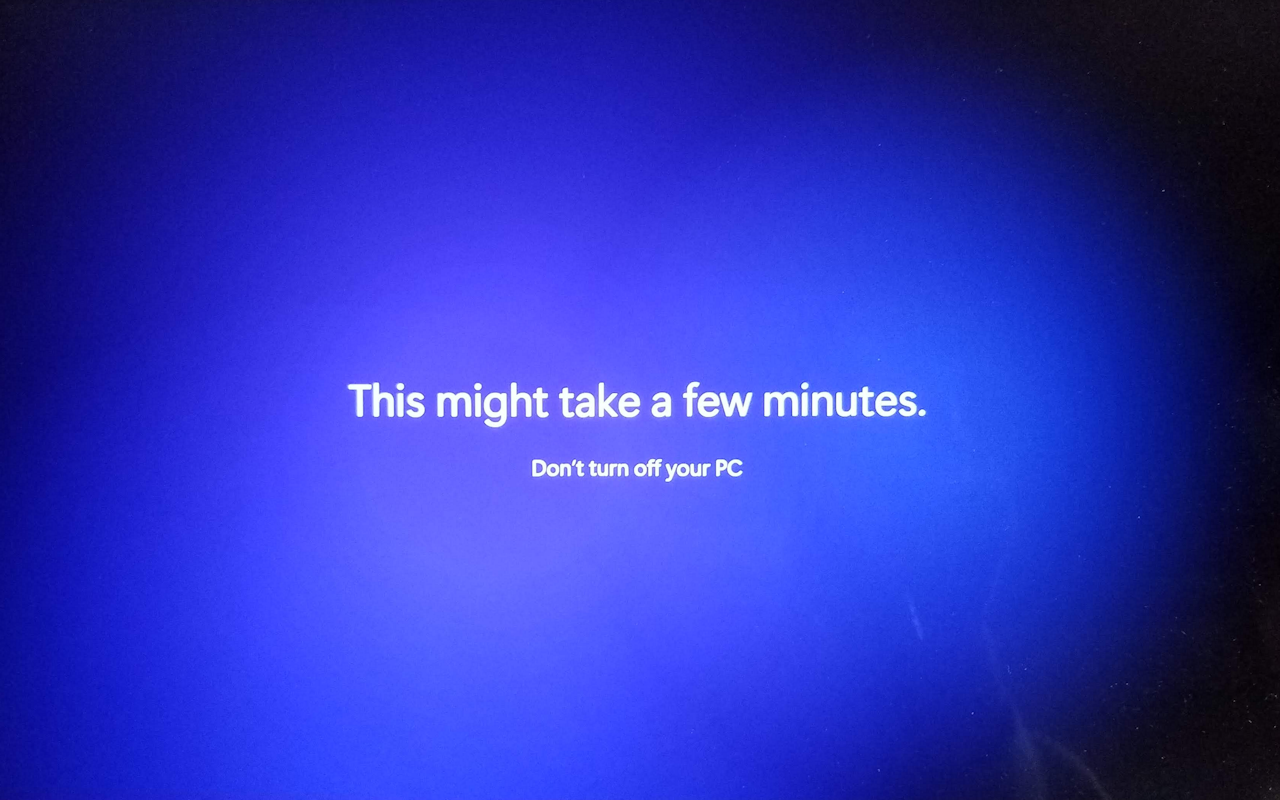
On the way…
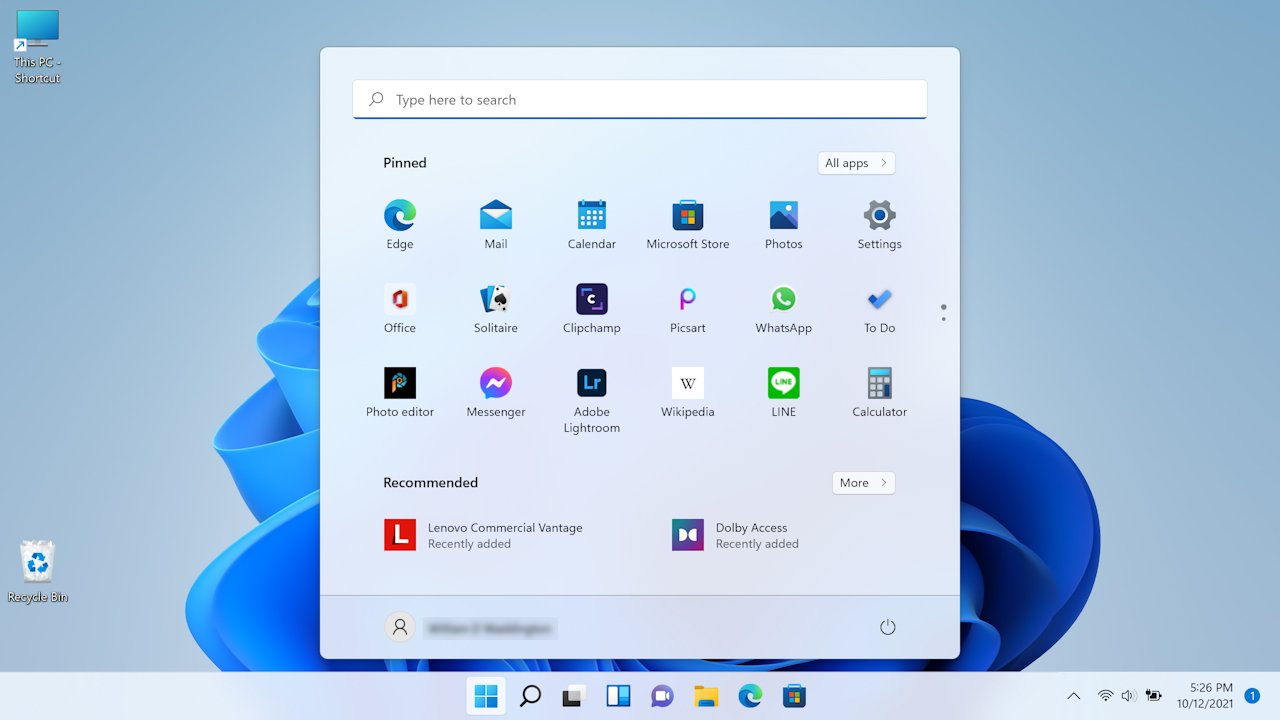
And we’re up – this screenshot after Lenovo Commercial Vantage installed
Hi, according to the official Microsoft procedure, you can also split the install.wim image into two smaller images in order to make it fit into a FAT32 USB drive.
Dism /Split-Image /ImageFile:C:\folder_name\sources\install.wim /SWMFile:C:\folder_name\sources\install.swm /FileSize:3800
But i really like your workaround. Thank you!
That’s noted in one of the links in the top of this article, but thanks for the reminder 😉
A really nice guide! Thank you!