
Hardware Enhancements
The P1 arrived shipshape and Bristol fashion, and with decent components: a single 16 GB Ram stick and a pair of NVMe SSDs. The 512GB was the one shipped from Lenovo, and Nate had added a 1TB drive. The 512GB part was as fast as possible, but the 1TB drive had a slower write speed. Perfectly fast and usable, but that’s all the excuse needed to swap in parts on hand: a pair of 32GB RAM modules and a pair of Samsung 970 EVO Plus 1TB SSDs. They may not stay in the machine permanently, but the swap was educational and (mostly) uneventful.
I like to work on a grounded mat with a wrist strap. I have a couple of large ones left over from the job, but lately use a small consumer-grade one. If something like that isn’t available (and it usually isn’t…) be very careful about static. Consult the Hardware Maintenance Manual for component access details. Always unplug the charger and use the BIOS option to disable the battery before cracking the case. The battery will be re-enabled the next time the charger is plugged in and the laptop turned on.
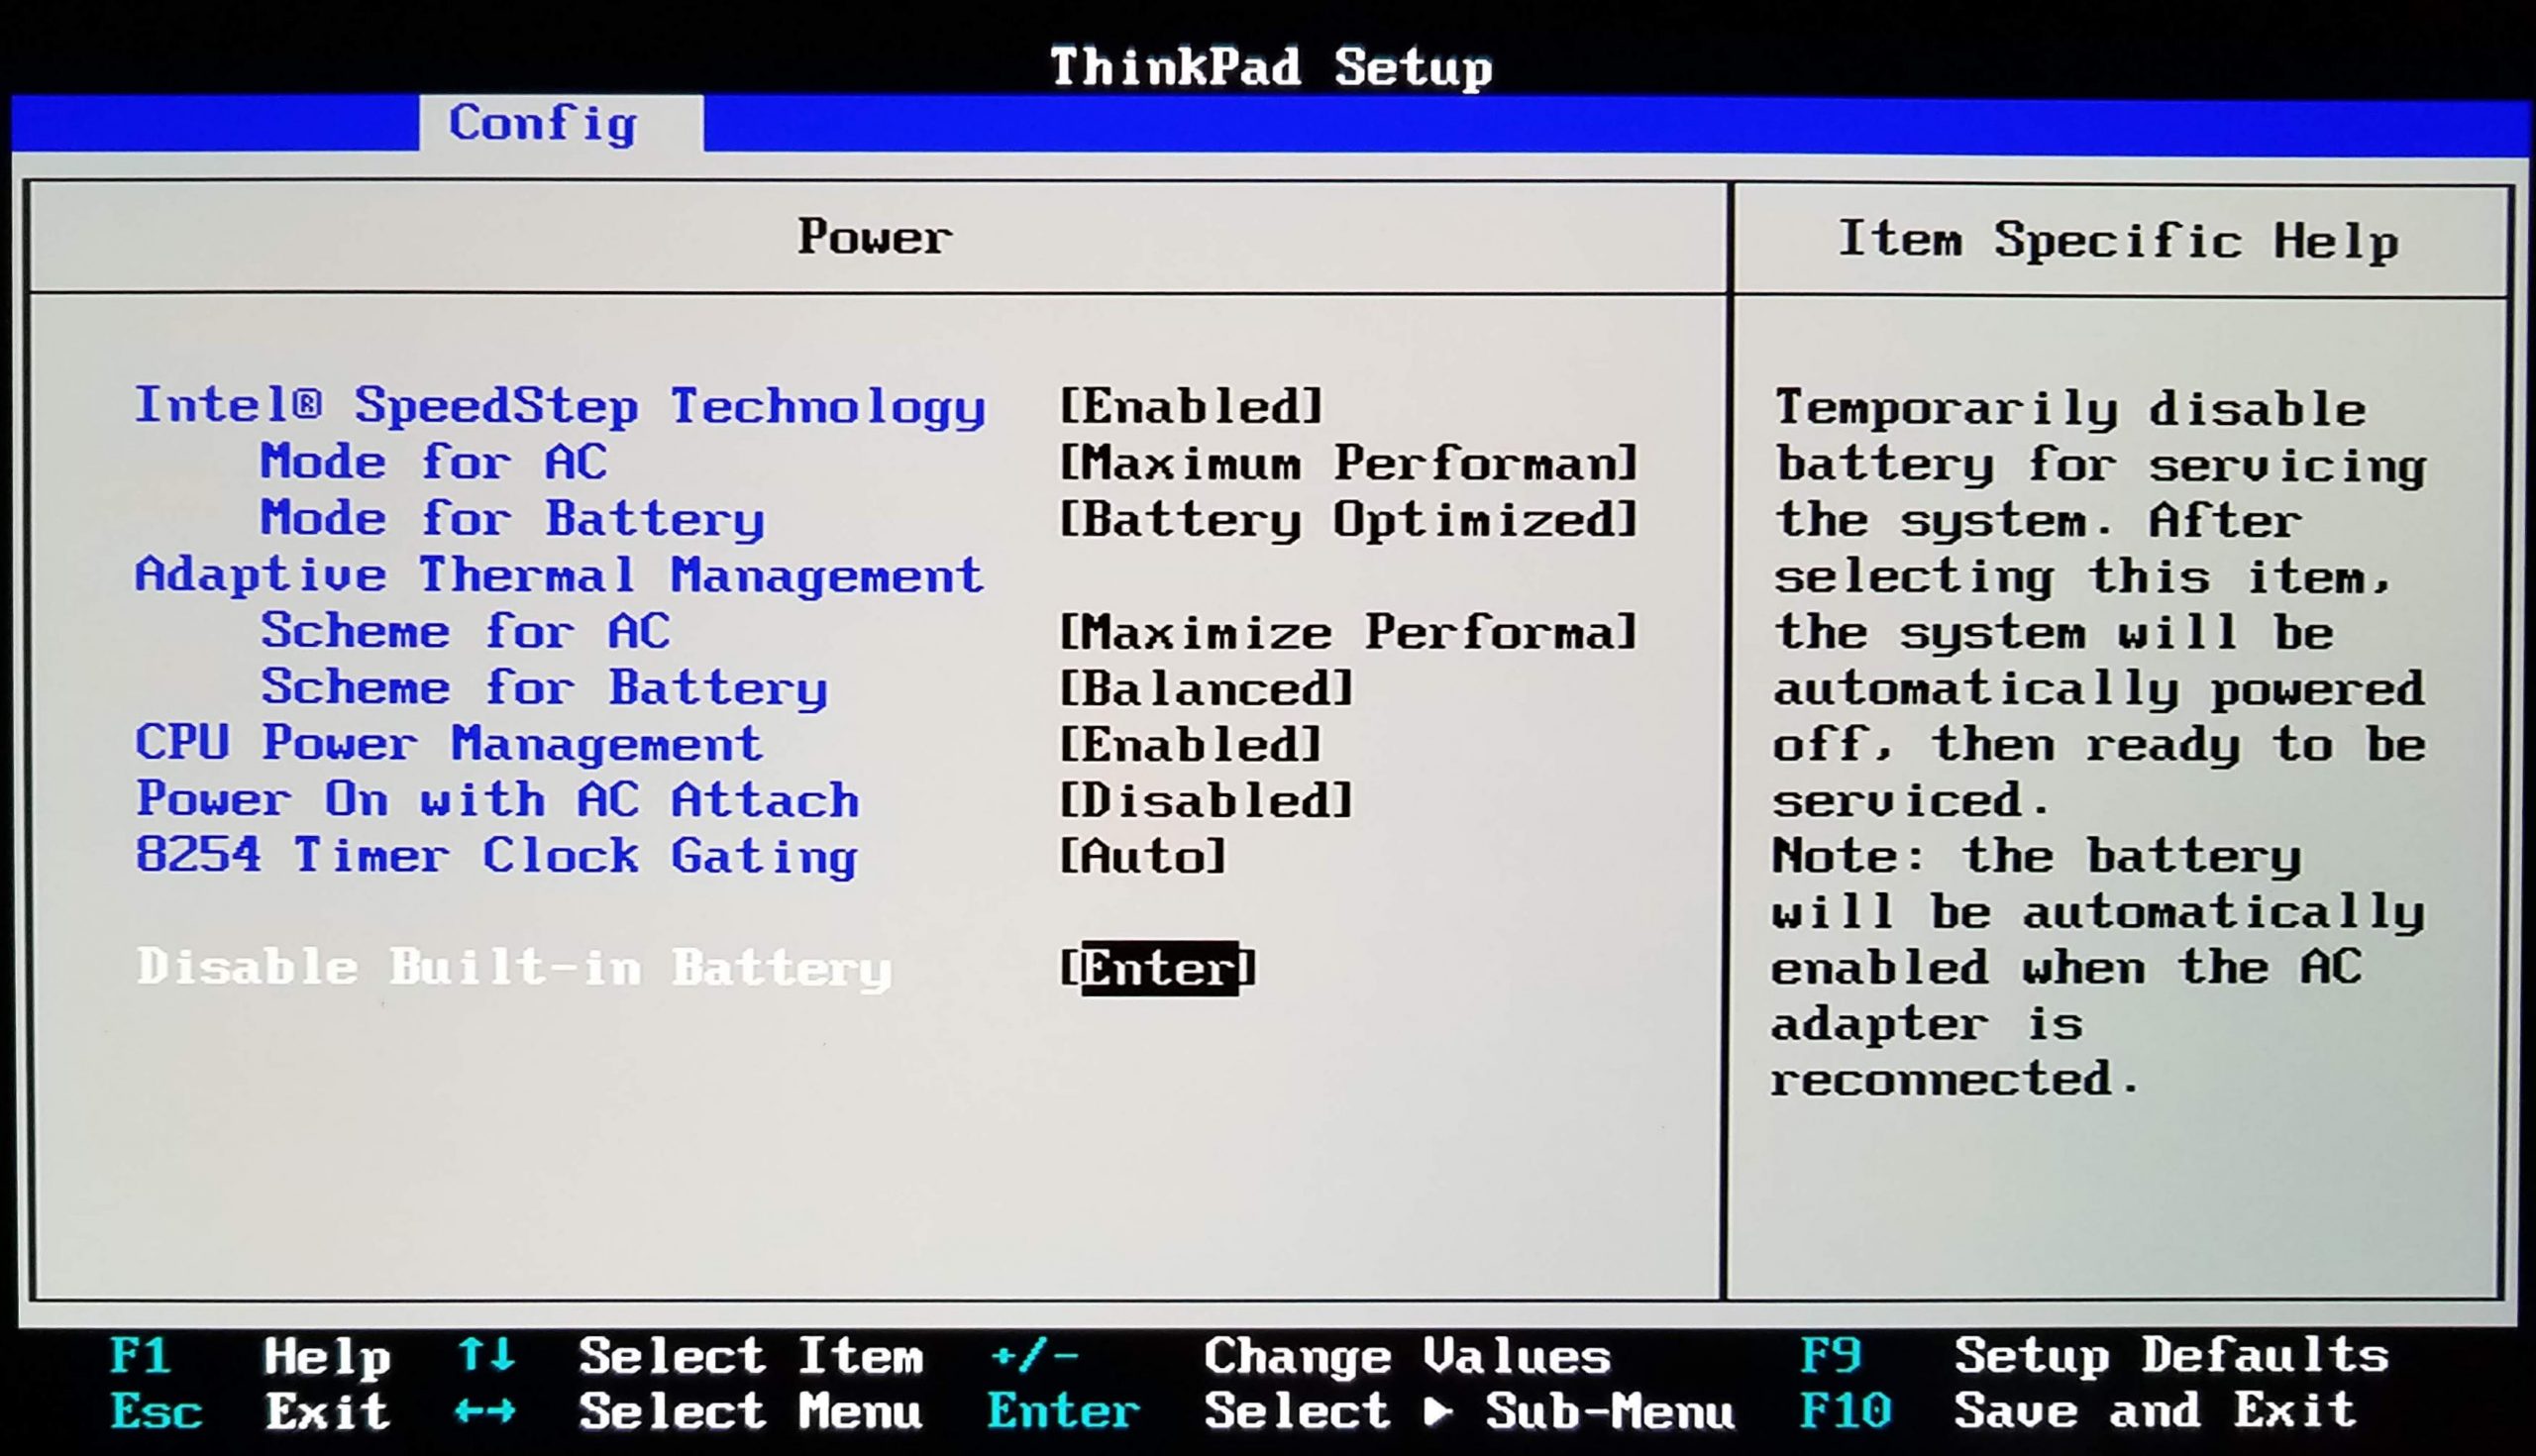
ThinkPad P1 Gen 2 BIOS Battery Disable
BIOS side note: The P1 is supposed to have both text-mode (classic) and graphical BIOS setup modes. This unit – and others as confirmed by a Lenovo engineer – for some reason don’t allow selecting GUI mode. The mode switch is there, but can’t be accessed.
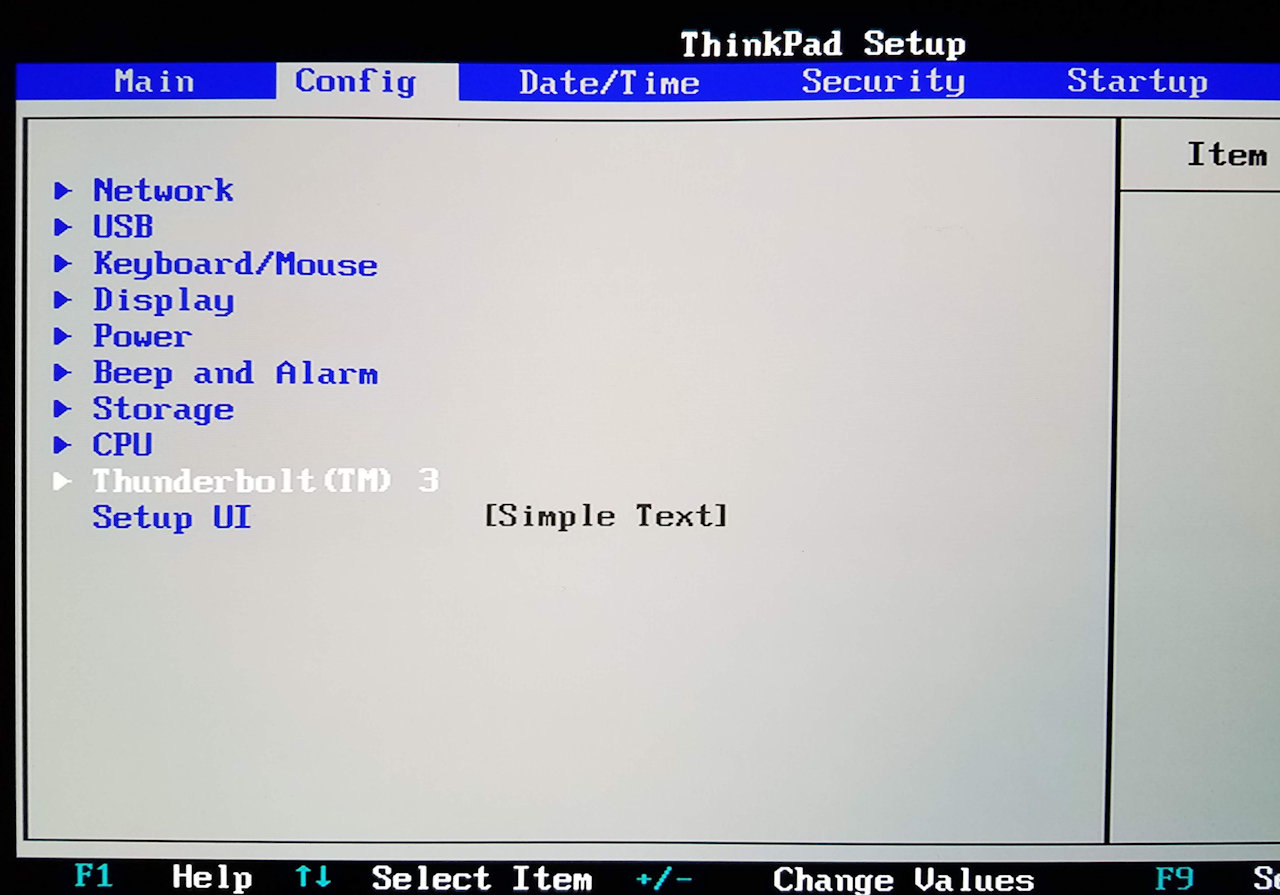
ThinkPad P1 Gen 2 GUI Setup Unavailable
The original internals:
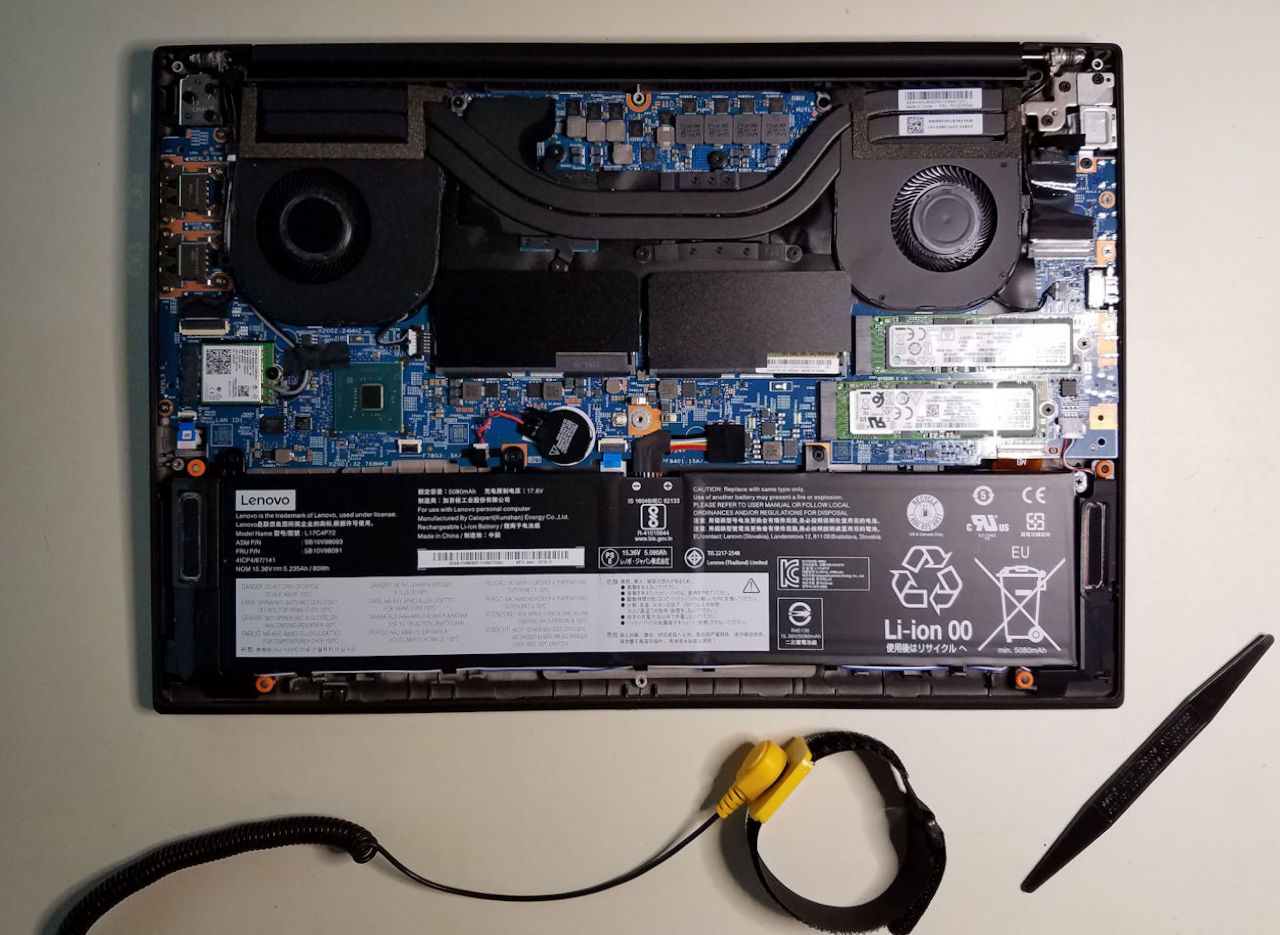
ThinkPad P1 Gen 2 Internals
More RAM:
Typically when adding RAM to a ThinkPad the first boot following will take a long time at a black screen as the new RAM is probed and configured. Sometimes a very long time. Subsequent boot/reboot will return to normal timing. Surprisingly, going from 16GB to 64GB on this P1 added less than a minute to first boot. It is one fast machine. For the record, this is the RAM I used. I tend to go to Crucial for RAM, but there are other reliable suppliers. Crucial 64GB Kit (32GBx2) DDR4 2666 MT/S CL19 SODIMM 260-Pin Memory – CT2K32G4SFD8266
It’s a good idea to run Memtest on new or suspicious RAM. I have a UEFI (and legacy) version on my multi-boot external drive, and also copied it and other tools to the 2nd SSD in the P1 – described later. Booted the UEFI version for this test (ignore the legacy boot highlighted below).

ThinkPad P1 Gen 2 Grub Menu

ThinkPad P1 Gen 2 Memtest Running
One pass took 7 hours. No errors. Whew. New RAM installed:
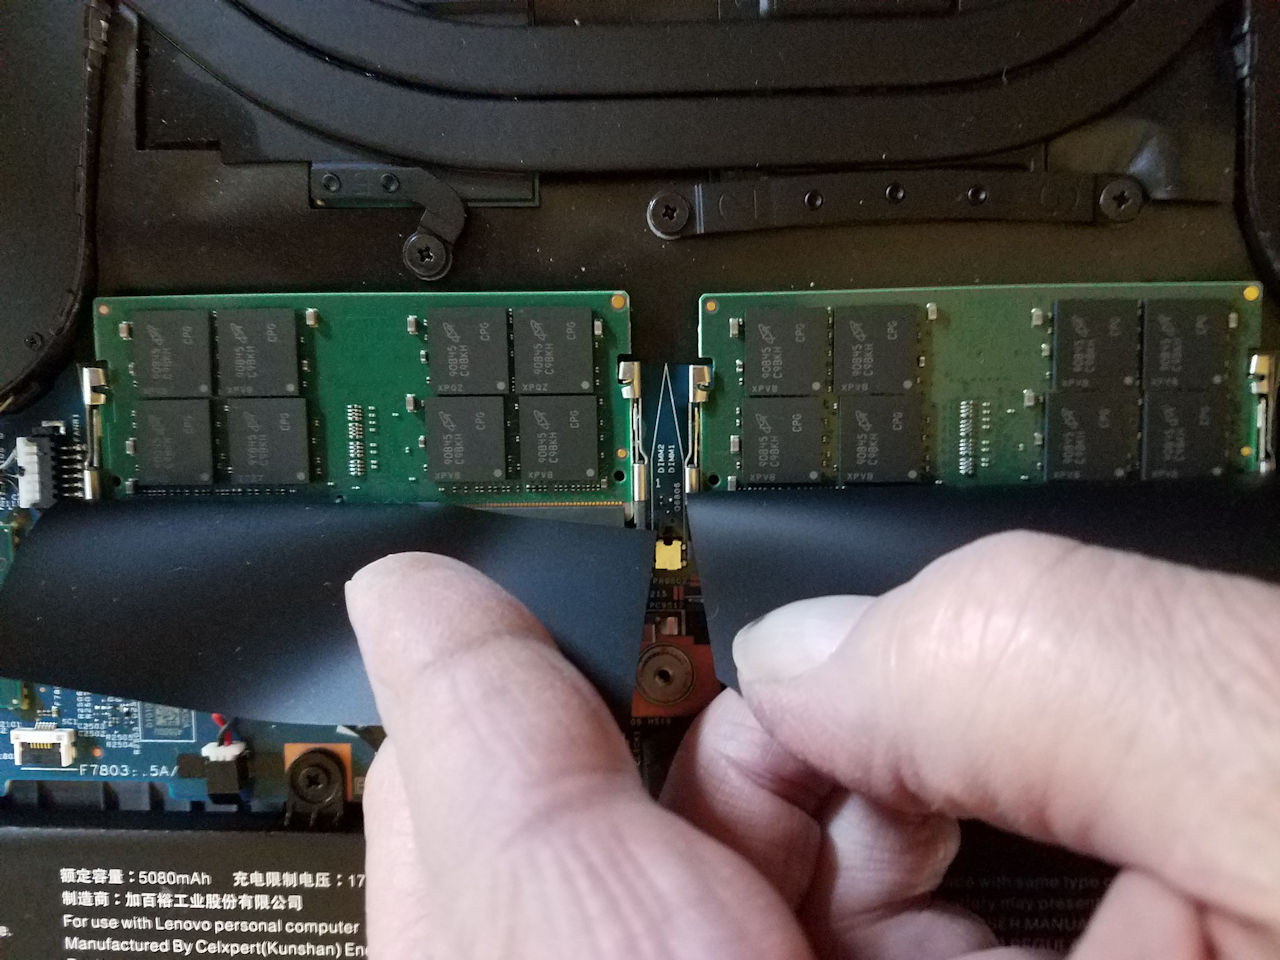
ThinkPad P1 Gen 2 RAM Installed
New SSDs:
The drives: Samsung 970 EVO Plus 1TB. Two of them. Now to the SSD swap(s). There are sticky thermal pads under both SSDs. Be gentle when removing the drives to avoid damaging the pads. Apart from that, removal and installation is easy. Installing/ transferring OS and data takes a bit more work.
There are several ways to approach this, depending on the intended result. If one is simply adding a 2nd drive to expand storage capacity there’s not much to it. Go to Disk Management and initialize, partition, and format the drive. If the bootable OS drive is the one being replaced then there are options: fresh install of a downloaded Lenovo image, fresh install of a use-built recovery image, “clean” install from Microsoft media (all described here: Initial Setup), or if it’s desired to migrate the existing OS, data, and programs from old to new – either a clone from old to new or first saving an image of the current drive elsewhere, then restoring that image to the new drive.
Partly because I had already installed a bunch of apps, and partly for the exercise, I tried both the clone and save/restore options. My tool of choice for that is Acronis True Image. I didn’t use an installed True Image. Not really appropriate for a laptop IMHO since its primary use is timed/scheduled backups. I have a bootable version on my multi-boot external drive – for the clone test and save/restore test – and also used it after copying to the 2nd SSD (Linux – Barely Installed) – for the save/restore test. An issue with bootable software, and some installed software: it often doesn’t play well with high-DPI displays. It can be tiny and very hard to read and navigate. A little deeper look at that issue here: High DPI Displays and Scaling
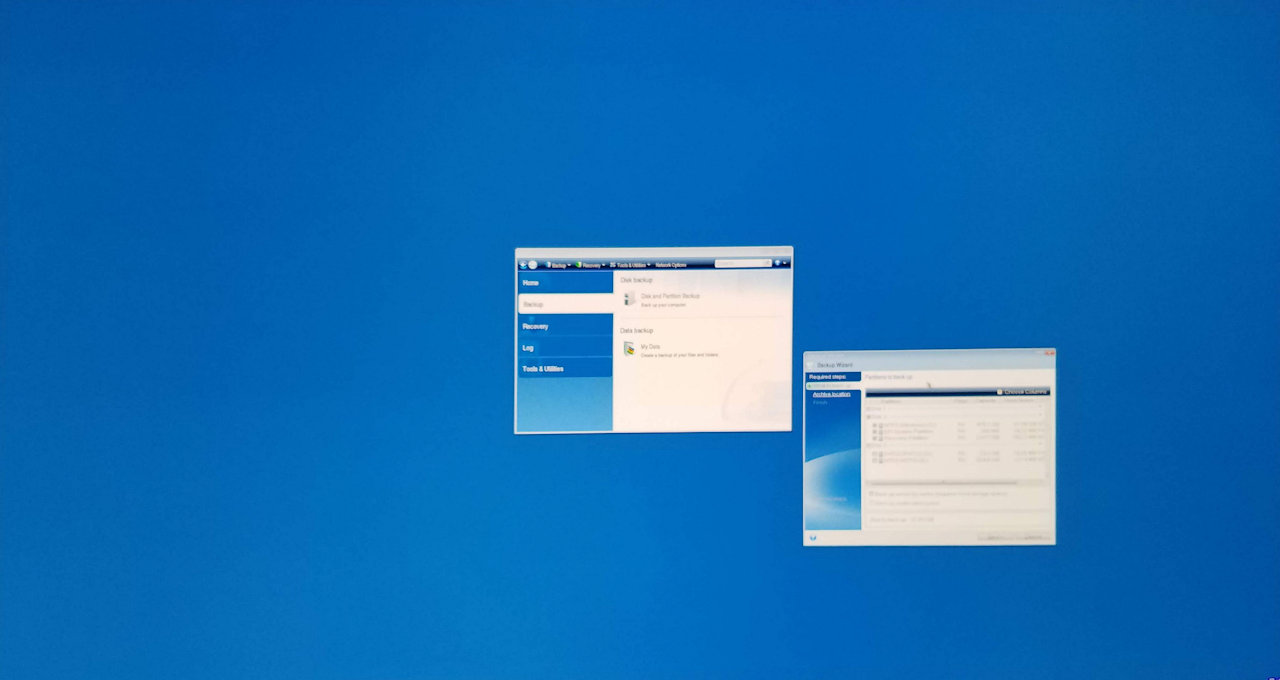
ThinkPad P1 Gen 2 Tiny Acronis
Thankfully, I’m nearsighted, so specs off and soldier on… Found a work-around later. See High DPI Displays and Scaling The original drive partitions:
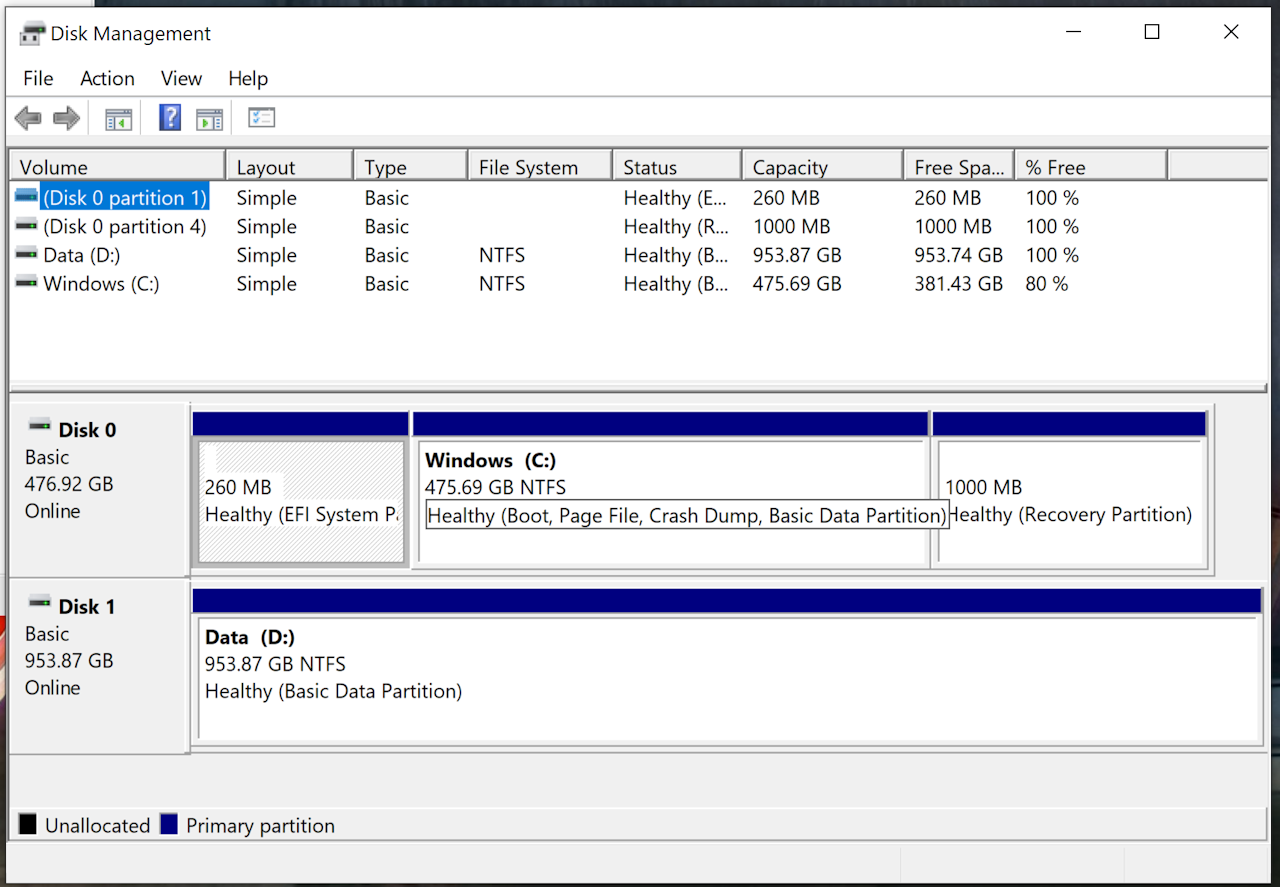
ThinkPad P1 Gen 2 SSDs Disk Management Original
The first effort was to boot the external drive, run Acronis, and clone Disk 0 to disk 1. Ran quickly and produced a bootable and functional 1TB drive.
Next test: boot Acronis and save an image of Disk 0 to the external drive, swap in a Samsung 970 EVO Plus SSD, boot Acronis again and restore the image to the 1TB drive. Also worked fine.
Final test: copy the external drive and all its bootable tools to the EVO now in the 2nd slot as Disk 1. Pull an Acronis image of Disk 0 and save it to Disk 1. Swap in an EVO for Disk 0 and restore the saved image. Also OK – bootable and functional drive produced. This is (just) one of the reasons I like the Linux – Barely Installed approach to setting up the 2nd SSD. It can have a saved Acronis image of the OS drive present – along with the bootable Acronis itself – to be restored if there’s ever an OS failure or SSD replacement on the first drive. The restored image contains everything present when the image was taken – not just the OS.
After the above tests I installed Fedora Linux in dual boot mode on the primary SSD (see Linux – Bare Metal Install). This involved carving out space for Linux and produced two additional partitions. Ran a similar set of tests. An Acronis clone operation would offer to clone the Linux partitions sector-by-sector but warned that repair would be necessary to boot Linux. That proved to be true, and it’s not a simple task. When using Acronis to pull a backup of the dual-boot drive it did not offer to include the Linux partitions. The restore worked but left unused space on the drive. Some care was required to assign locations to the restored partitions so the empty space could be reclaimed for Windows or re-used to install Linux. It was all manageable but a bit fussy.
The final SSD layouts are shown below: Windows and Fedora Linux on the primary drive, a FAT32 partition containing a bootable “live” Ubuntu and other tools + an NTFS partition on the second drive. The Disk numbers have changed. There’s a strange mismatch between NVMe0, NVMe1, Disk 0, Disk 1, and Slots A & B in the Hardware Maintenance Manual. I gave up trying to get them all to appear in the same order (which required considerable OCD suppression…) and just let them be what they are. It all works.
One other note: both a clone op and image save/restore left the Recovery partition not flagged as such. Diskpart does see it as recovery. Verified that the recovery environment was available from within Windows or via SHIFT + reboot, and tested building recovery media from within Windows – built media as expected. Partition UUID was also correct, so no idea why Disk Management doesn’t flag it as Recovery. I’m convinced it’s not a problem.
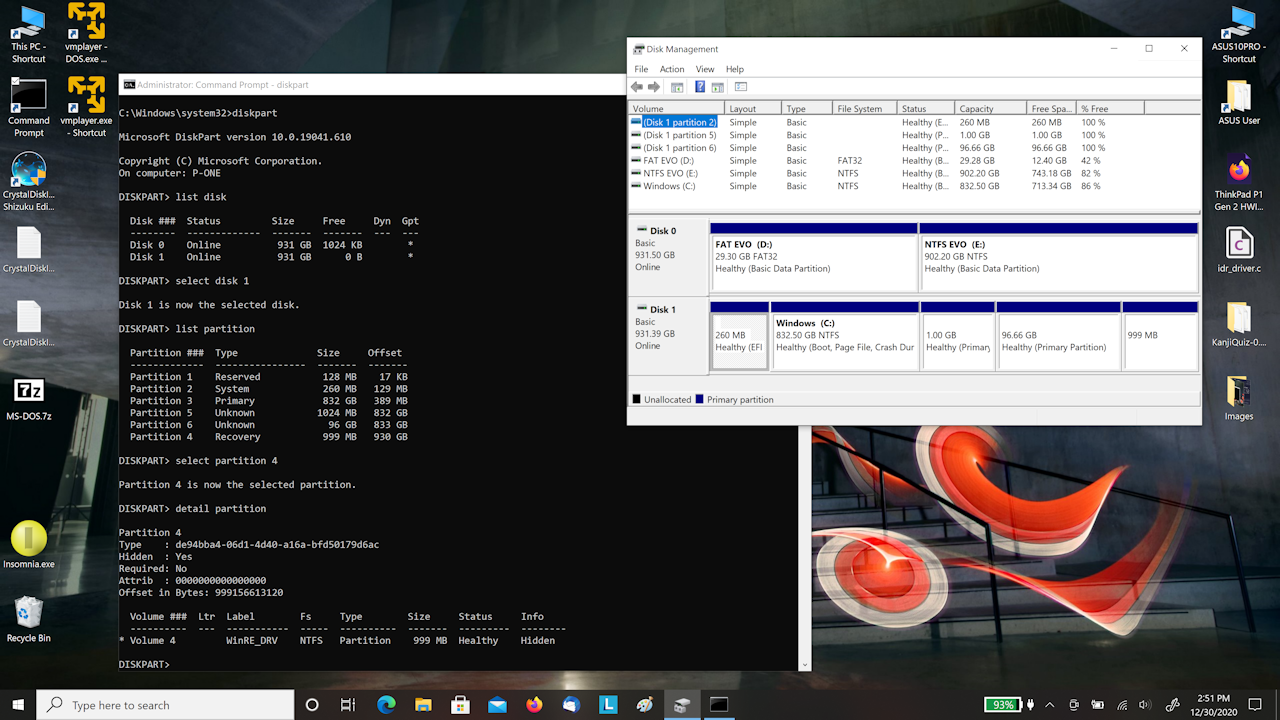
ThinkPad P1 Gen 2 SSD Post-recovery Partition Disk Mgmt and Diskpart
Drives installed:
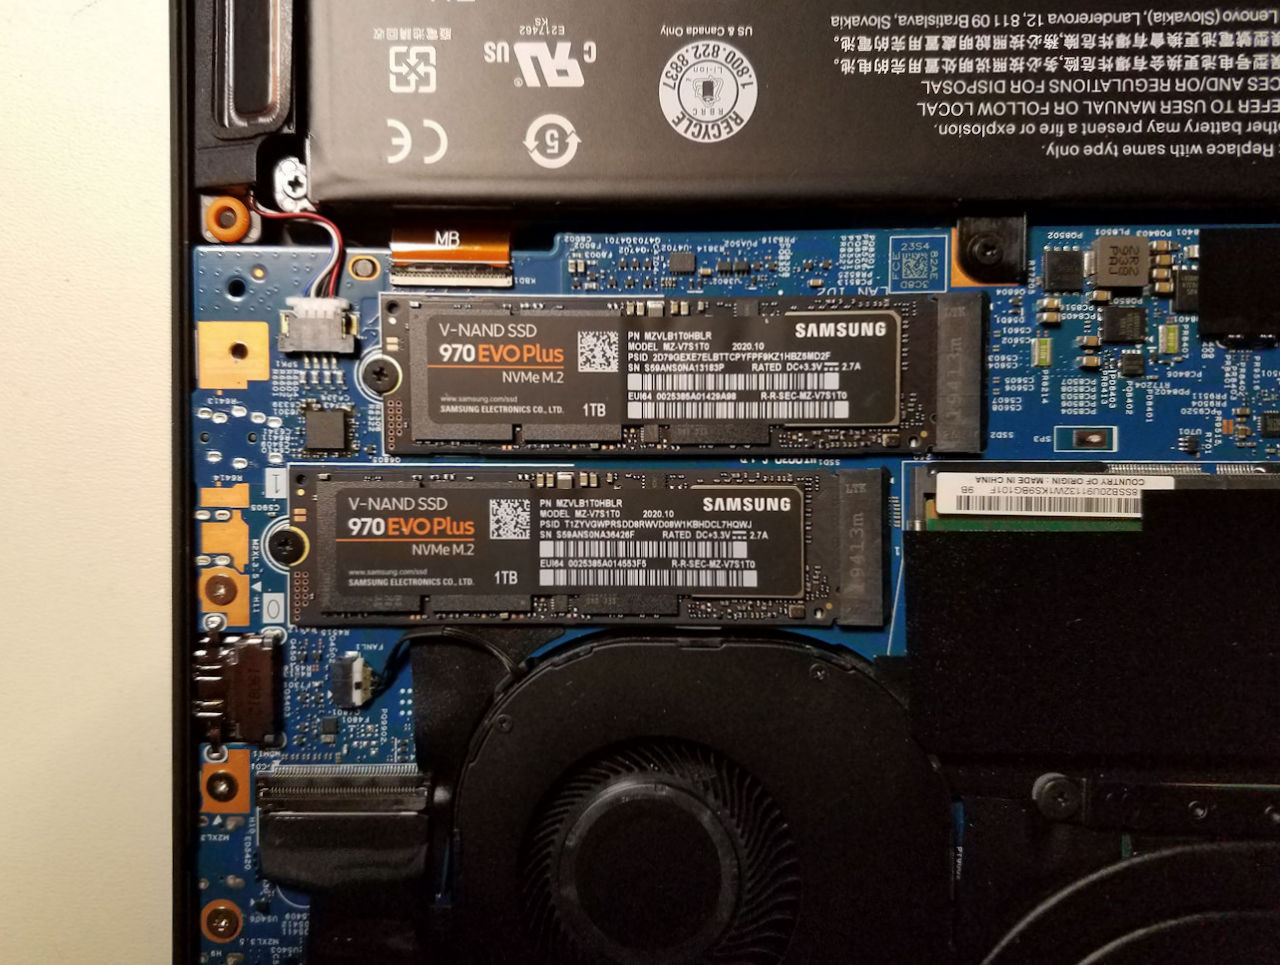
ThinkPad P1 Gen 2 SSDs Installed
Original drive performance:
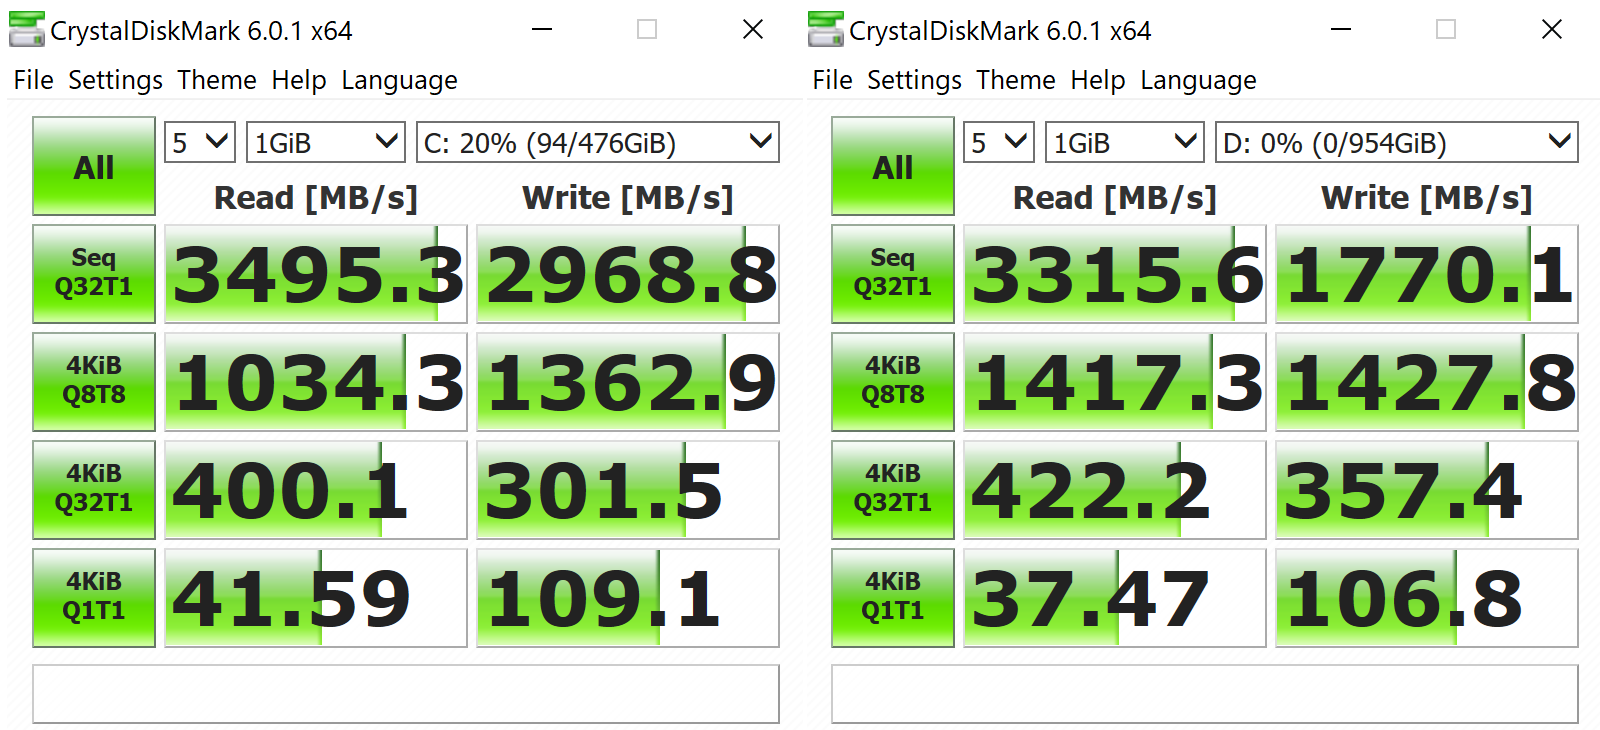
ThinkPad P1 Gen 2 SSD Performance Both Original
And the new drives:
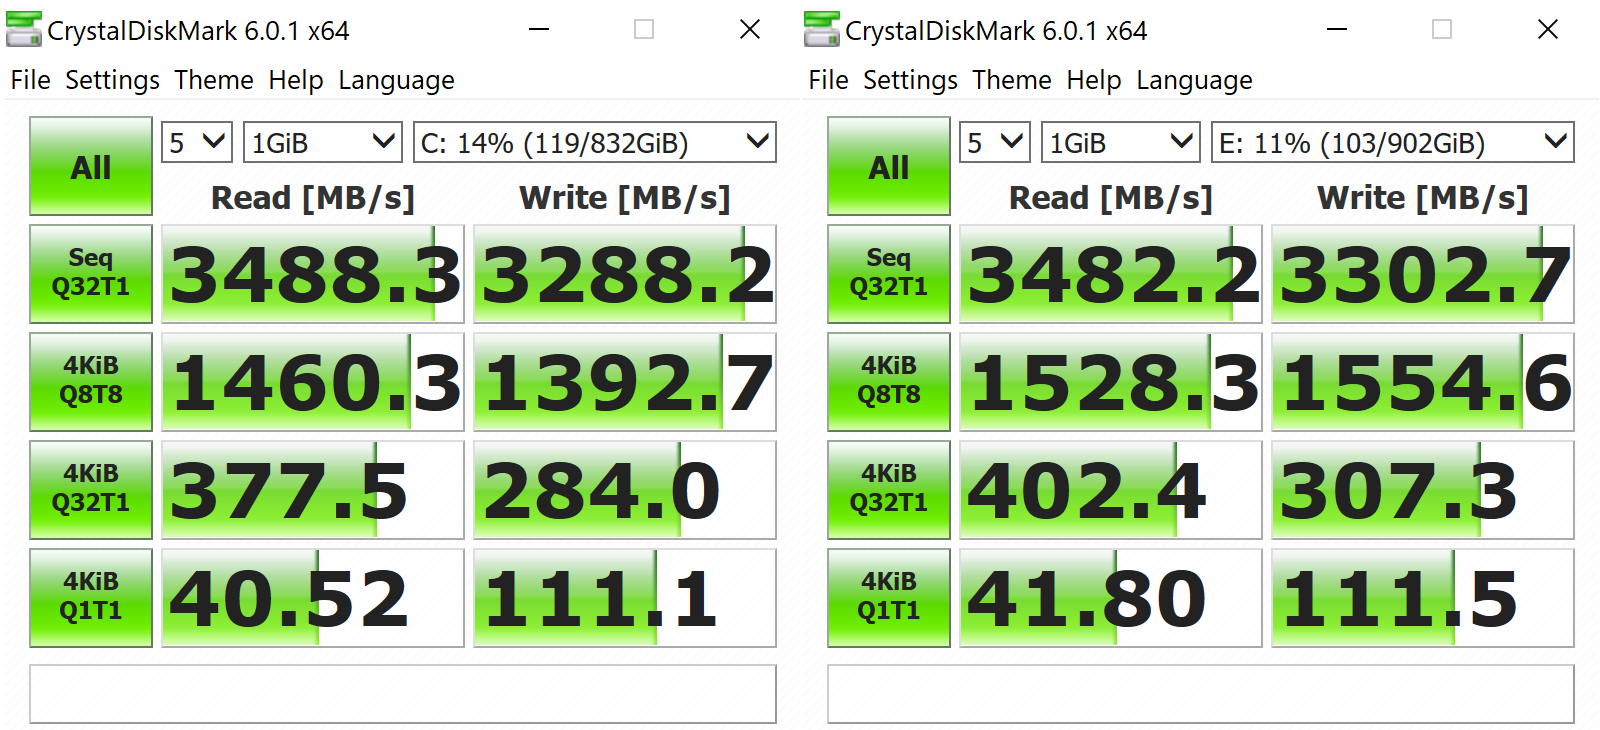
ThinkPad P1 Gen 2 SSD Performance Both New