
Linux - Bare Metal Install
[Update 2020.07.22] It’s taken a while, but I finally got organized and tried a bare-metal install of Linux – Fedora 32 – on the X1YG5. Fedora will be available on some ThinkPads as shipped from Lenovo at some point, so it seemed like a good distro to fiddle with.
The back story: I’ve spent a lot of time with Linux ( and Solaris ) but mostly on the “greasy side” writing and maintaining drivers for my small company’s hardware, starting with Kernel 2.0.35 (RedHat 5.1). Very little time spent on the “shiny side” as a user. It’s been a bit of a revelation to me how far the user experience has come – installation, hardware support, UI, updating, app installation…
This article will be old news to anyone who’s been current with Fedora Linux, but it was new to me. Indulging my compulsion to document this stuff…
I’ve done many (many…) bare metal installs of Linux, but mostly on desktops in multi (multi…) boot configurations with 10 or more distro versions to test drivers and hardware against. With laptops I rarely do installs of Linux unless there’s a 2nd drive available, and even then I usually just copy the live media over without actually doing a full install: Linux – Live
Since this was to be an actual install, and from past experience I’d have to either dedicate the whole SSD or attempt a complex and risky multi-boot setup (which turned out to be easy – see below) I first pulled a backup of the whole drive: Win 10 plus some software and configuration added. I used the bootable Acronis on my “Turbo” external “Swiss Army” NVMe drive and saved the image to that same external drive. Quick and easy… about three minutes.
Side note: I later did a full drive restore from that image. About 80GB of content. Took right at two minutes from restore start to Windows 10 up and running. Nice 🙂
Another note: Apps flagged as “downloaded” below weren’t present in the initial install. Typing an app’s name in the top-of-the-wallpaper activity search box produced an offer to download and install. On my gigabit internet connection that was pretty much instant.
Installation:
As with the Linux – Live testing, I used my “Turbo” external “Swiss Army” NVMe drive to boot Fedora 32 live and run the installation. For some reason – the way Fedora is signed, I presume – it was necessary to turn off Secure Boot in BIOS to bring up Fedora when booted as a loop-mounted ISO. This isn’t required for Ubuntu.
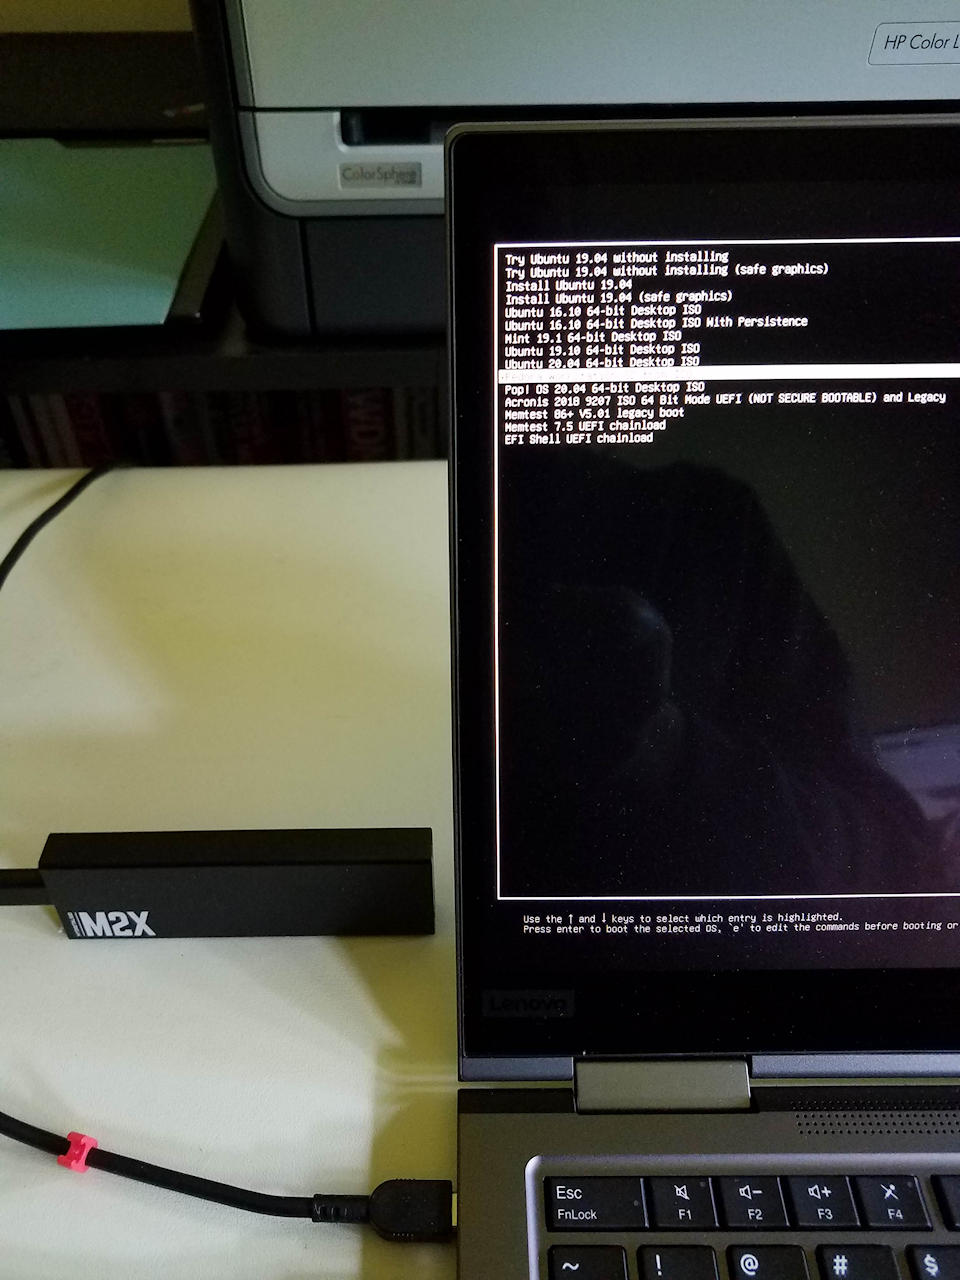
ThinkPad X1 Yoga Gen 5 Boot Live
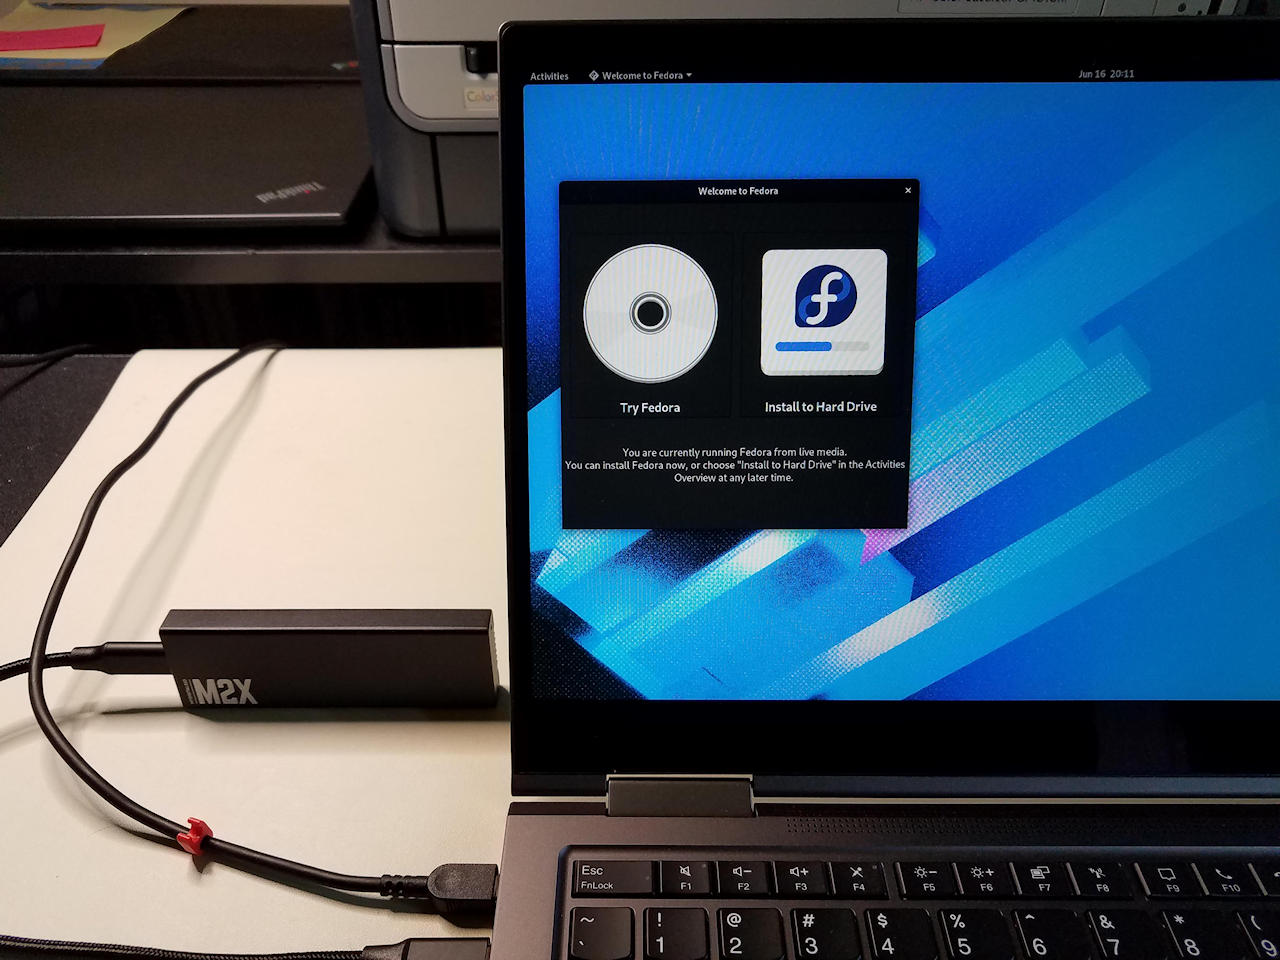
ThinkPad X1 Yoga Gen 5 Live Booted
My expectation was that I would do a full-drive install, and not a dual-boot install with Windows 10. In the past, trying to carve out disk space while preserving things like recovery was nearly impossible. Adding to that, one OS piggybacking the other’s boot loader is not something I care to deal with. Too much potential for a later OS update or removal to render both OS-en unbootable. But.. we’re in the UEFI era now, perhaps it’s easier to make space and the partitions required for a 2nd OS install. Sure enough – the Fedora installer made that surprisingly easy 🙂
Disk selection required:
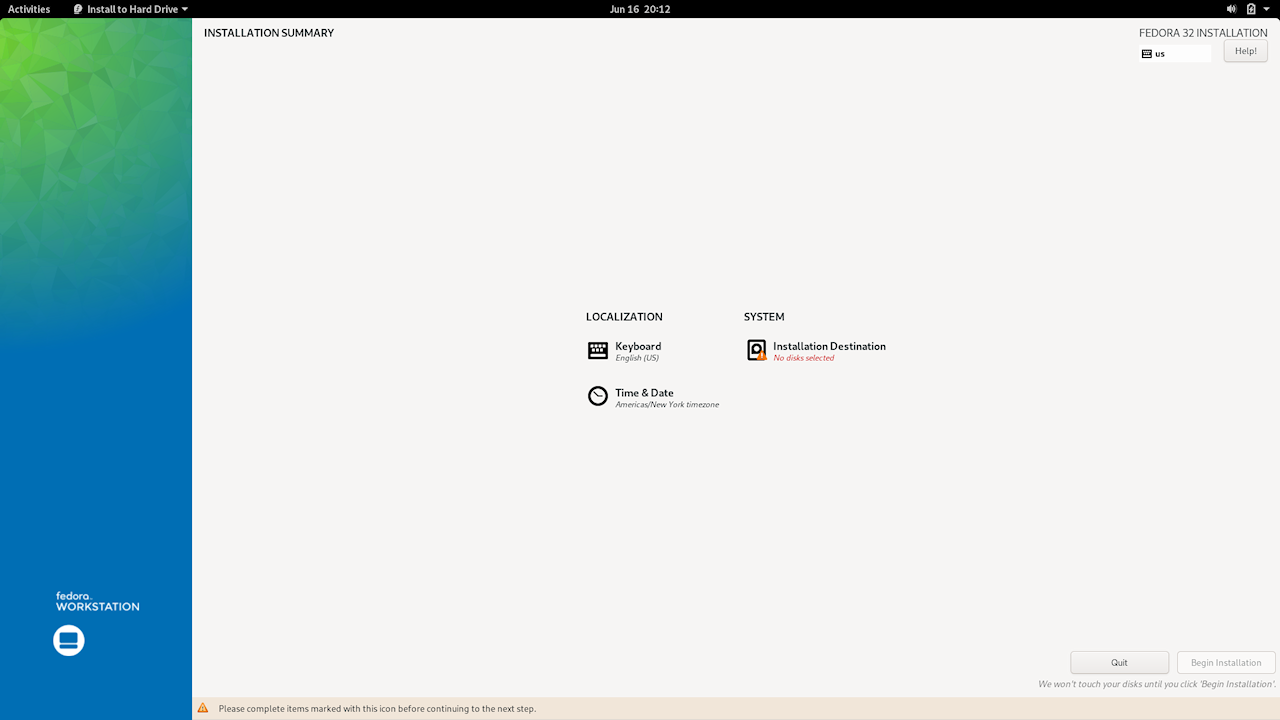
ThinkPad X1 Yoga Gen 5 Fedora Installer No Disk Selected
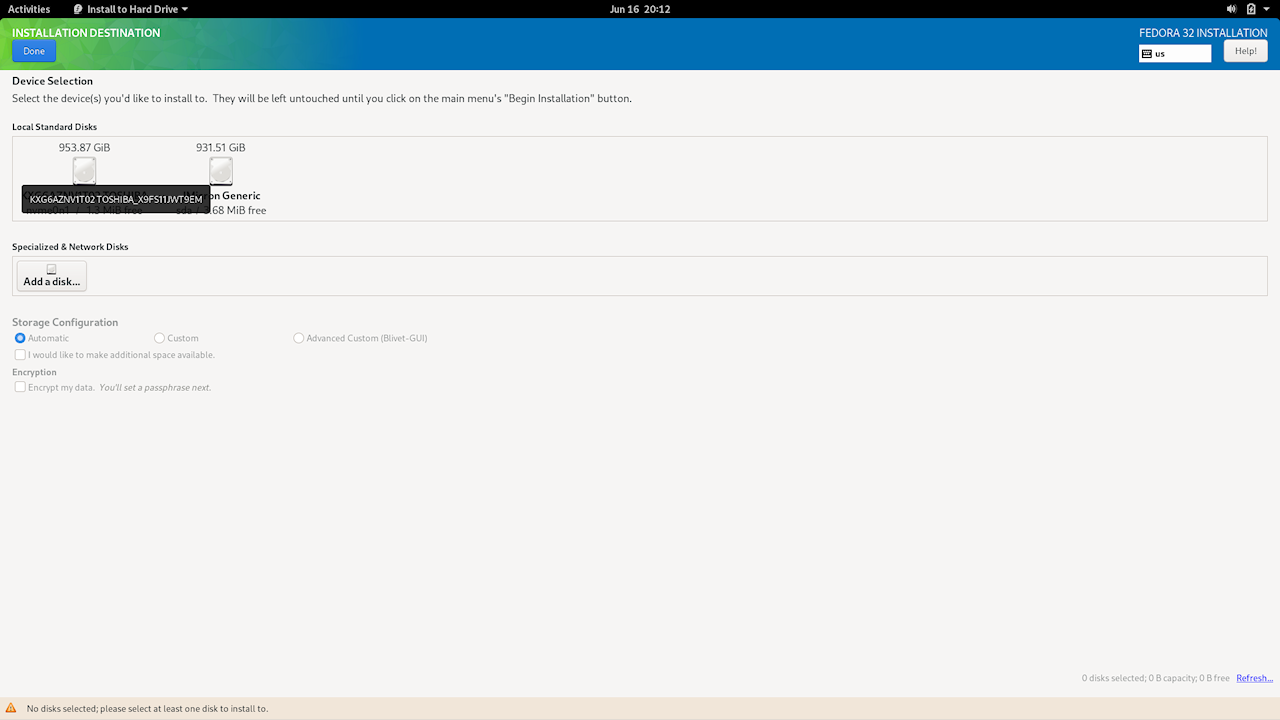
ThinkPad X1 Yoga Gen 5 Fedora Installer Disk Selection
Not enough space on selected drive:
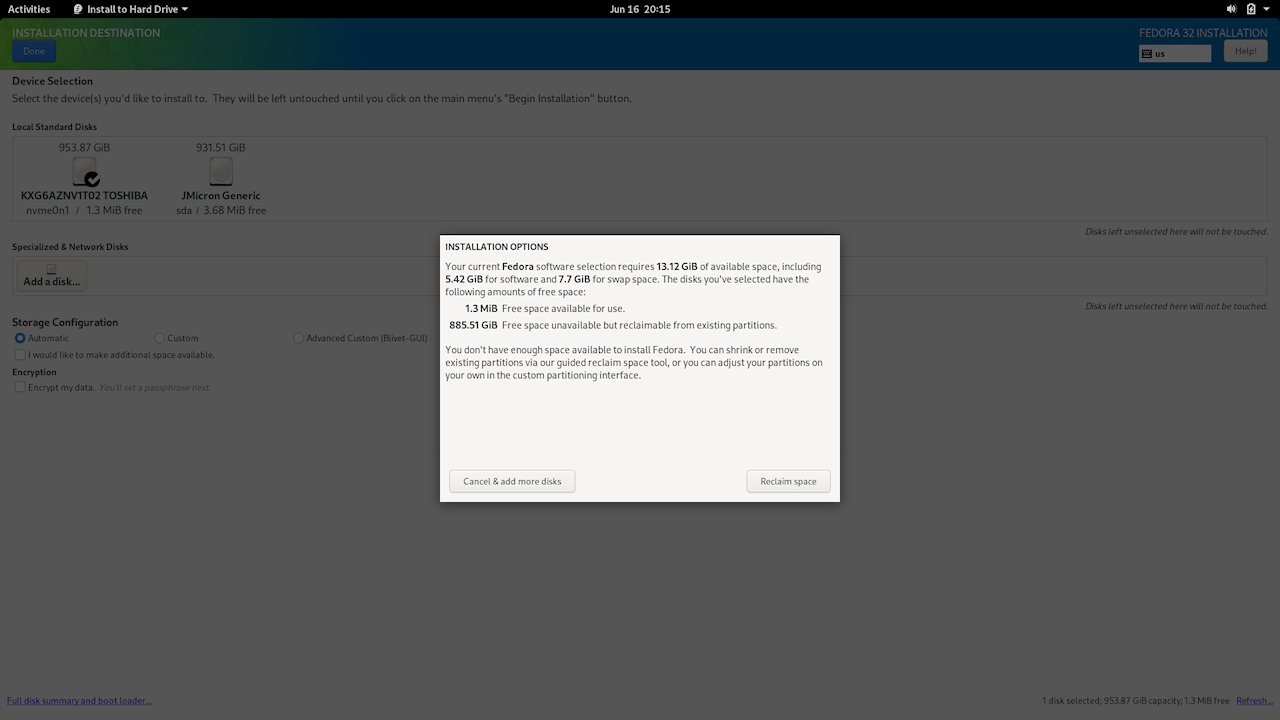
ThinkPad X1 Yoga Gen 5 Fedora Installer Space Requirement
Reclaim space: Select the Windows partition and move the slider to reduce its size. This will happen during the install process. Liberated ~ 100GB for Fedora.
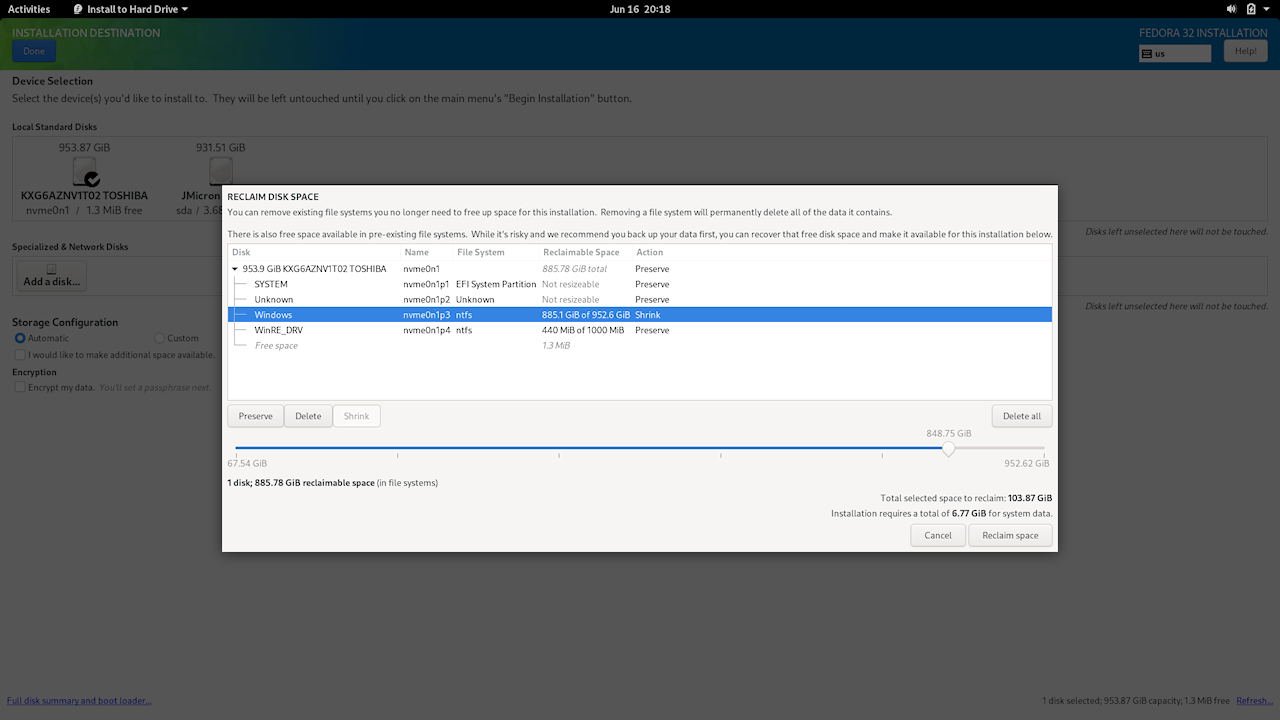
ThinkPad X1 Yoga Gen 5 Fedora Reclaim Space Slider
And off we go…

ThinkPad X1 Yoga Gen 5 Fedora Installer In Progress
That took about five minutes 🙂
SSD configuration after the resize and install (Windows and Fedora – downloaded Gparted – views):
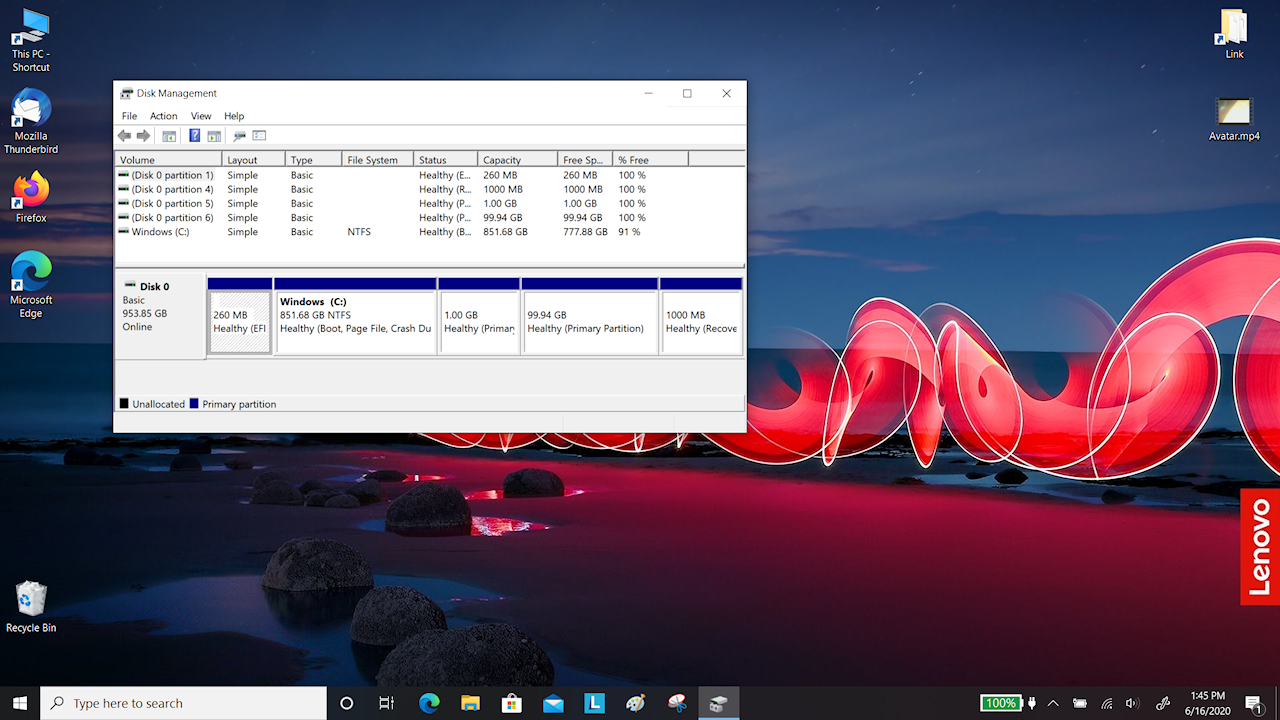
ThinkPad X1 Yoga Gen 5 Disk Mgmt After Fedora Install
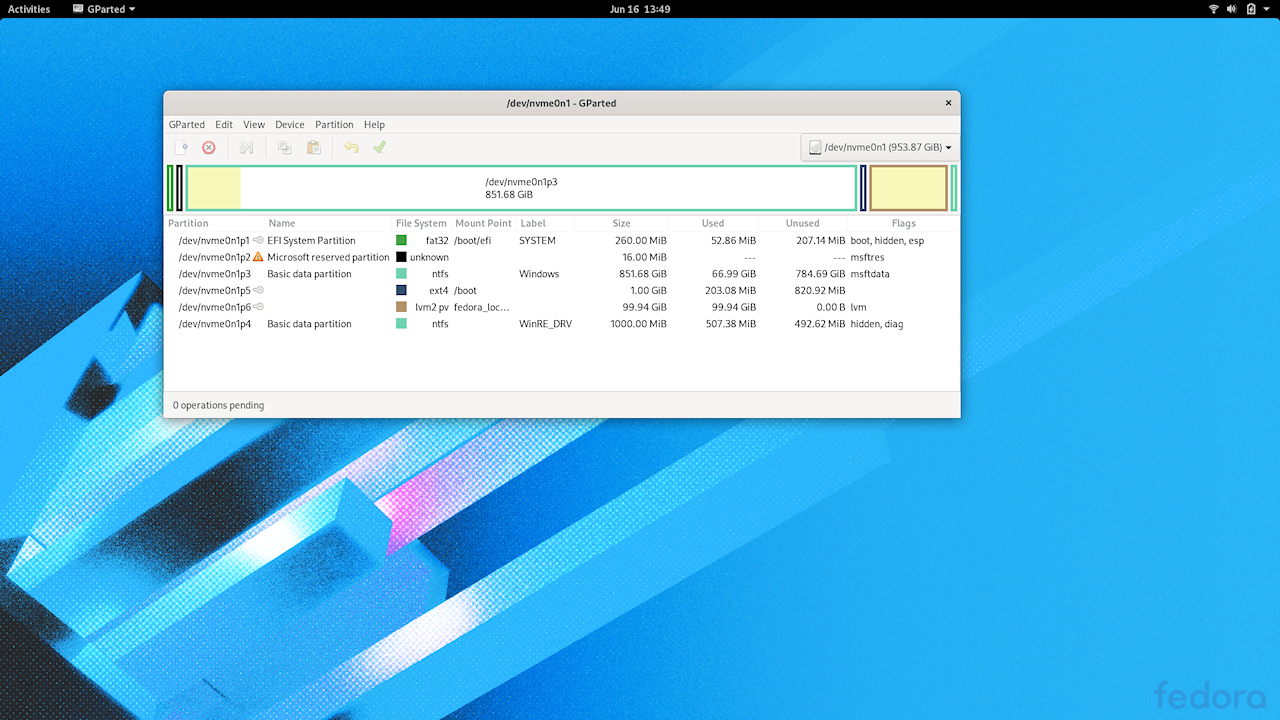
ThinkPad X1 Yoga Gen 5 Fedora Gparted
Fedora has added itself to the UEFI boot list, and a reboot brings up the grub menu:
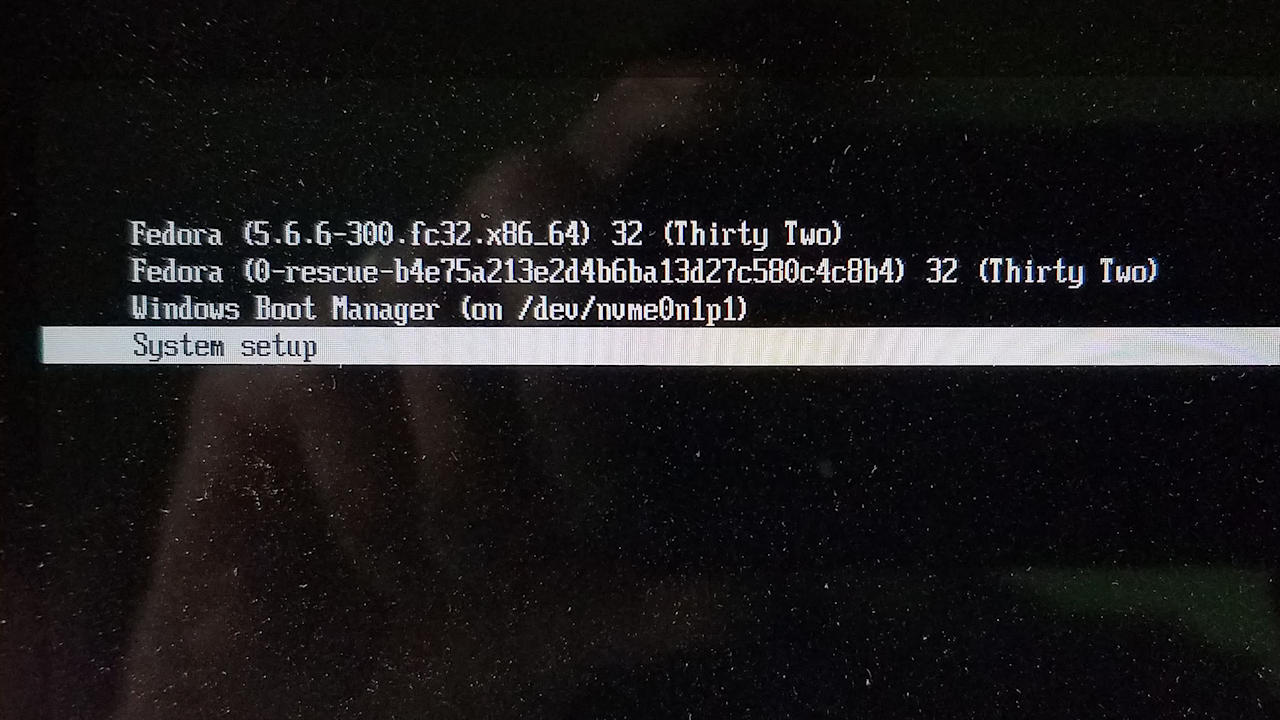
ThinkPad X1 Yoga Gen 5 Fedora Grub Menu
From there Fedora or Windows can be selected. It’s also possible to hit F12 at boot time and access the UEFI boot menu directly. Boot order can be changed if desired via BIOS Setup in the App Menu.
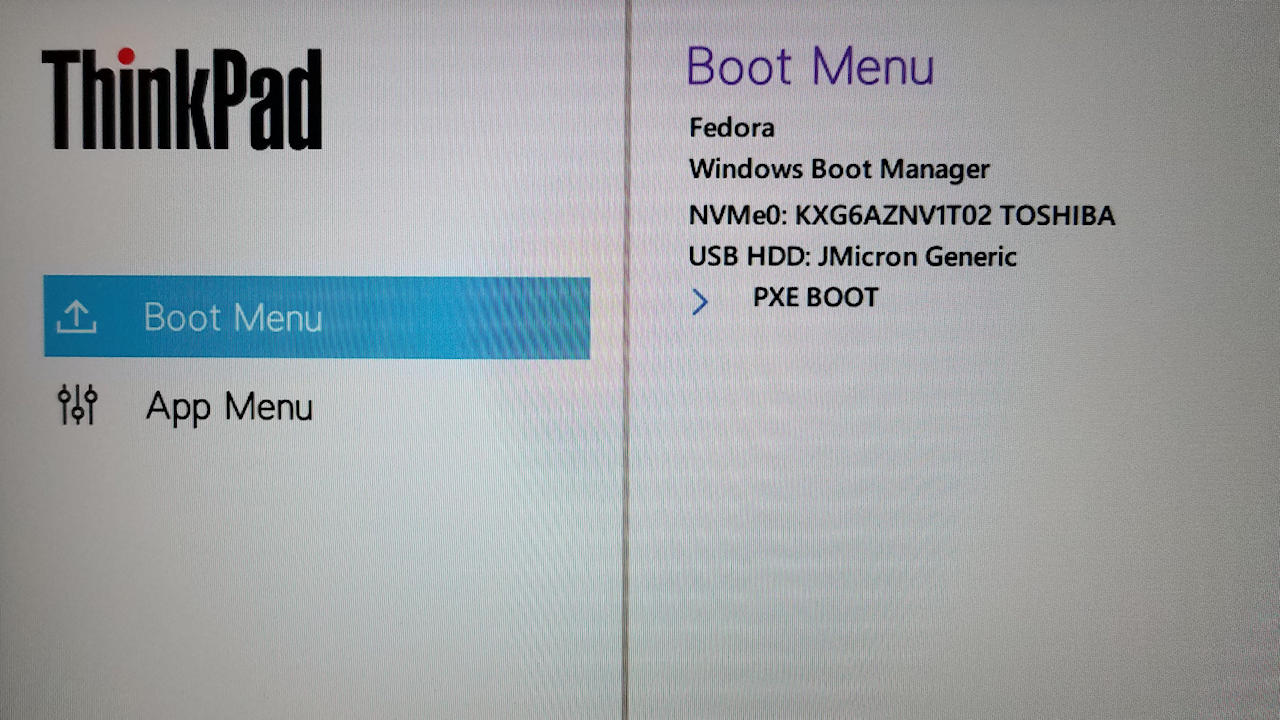
ThinkPad X1 Yoga Gen 5 Post-Fedora Install Boot Menu
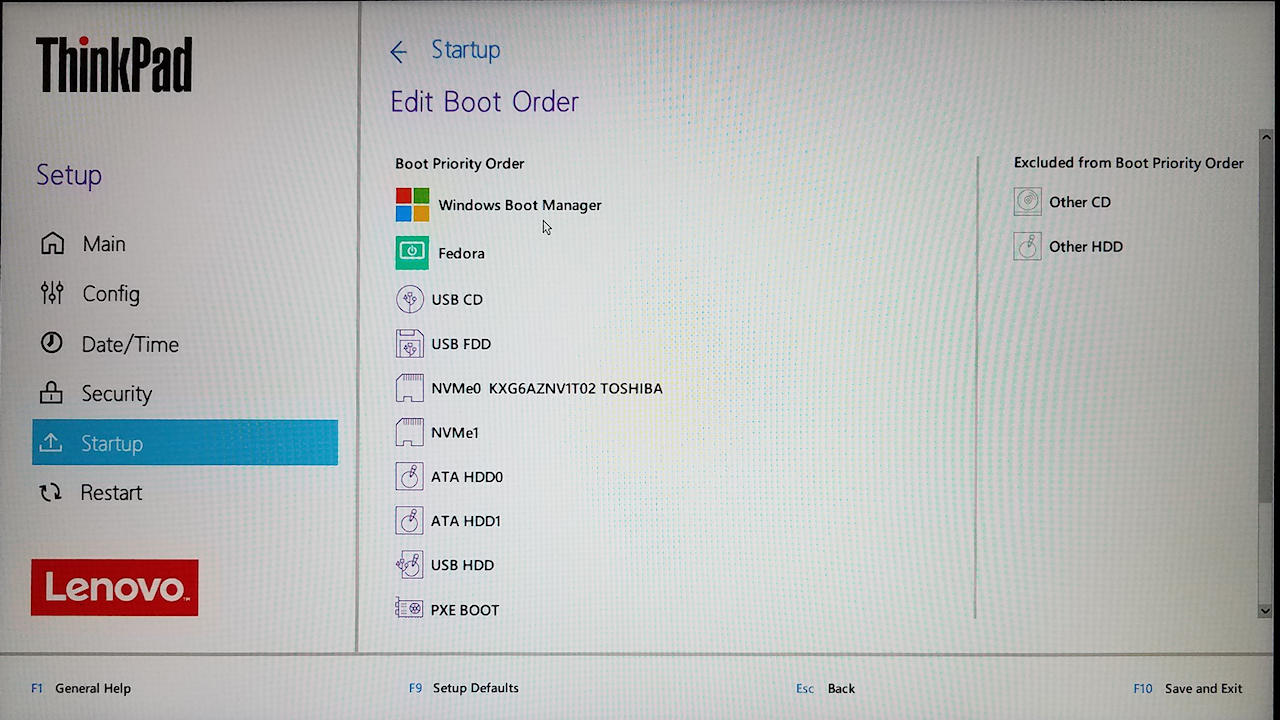
ThinkPad X1 Yoga Gen 5 Post-Fedora Install Boot Order
It’s important to disable Windows fast startup to ensure the the F12 option is available at boot time. With fast startup on Windows shutdown is more like hibernation, and it’s not safe to switch OSen or make BIOS changes in that state.
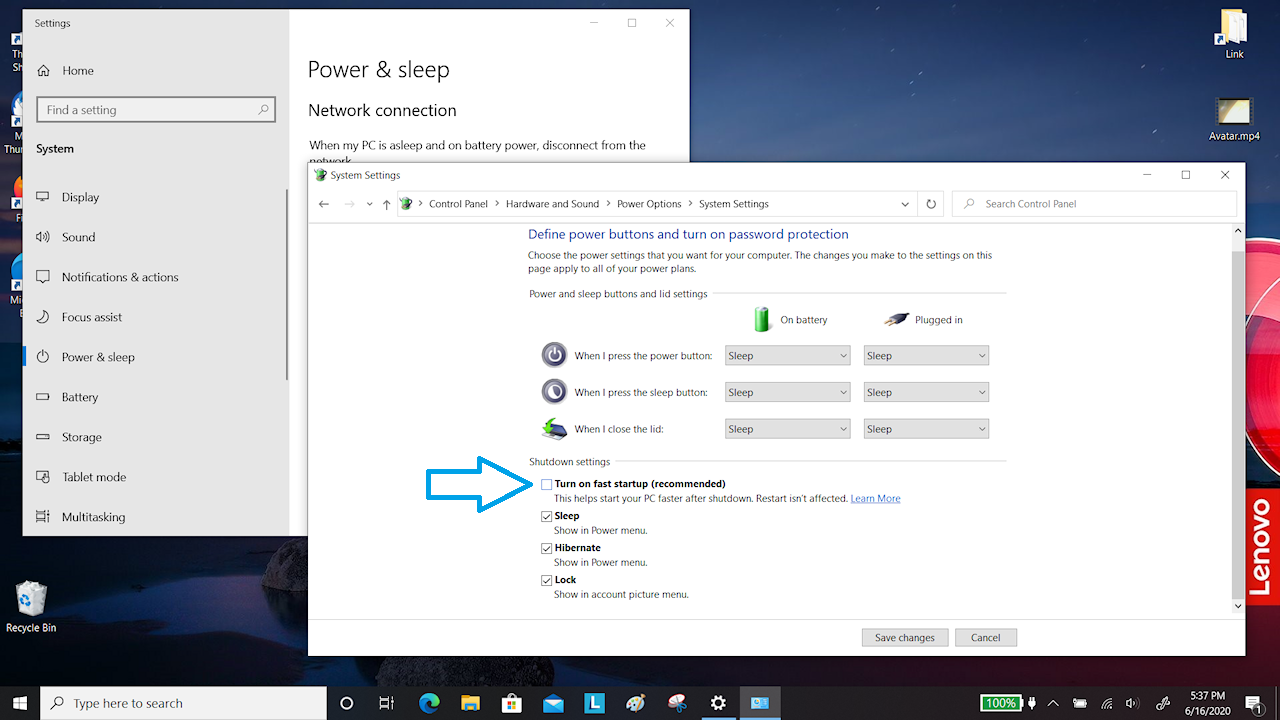
ThinkPad X1 Yoga Gen 5 Turn Off Fast Startup in Windows
Another bit of tension between Window and Linux is sleep mode. ThinkPads have for a while supported Modern Standby – s0i3 sleep – that’s sort of sleeping with one eye open. Linux (as of this writing) doesn’t support that mode, and can’t sleep successfully.
Thankfully there’s a BIOS option that allows selection of the classic s3 sleep mode, which Linux does support. Early discussion claimed that if the setting was toggled, Windows couldn’t sleep without a reinstall. That’s is not the case in my testing. Windows drops back to s3 sleep without reinstalling.
[Update 2020.07.29] There is some forum conversation indicating that some features (touchscreen on a Gen 3…) may not work after S3 sleep w/out a reinstall. This bears further testing…
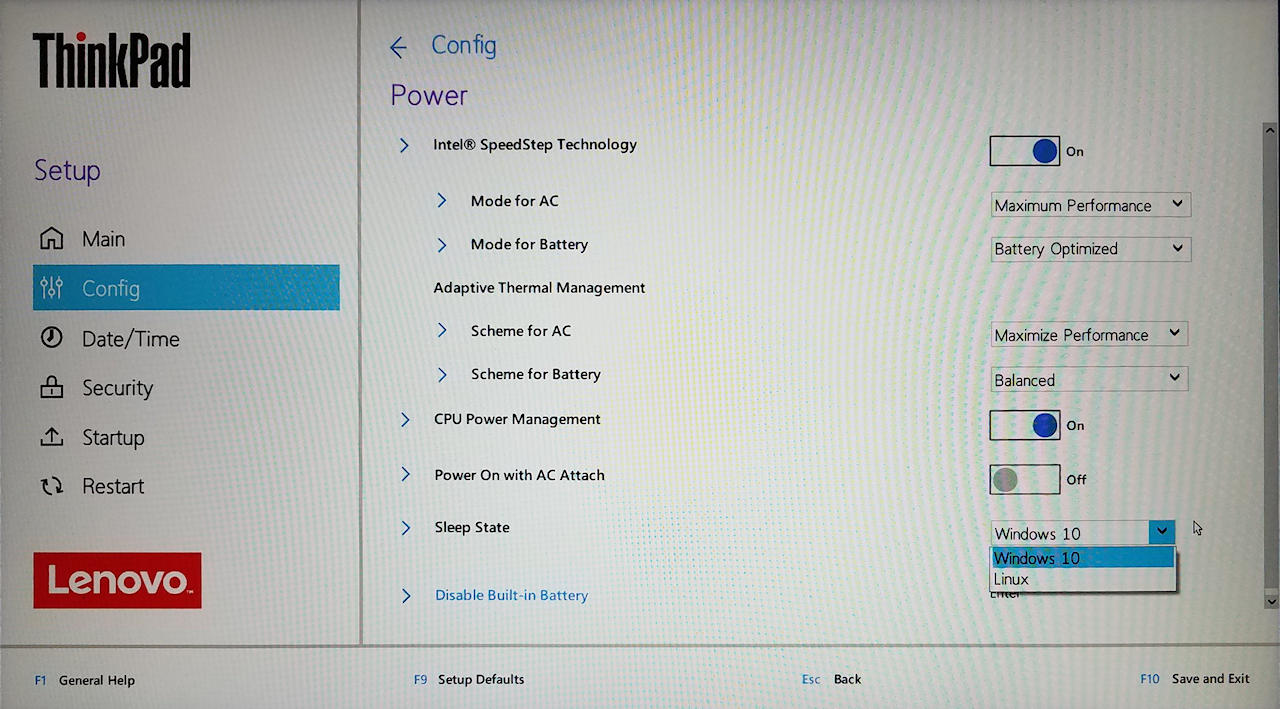
ThinkPad X1 Yoga Gen 5 – BIOS Sleep Mode
Side rant: Modern standby caused a lot of distress in the Linux community: “Lenovo hardware doesn’t support Linux!” Back in the day … way back in the day … the question was whether Linux supported new hardware, not v/v. Times have changed, I guess. I do completely understand and agree with the complaints re unreleased specs and proprietary drivers, though. Happy that Lenovo is/will be offering Fedora and is contributing to up-stream development (I believe).
Now a quick look at what works – and what doesn’t:
This is a quick-and-dirty survey. Many things – and details – yet to test.
Sleep: yes, hibernation: no. The machine seems to hibernate but on resume it just boots normally. Some discussion of the bug here: Bug 1795422 – System image not restored after hibernation.
Wifi works. AC and AX modes supported.
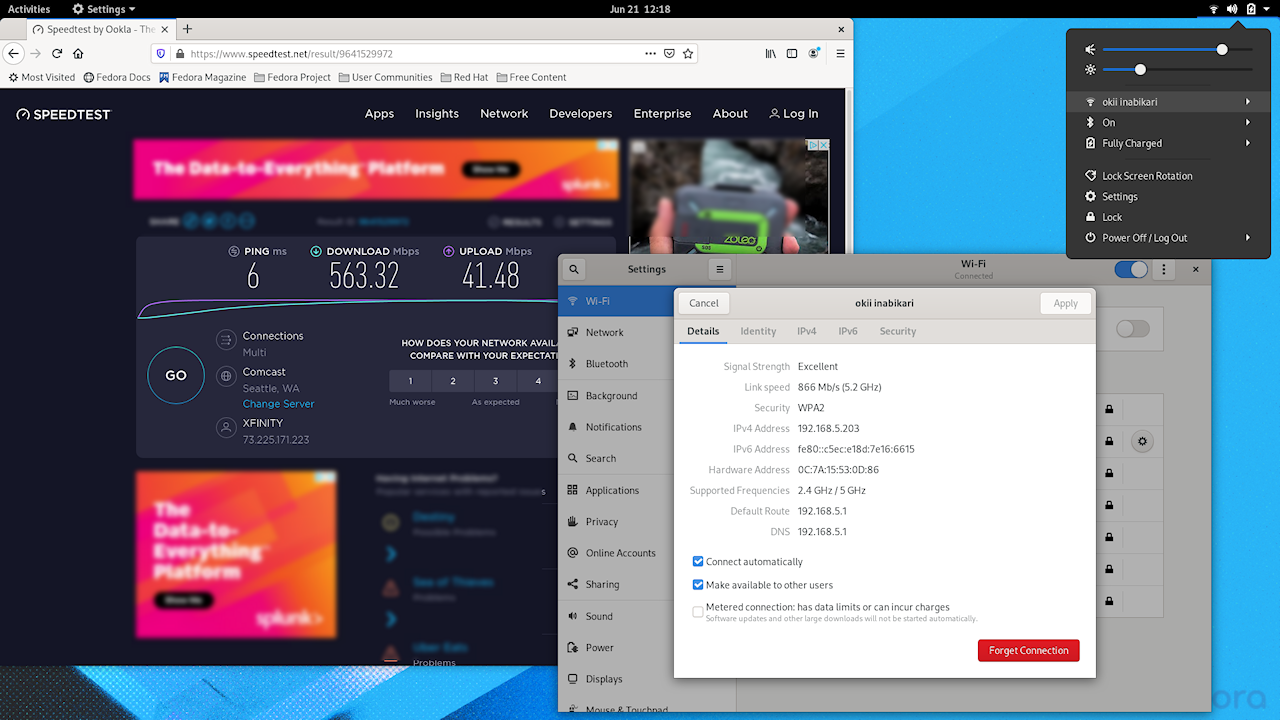
ThinkPad X1 Yoga Gen 5 Fedora AC Performance
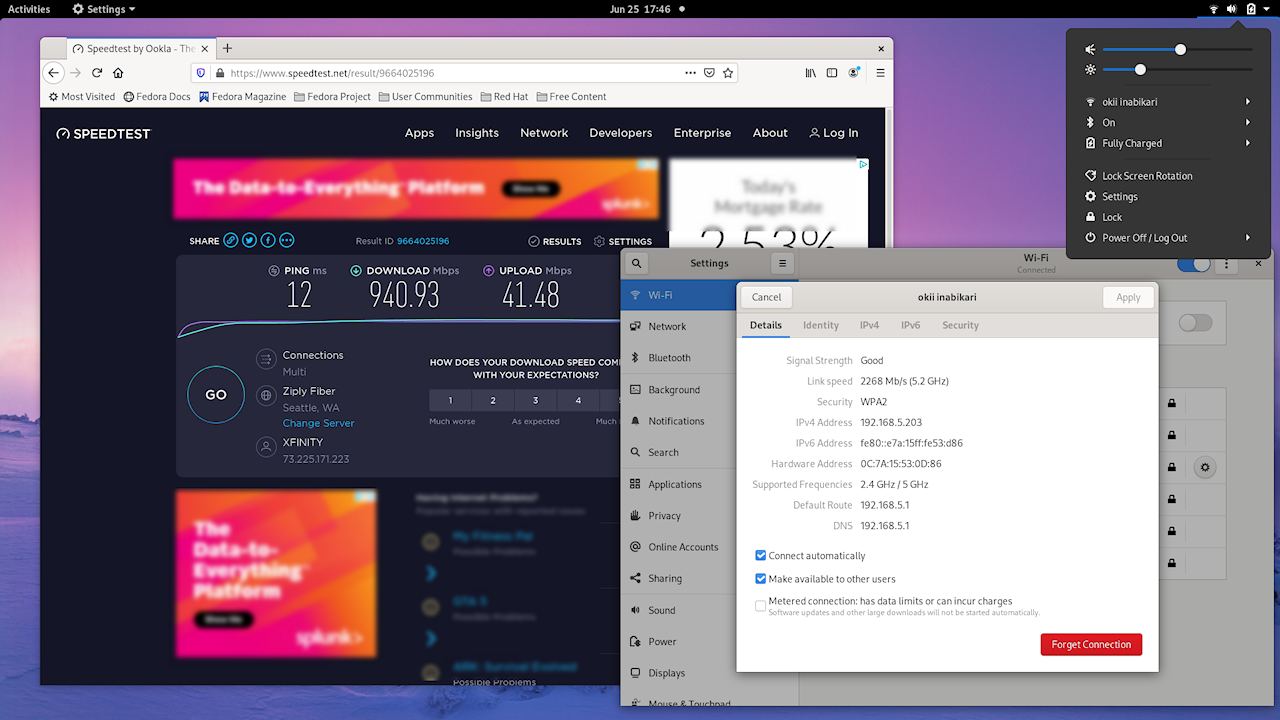
ThinkPad X1 Yoga Gen 5 Fedora AX Performance
Orientation & tablet mode detection work. Auto on-screen keyboard works.
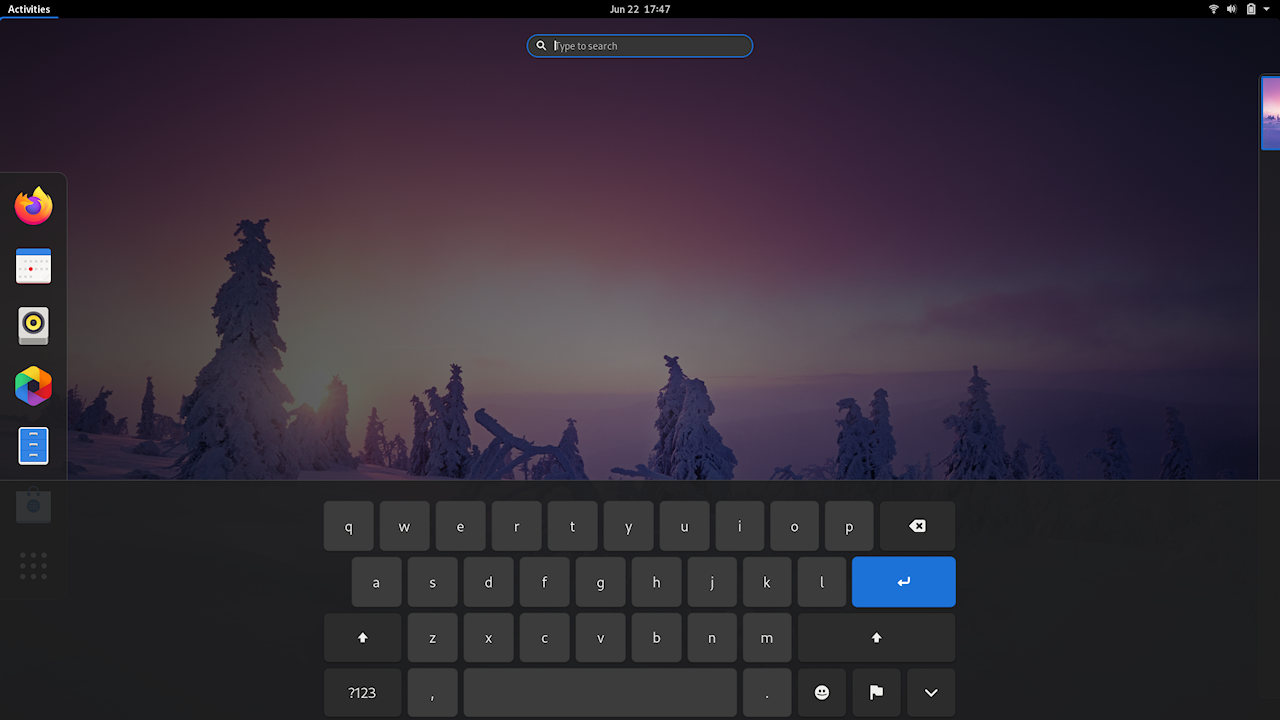
ThinkPad X1 Yoga Gen 5 Fedora On Screen Keyboard
Sound works. Speakers and mic:
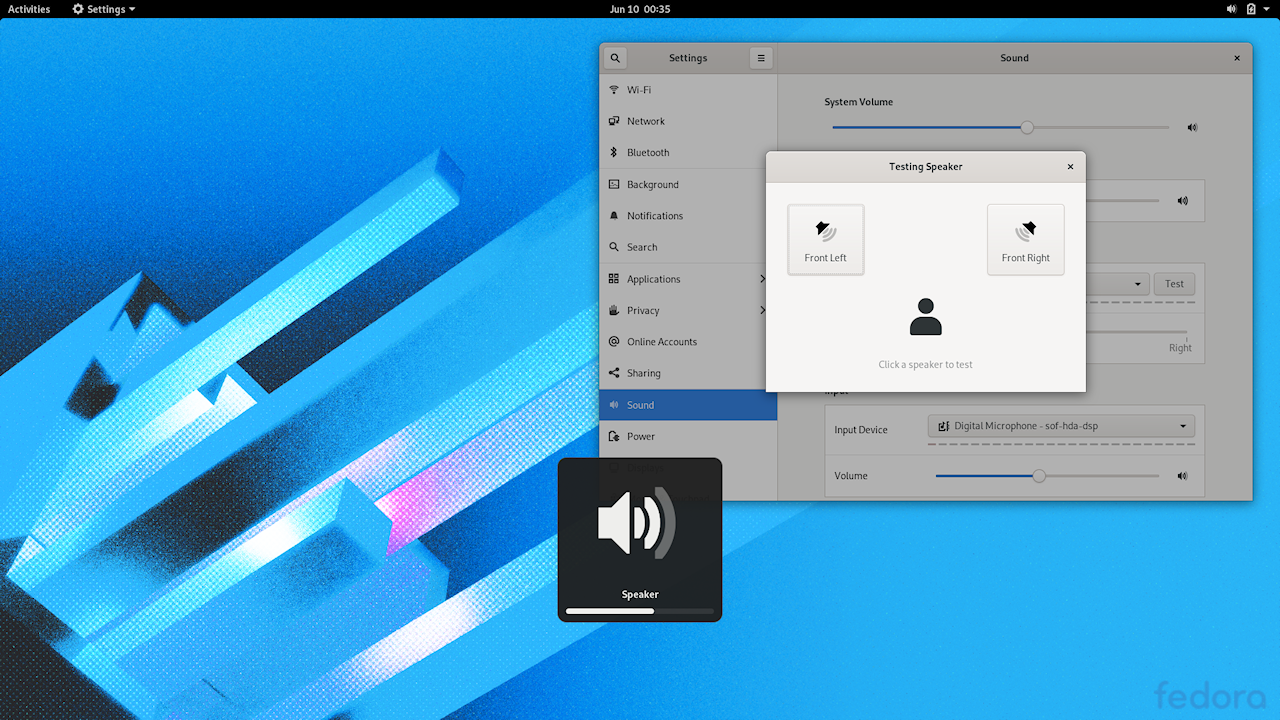
ThinkPad X1 Yoga Gen 5 Fedora Tux Paint
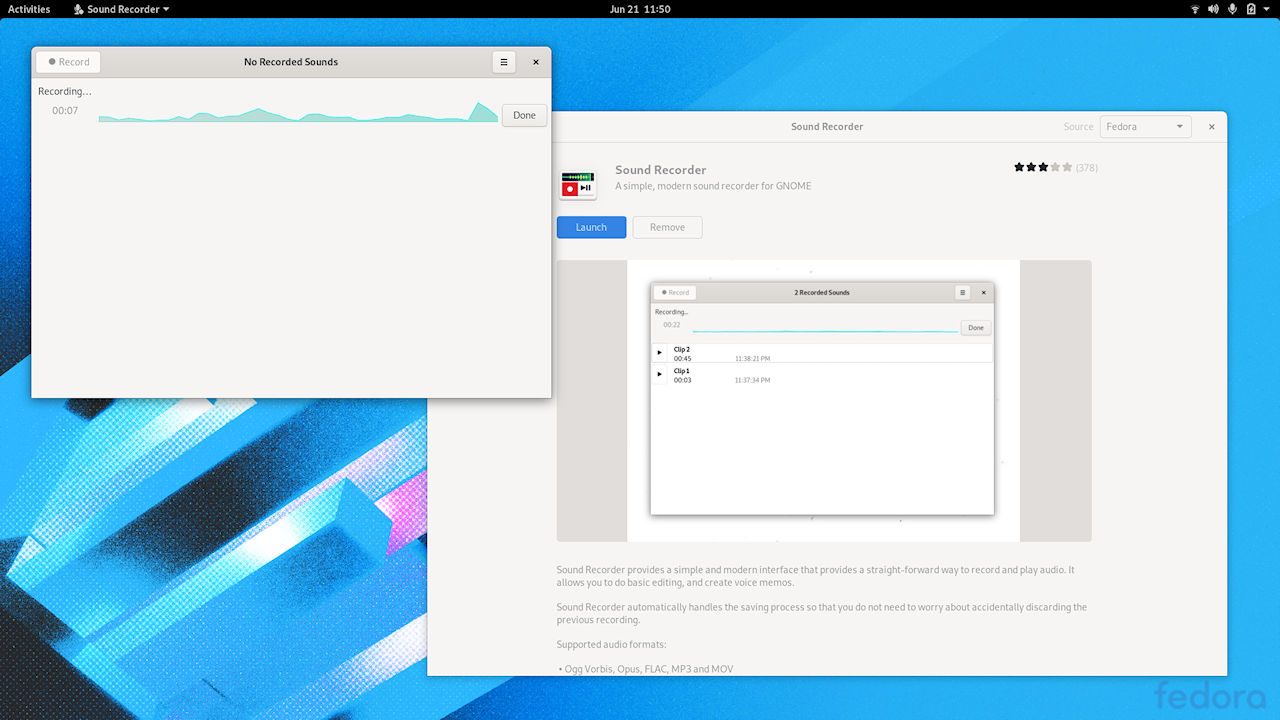
ThinkPad X1 Yoga Gen 5 Fedora Microphone
Camera: bzzzzt! Didn’t seem to work. Included Cheese app preview looks nasty, and saved snap is black and white. However, Camorama app (downloaded) does seem to work so it’s not directly a camera or driver support issue.
[update 2020.10.02] Cheese was defaulting to the IR camera. Selecting the conventional camera sorts the problem. Images below.
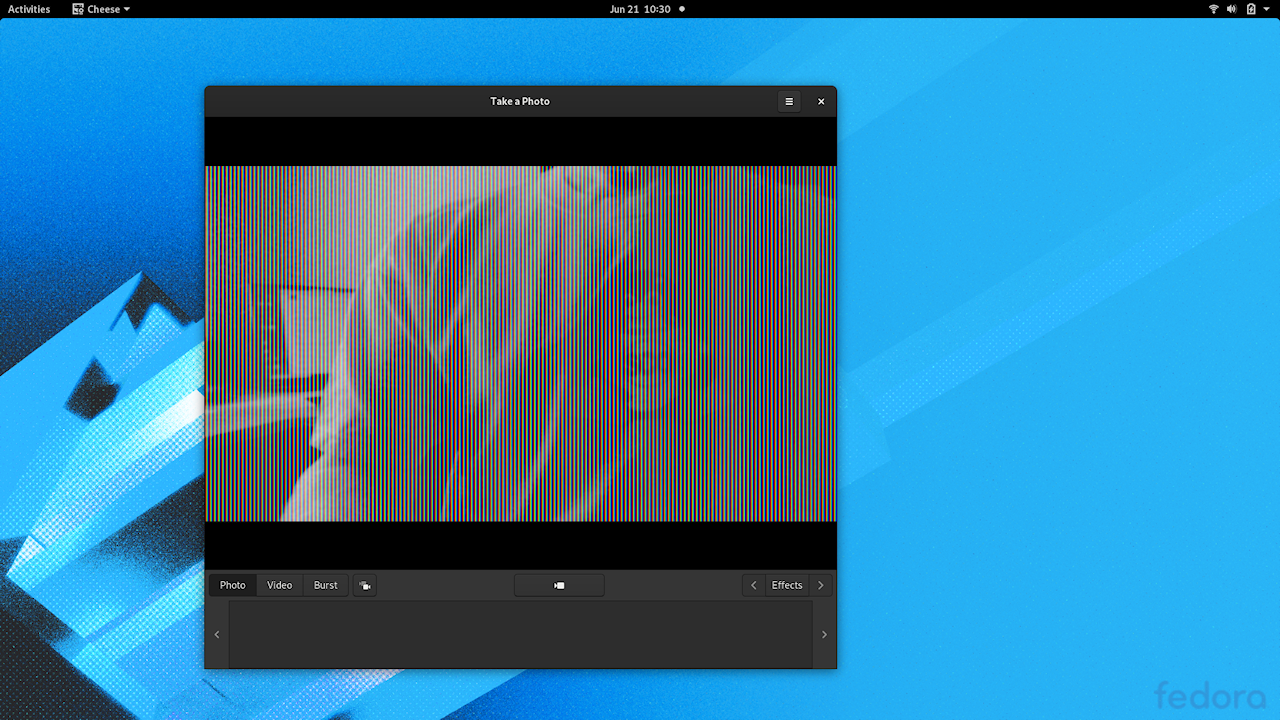
ThinkPad X1 Yoga Gen 5 Cheese Screenshot – IR Camera

ThinkPad X1 Yoga Gen 5 Cheese Snapshot – IR Camera
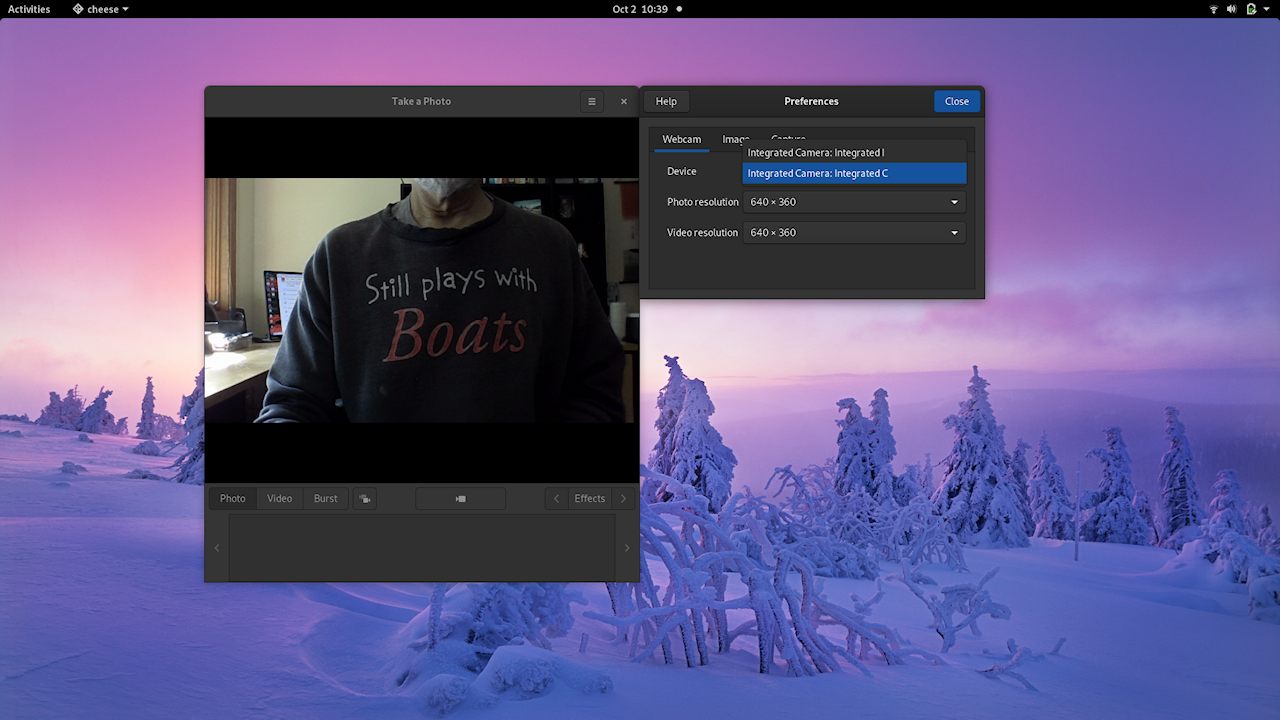
ThinkPad X1 Yoga Gen 5 Cheese Screenshot – Conventional Camera

ThinkPad X1 Yoga Gen 5 Cheese Snapshot – Conventional Camera
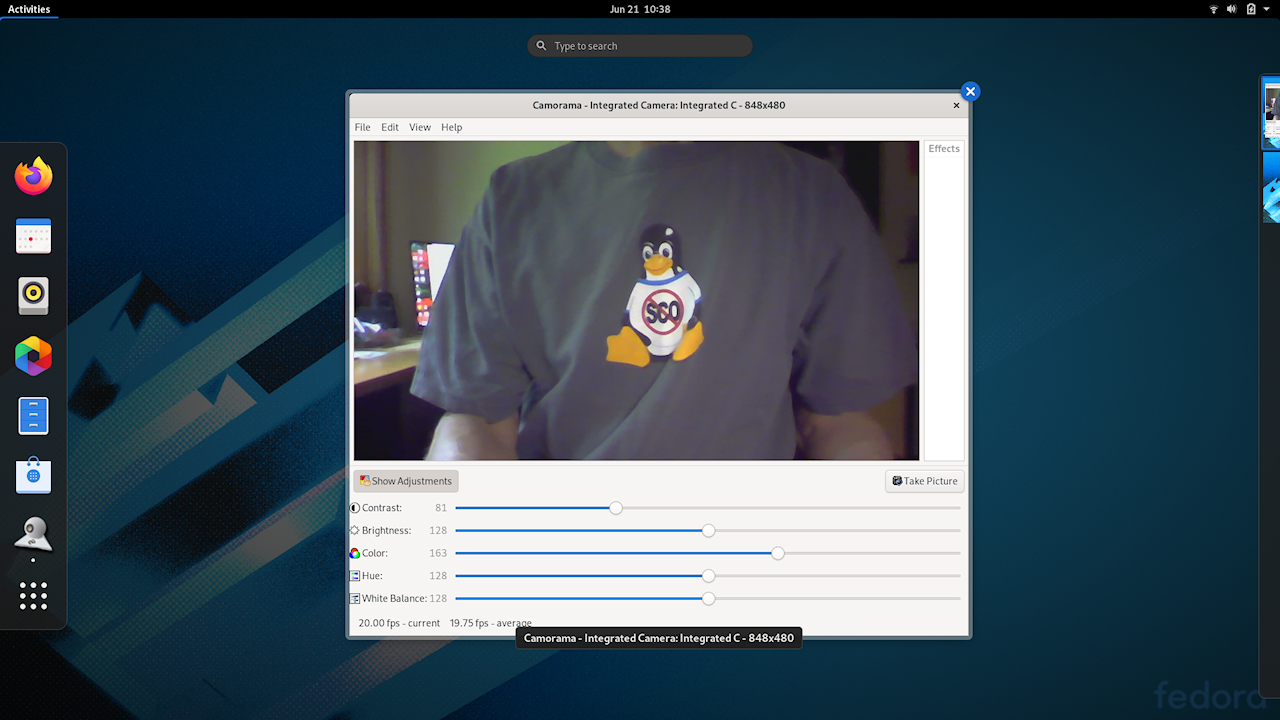
ThinkPad X1 Yoga Gen 5 Camorama Screenshot

ThinkPad X1 Yoga Gen 5 Camorama Snapshot
Garaged pen works. Tested with Libre Office Draw, and more aligned with my artistic “ability” (downloaded) Tux Paint 😉 :
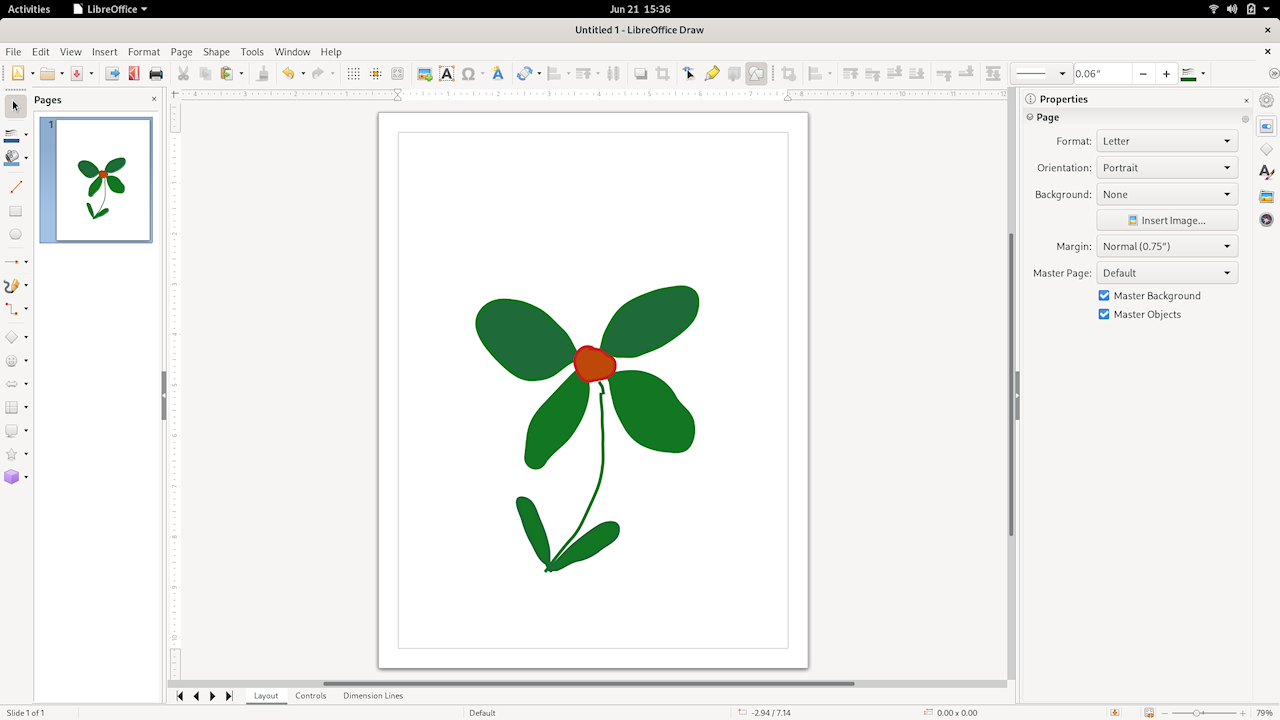
ThinkPad X1 Yoga Gen 5 Fedora Libre Draw
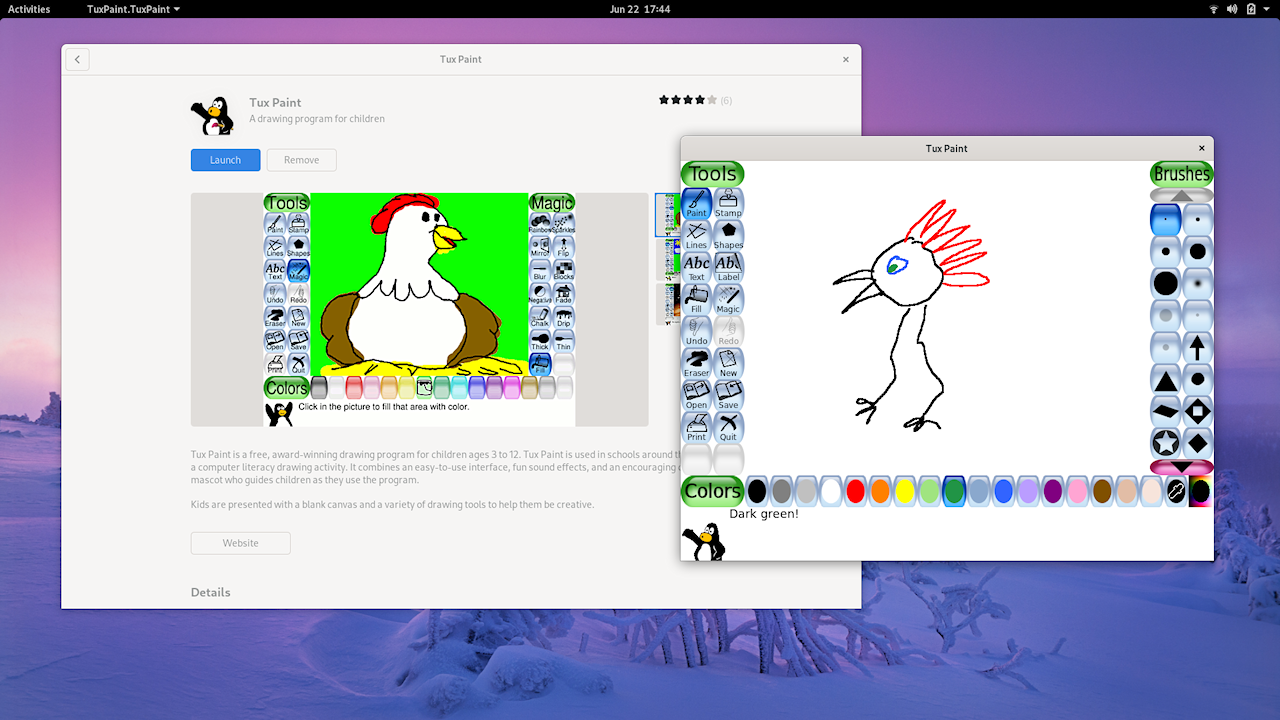
ThinkPad X1 Yoga Gen 5 Fedora Tux Paint
Windows NTFS Partition accessible – provided bitlocker is disabled:
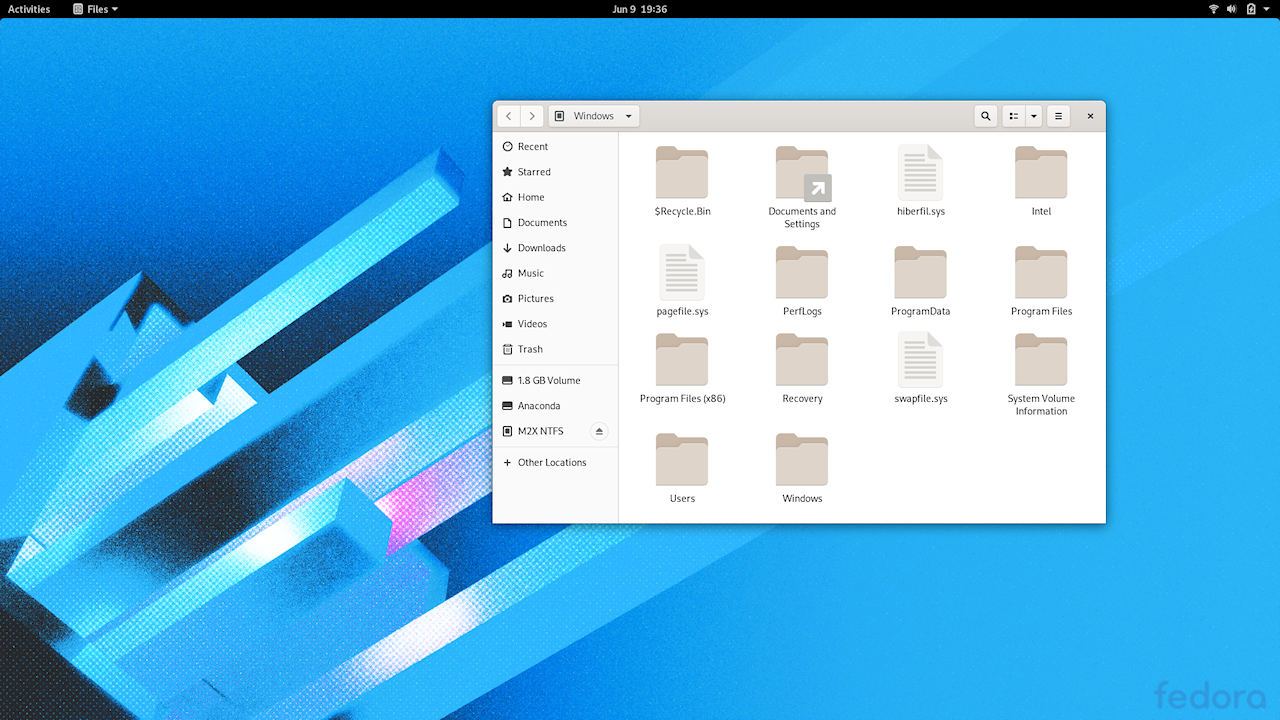
ThinkPad X1 Yoga Gen 5 Fedora NTFS Access
Windows share access via network works – once I figured out what to poke. Typing “smb://asus10pro/” in the Connect to Server box in Other Locations in File Browser did the job. “asus10pro” is the hostname of my Windows desktop machine.
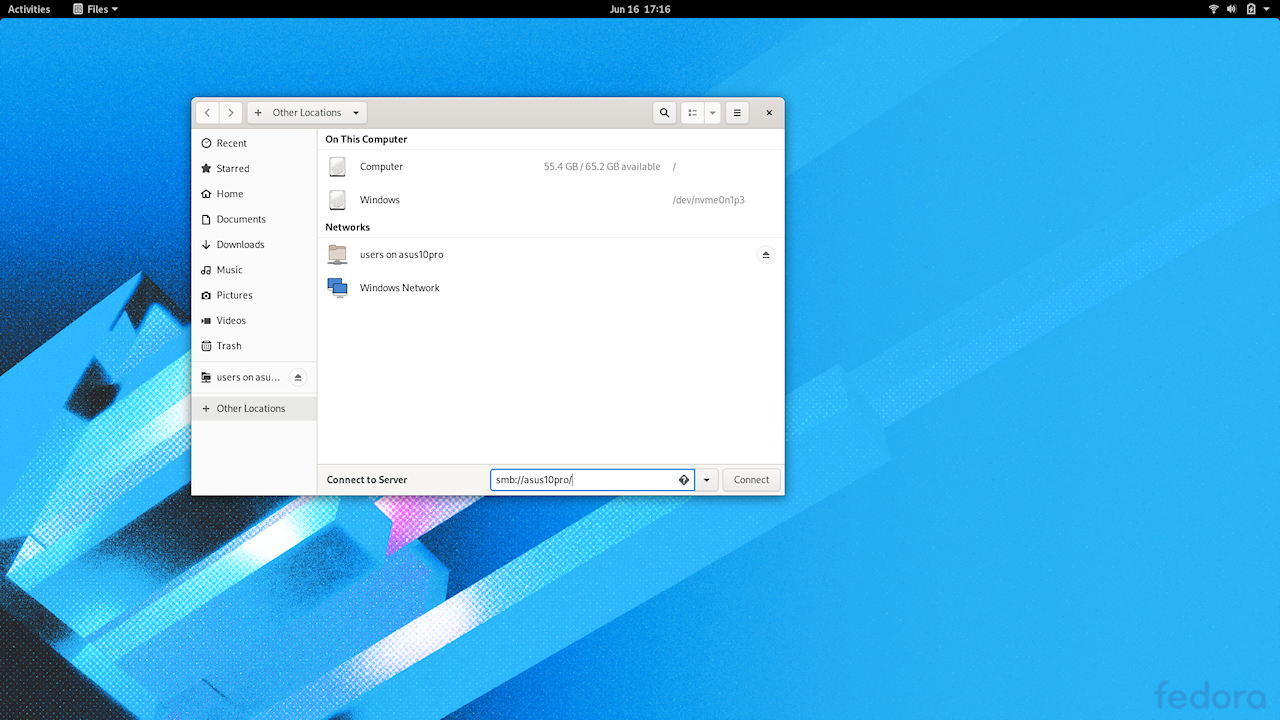
ThinkPad X1 Yoga Gen 5 Fedora Windows Network Access
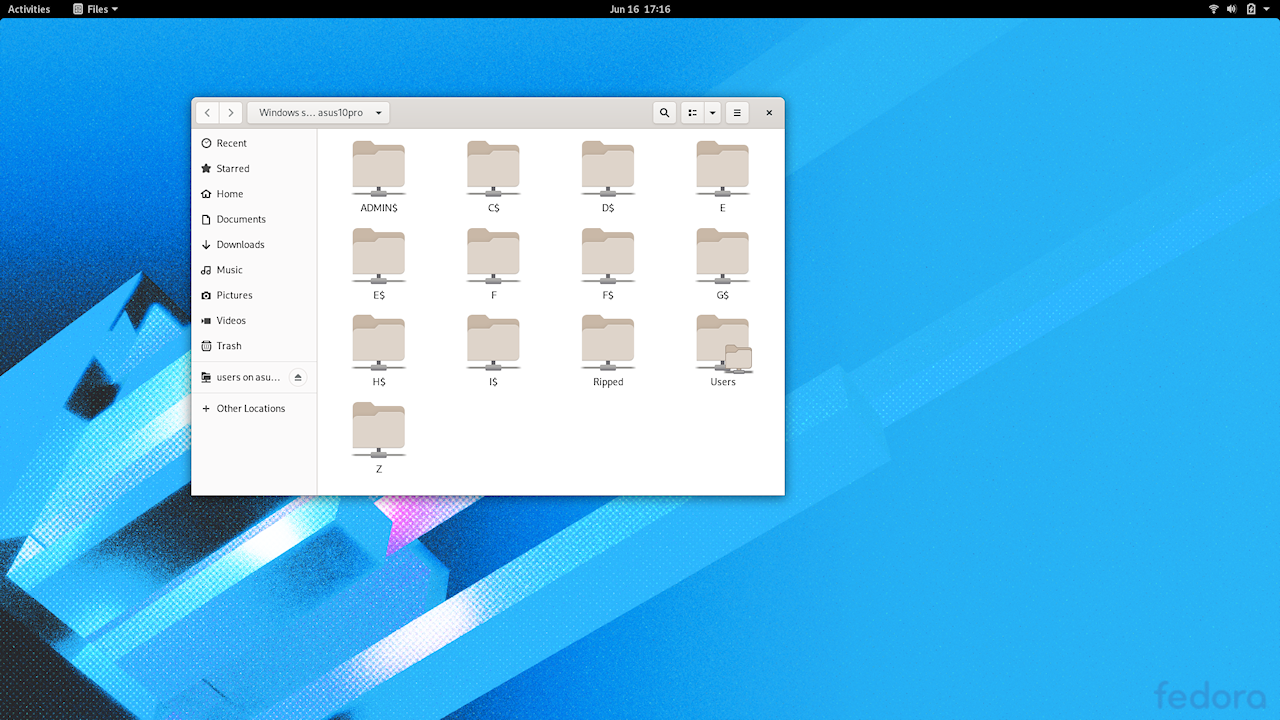
ThinkPad X1 Yoga Gen 5 Fedora Windows Host View
[Update 2020.07.28]
Bluetooth pairing and audio out works:
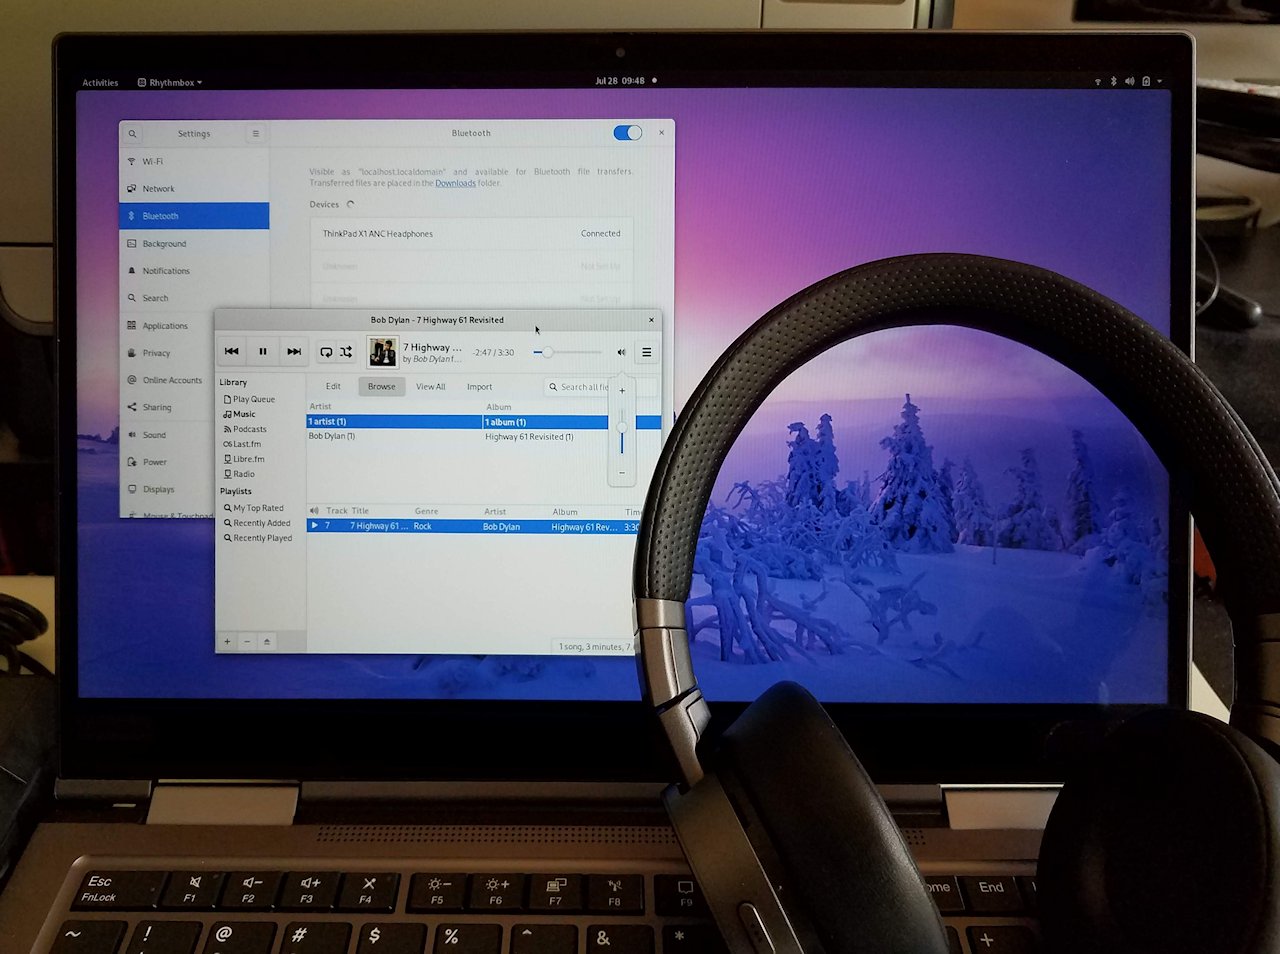
ThinkPad X1 Yoga Gen 5 Fedora X1 Bluetooth Headphones
Todo List:
Examine battery run-time with various workloads.
Look at behavior when in ThinkPad Side Dock.